

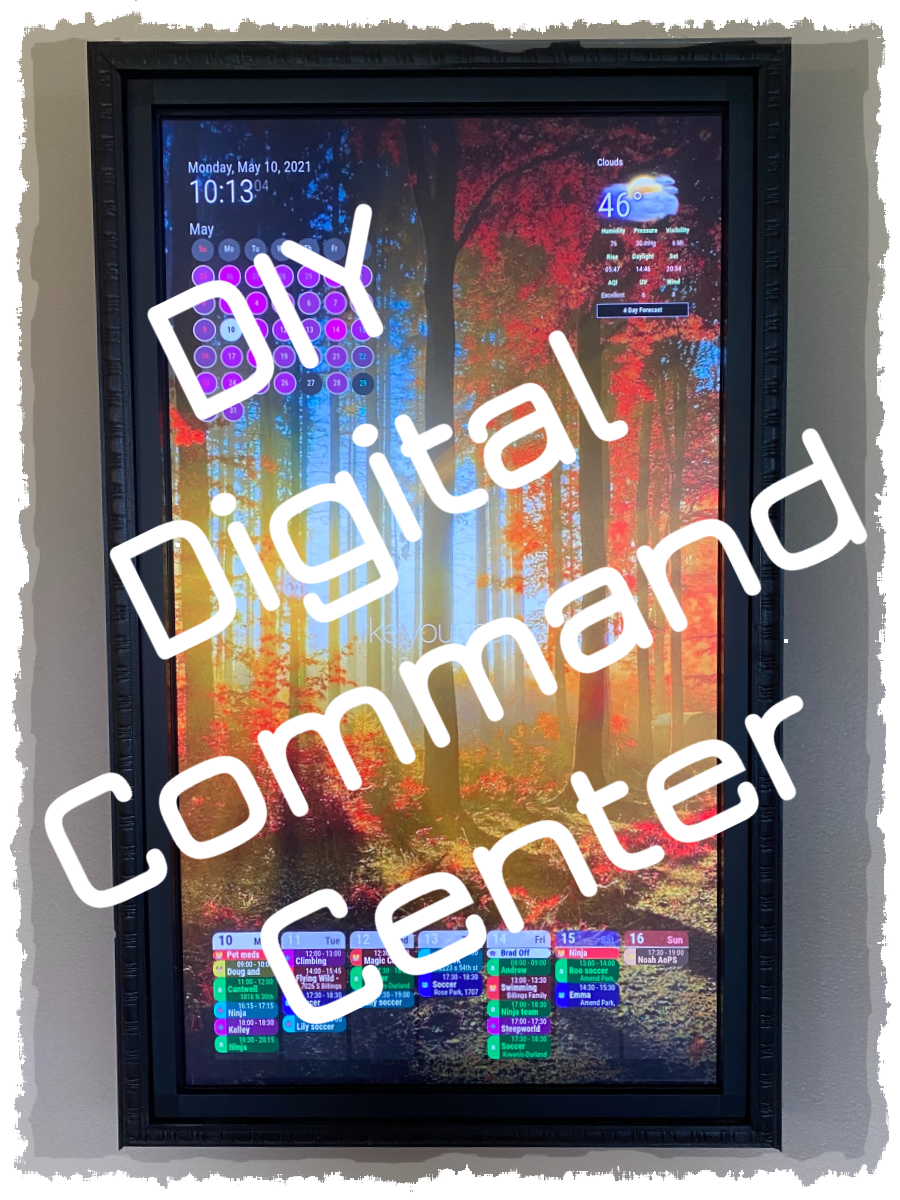
How We Made a Digital Family Command Center
With six people in our family our calendar is FULL. If we don’t have an organized method to keep track of events, things will get missed.
We have tried many different family command center variations. Wall calendars, clipboards with lists, chalkboard and dry erase weekly planners. You name it and we’ve probably tried it. It’s easy to get lost in the many beautiful command center ideas you find on Pinterest.
One aspect of the typical family command centers that has been our downfall in the past is that our schedules often change throughout the week. This involves a lot of erasing and re-writing, which often doesn’t get done. It’s hard to trust a planner that might be missing something. I always found myself reverting to my trusty Google calendar.
When we moved to a new house, I found myself wondering why we couldn’t just put our Google calendars up on the wall. Then, events would automatically update as they were scheduled and we all could see where everyone was supposed to be and when.
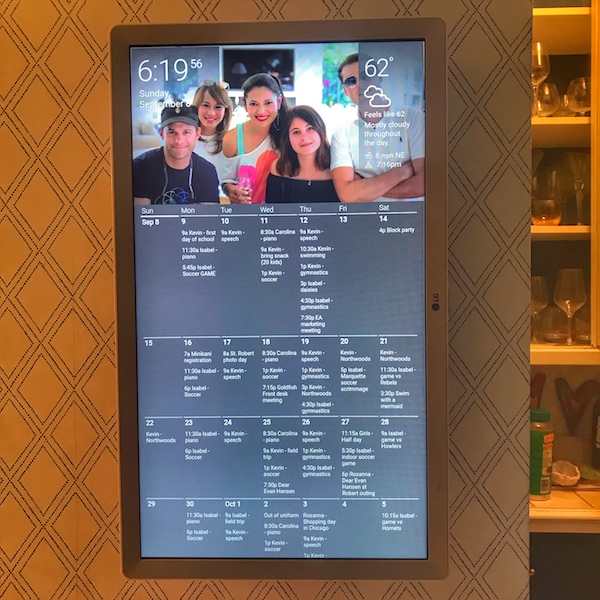
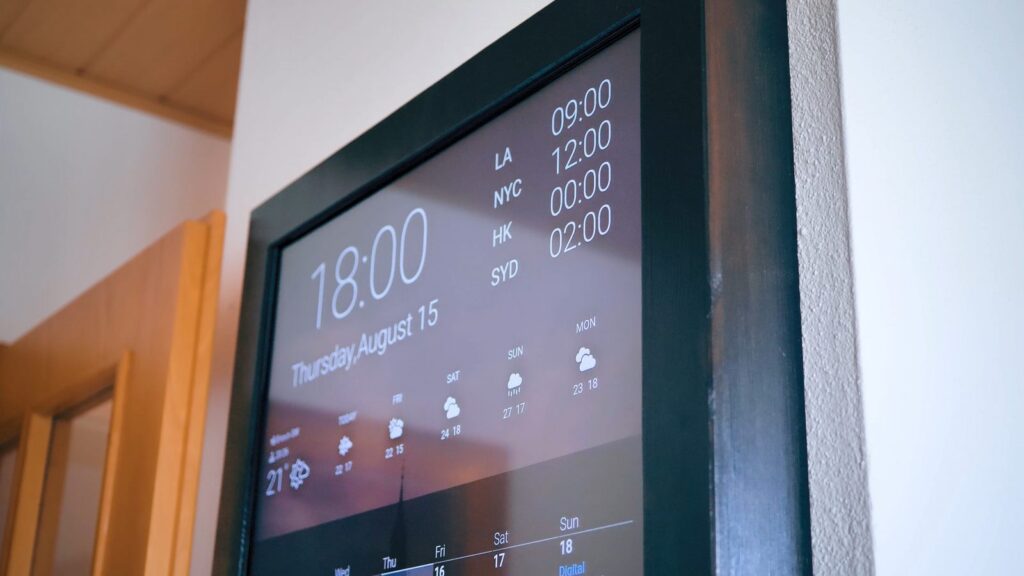
A quick internet search showed me lots of great digital command center ideas to get started. Check out the photos below to see just a few. Click on the images to link to their sites for more information on each.
Let’s get to making our own!
I did some research about the various options, figured out the size we’d need for our wall, and began the planning process. Keep reading to see the materials used and steps followed to make ours.
Supplies:
- Screen with HDMI input
- First I tried out a TV we had that wasn’t being used. It worked great but was an older model that could only be displayed in landscape orientation.
- I ended up ordering this computer screen that could be used in portrait mode.
- Raspberry Pi 4 – I used the Labists Starter Kit, which comes with everything you’ll need to get started
- USB mouse and keyboard for initial Raspberry Pi setup (Once configured, the Pi can be operated from its own peripherals or another computer connected over the Internet).
- Screen wall mount – This is what I used but you may need something different for your screen. If it’s small enough, you could also just support the screen with your frame.
- Infrared Touchscreen Frame (optional) – I plan on making our command center interactive at some point.
- Kreg Jig
- Drill
- 1-1/4″ coarse thread pocket hole screws
- Level
- Tape measure
- Stud Finder
- Boards for frame 1×3’s
- Molding for frame – optional
- Miter saw
- Don’t forget safety gear like eye protection, sanding mask, and earplugs when using your saw.
- Wood Glue
- Clamps
- Black latex paint
- Velcro strips with adhesive
Step 1: Set up your Raspberry Pi
Set up the Raspberry Pi and attach it to your screen of choice. If you need help with this step you can check out this post on how to set up a Raspberry Pi.
During the digital dashboard setup process, you can use a USB mouse and keyboard attached to the Pi and then disconnect them when you’re ready to hang it on the wall. Another method is to set up remote access to Pi so you can work from your laptop or desktop computer to control the command center. I’ll do a future post explaining how this can be done.
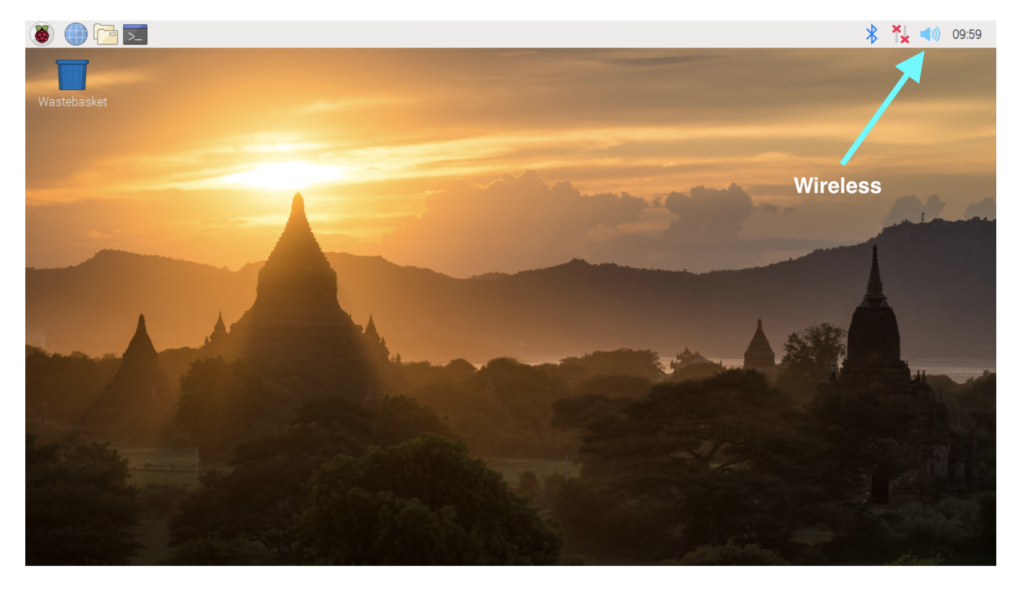
Step 2: Connect the Pi to your wireless network
Click on the wireless icon in the upper righthand corner of the screen and choose your network. Add a password if needed.
Step 3: Configure the command center
You could also save this step for the end, after everything is mounted.
There are multiple options for your display. The two that I looked into are:
Dakboard – You can create and customize a digital wall display on their website and it will run on your screen through a wireless connection. There is a free version and tiered premium versions with more options.
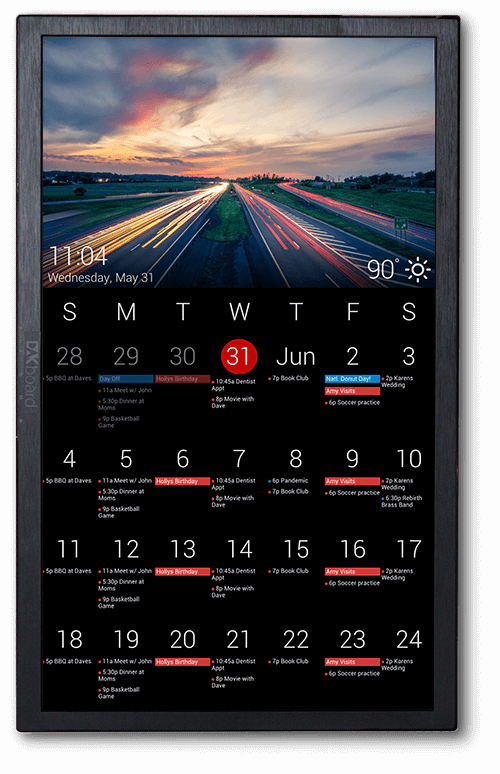
MagicMirror² – A free, opensource, modular option that takes a little more effort to set up but is more customizable. Most people use one-way glass over their screen for this install, to make it look like a mirror that has digital images coming out of it.
Here’s an example of a MagicMirror shared by Amy Lee Bennett on medium.com:
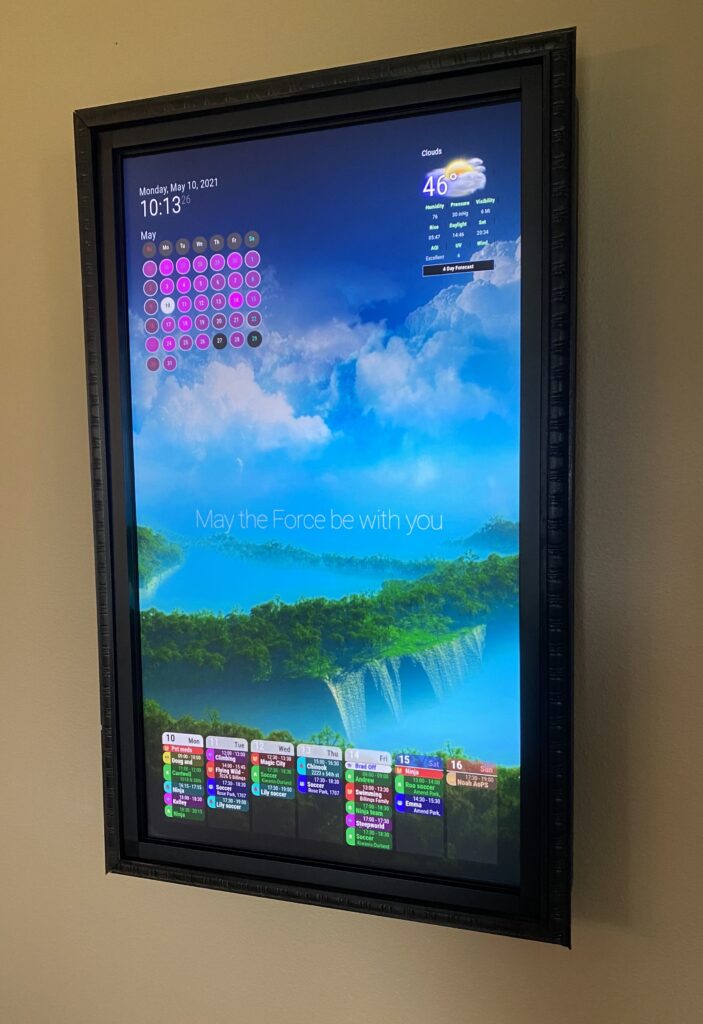
Step 4: Mount the screen on the wall
I decided to mount the screen first, and then build the frame around it. My reasoning was that the screen needed to be very secure. I planned on adding a touchscreen interface in the future and we didn’t want little fingers accidentally knocking the whole thing off the wall.
This is the TV Wall Mount I used but you may need to find something different that will work for your screen.
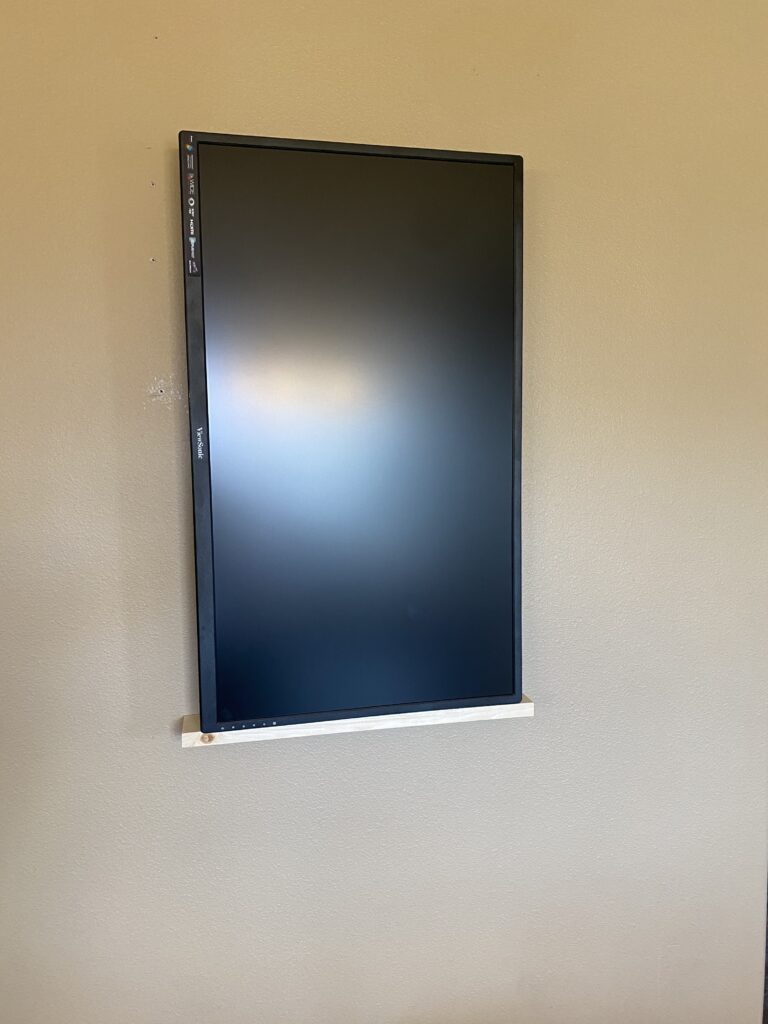
Since we chose to mount the screen sideways in a portrait orientation, I attached the wall mount turned sideways as well. As you can see from the picture below, our screen is wider on the bottom than the top. This meant that either the right or left side would be wider once the screen was up in position.
The way our screen is set up, the mount attaches to the thin side. If I had simply to mounted the screen sideways, it would have hung on the wall with the thin side close to the wall and the thicker side pushed out at an angle. To remedy this, I added washers in between the mount and the wall to push it out enough for that side to be even with the thicker, bottom part of the screen.
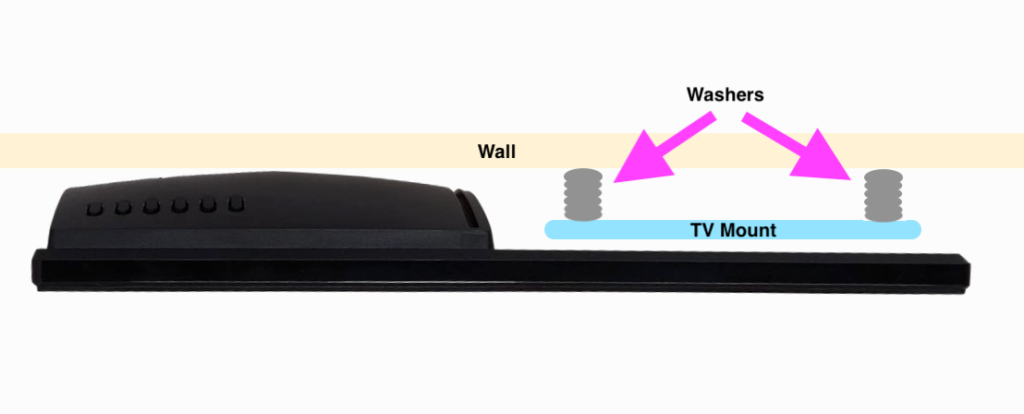
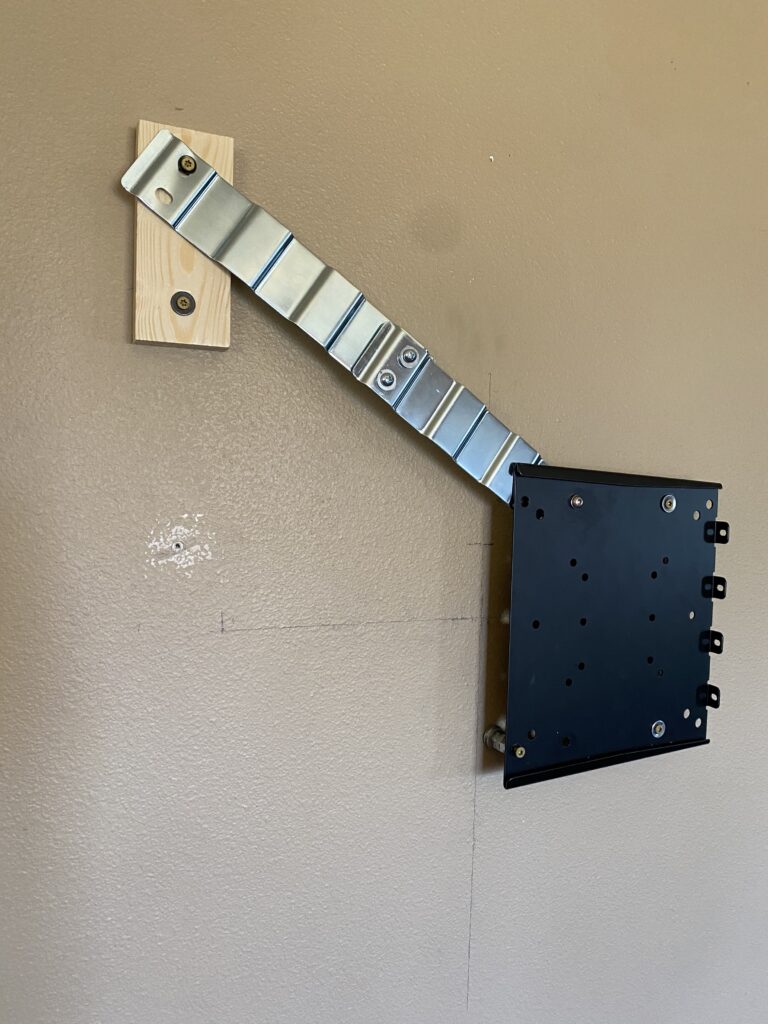
You can see below how the mount is pushed off the wall with washers. The two screws on the far right are secured into the stud. The two screw holes on the left wouldn’t reach the next stud and drywall anchor wouldn’t work with my washer tweak pushing out the mount. To give the entire setup a little extra stability, I used some supplies we had in our garage to make one of these screw holes connect to the next stud over.
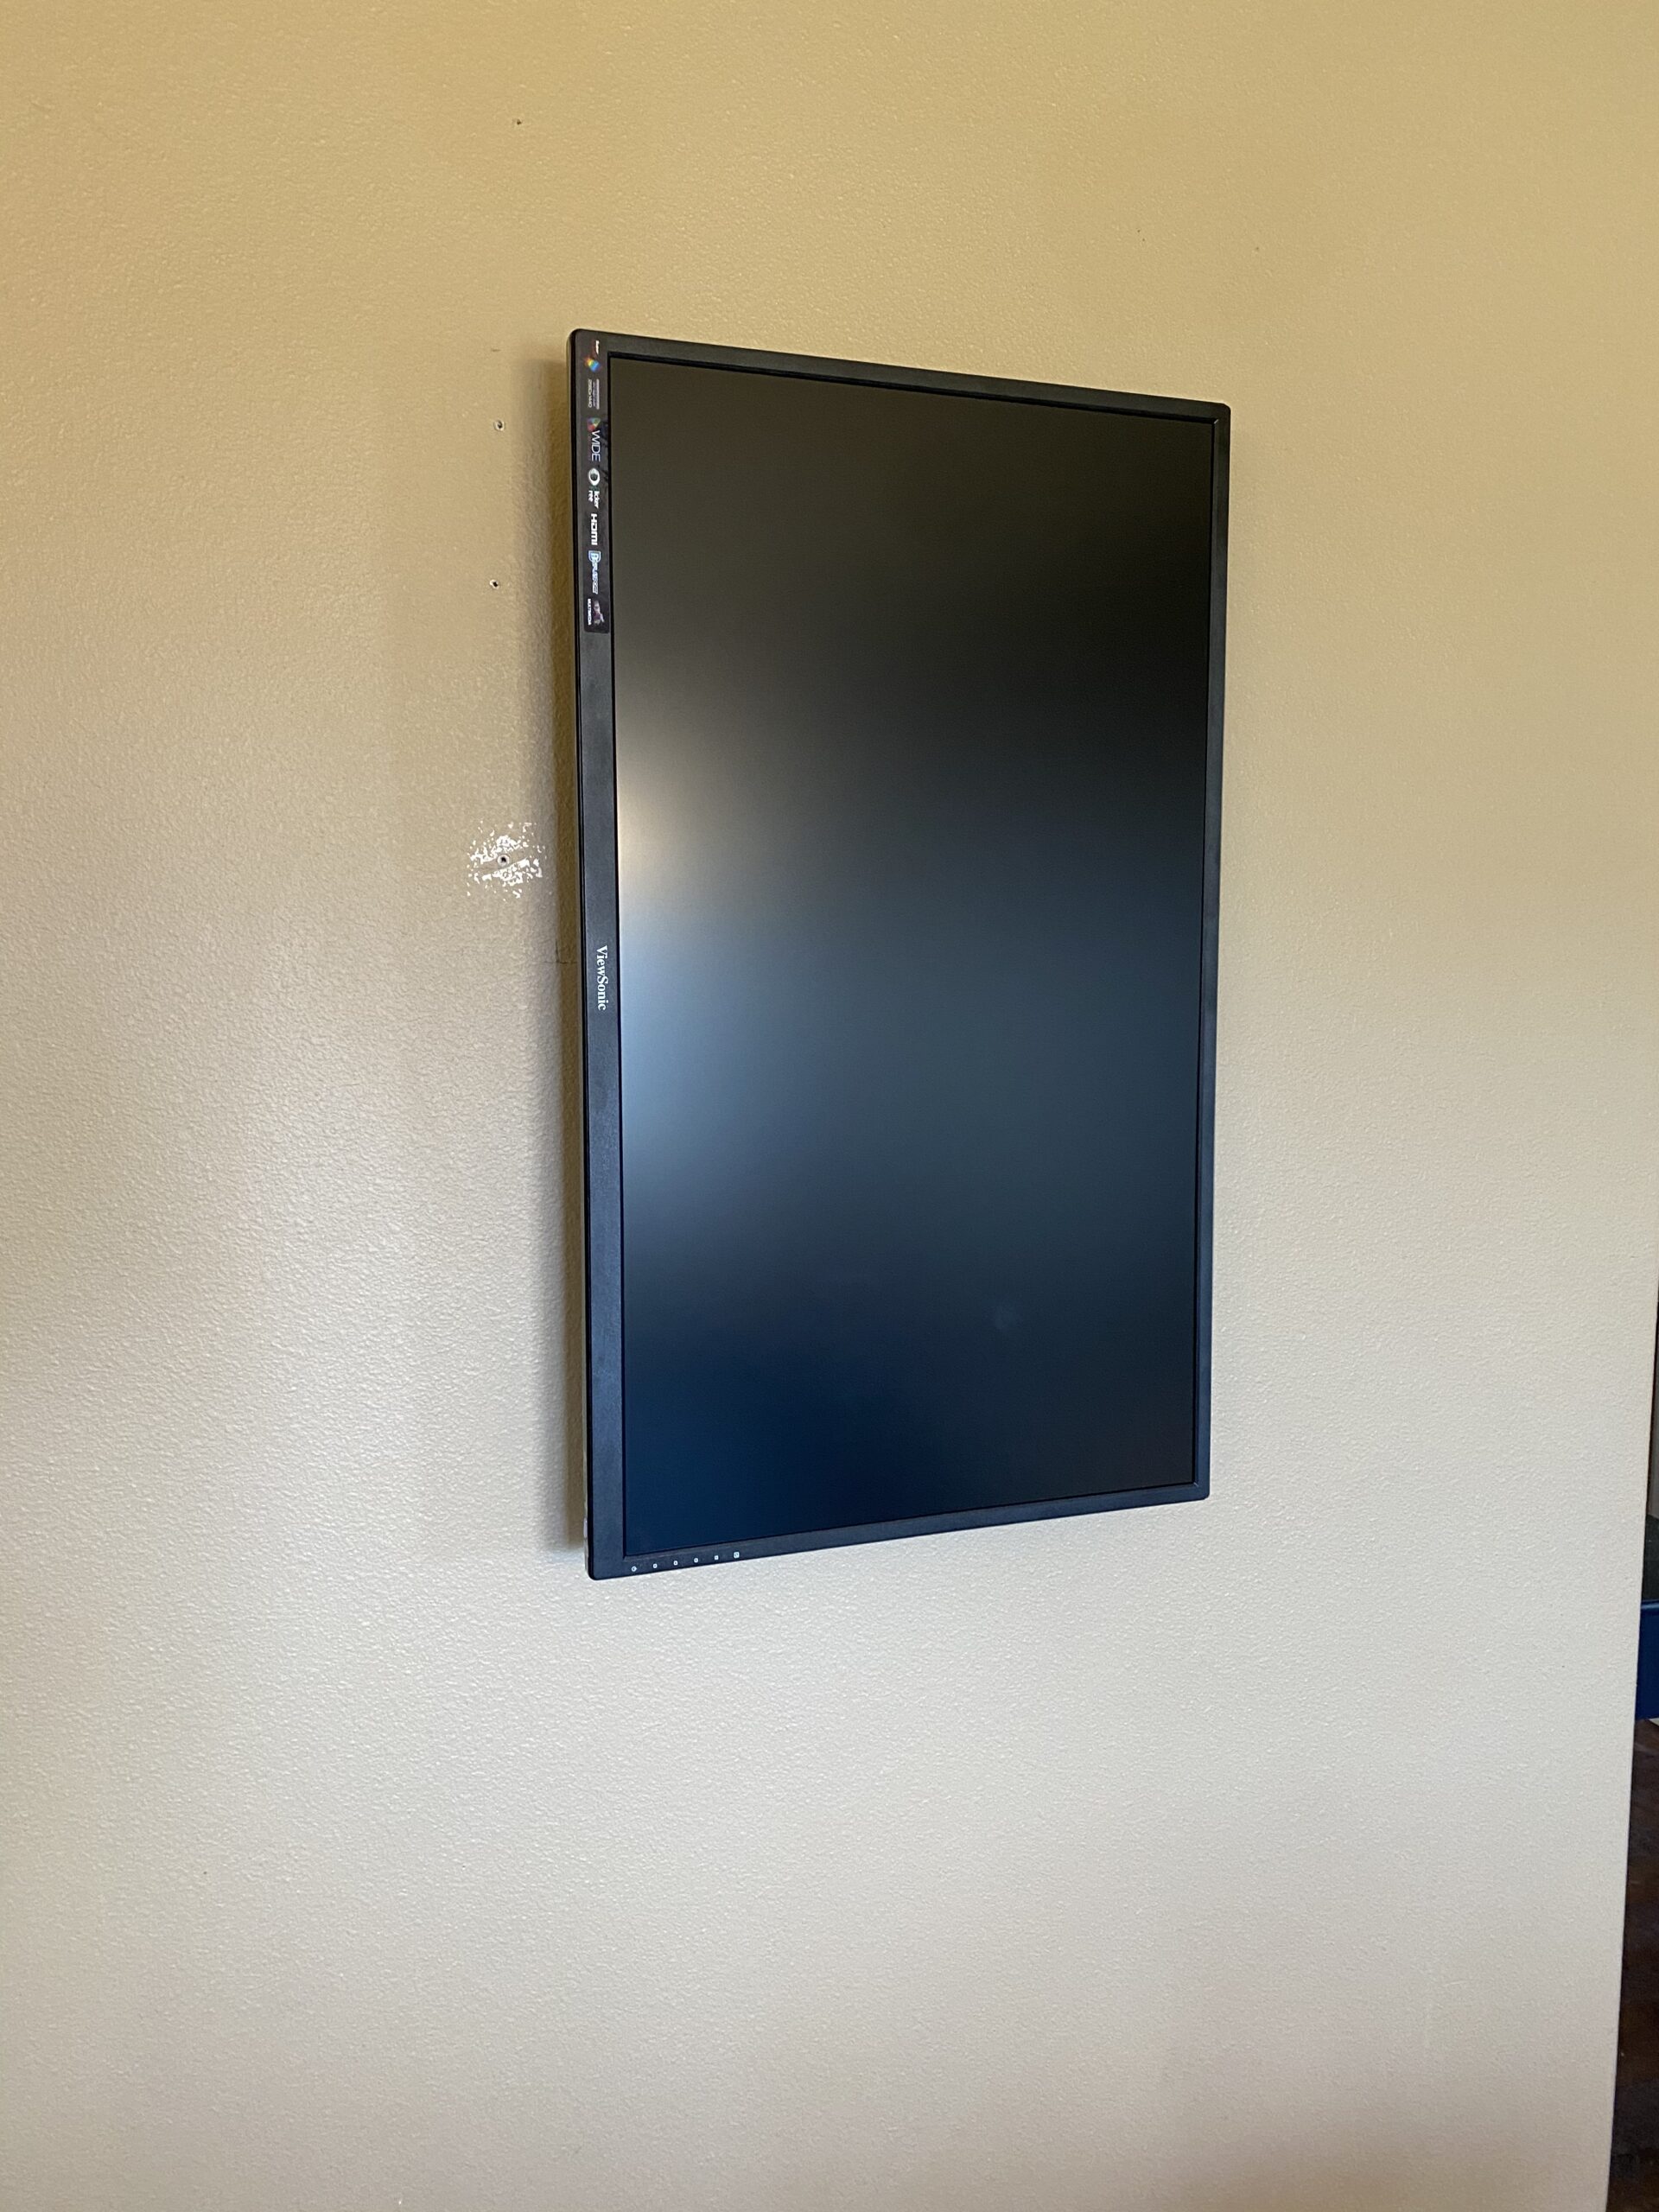
Here is the screen mounted:
Then, just because I was worried that the sideways mount might not be secure enough, I attached the bottom of the frame directly to the wall under the screen. I screwed two pocket hole screws on each side directly into the studs with a 1×3. This screen isn’t going anywhere.
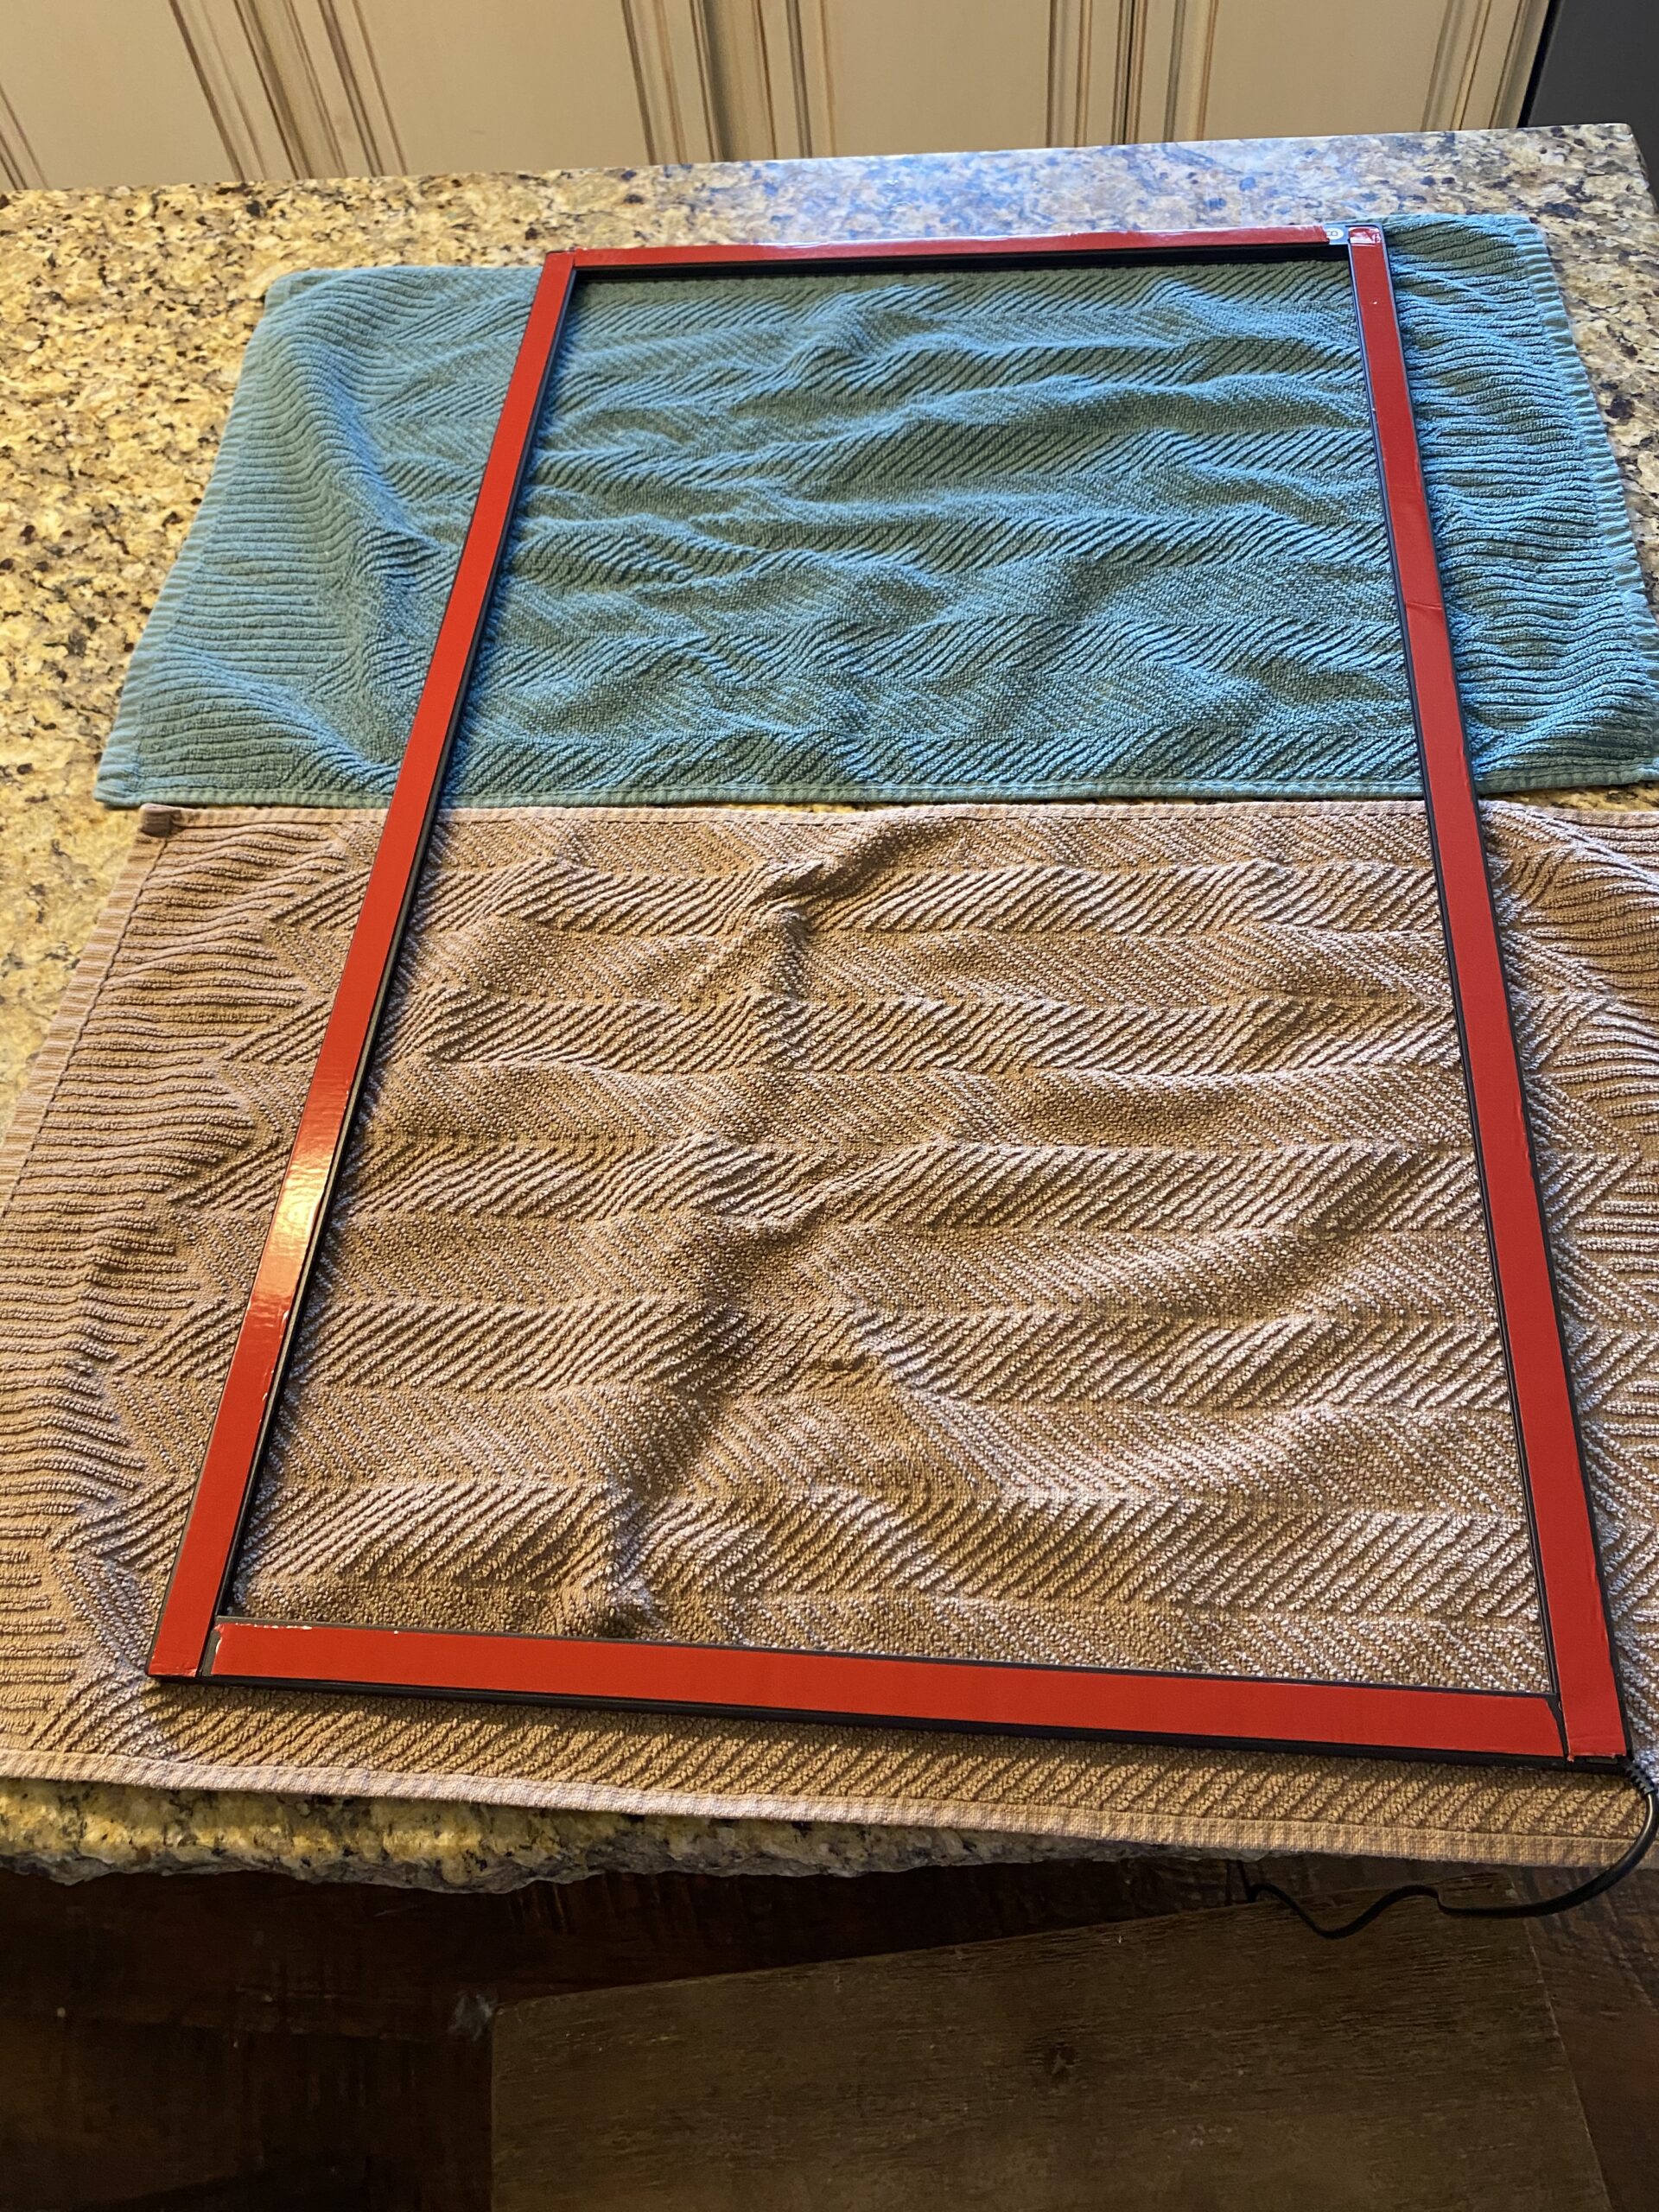
Step 5: Add the IR touchscreen (optional)
The IR touchscreen is something we hope to use to make our command center interactive. We have grand plans to have individual screens to show each family member’s schedule and to-do list. Check out the Youtube video below to see a sample of what the touchscreen can do. It’s from Smartbuilds.io and you can find more great projects on his site as well.
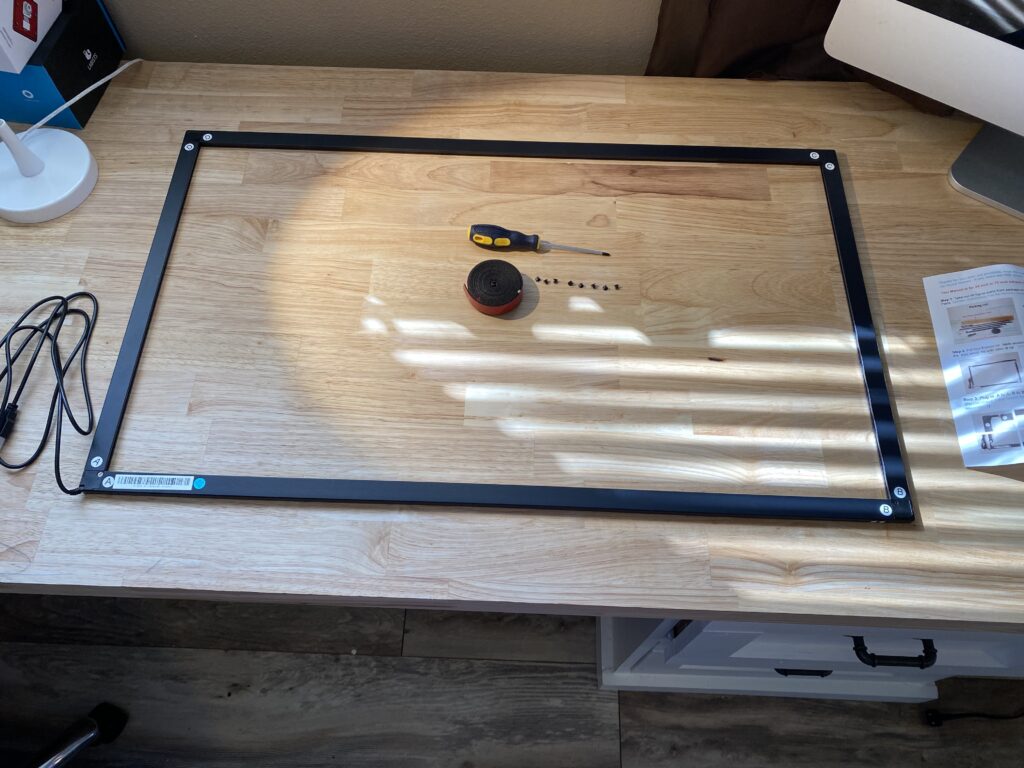
To install the touchscreen, I simply clicked the corners together.
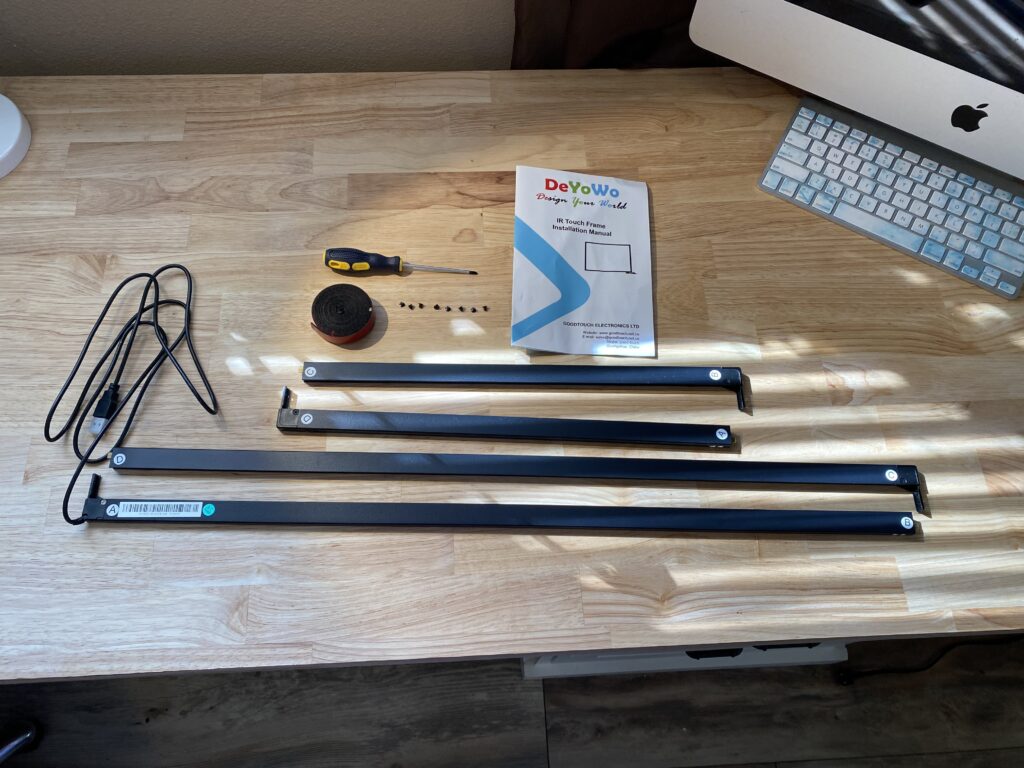
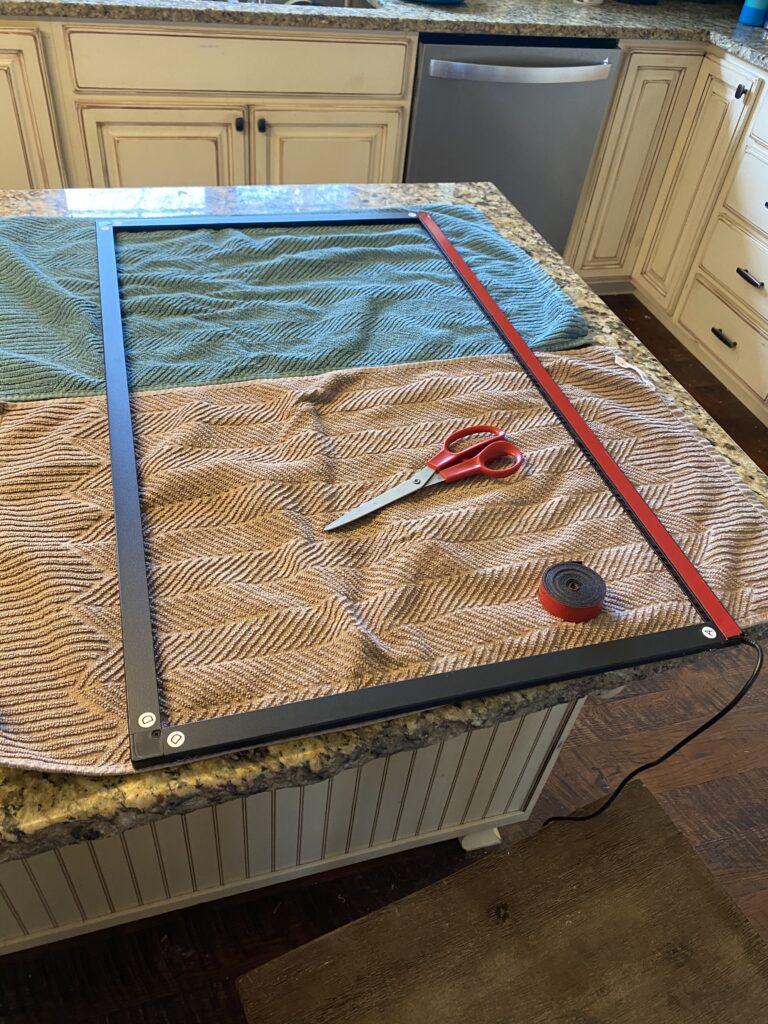
Then I added the sticky backing that came with the kit and stuck it onto the monitor.
Step 6: Add the frame
The next step was to build the frame around the screen. I measured and cut 1×4’s to fit and secured two of them together with pocket holes. We wanted to maintain access to the monitor controls and the Raspberry Pi later so I left one board separate. This side was added later onto the frame with velcro.
I painted the boards with one coat of black latex paint. You could add a second coat but I liked the way it looked a little distressed with just one. At this point, I also painted the bottom of the frame already attached to the wall.
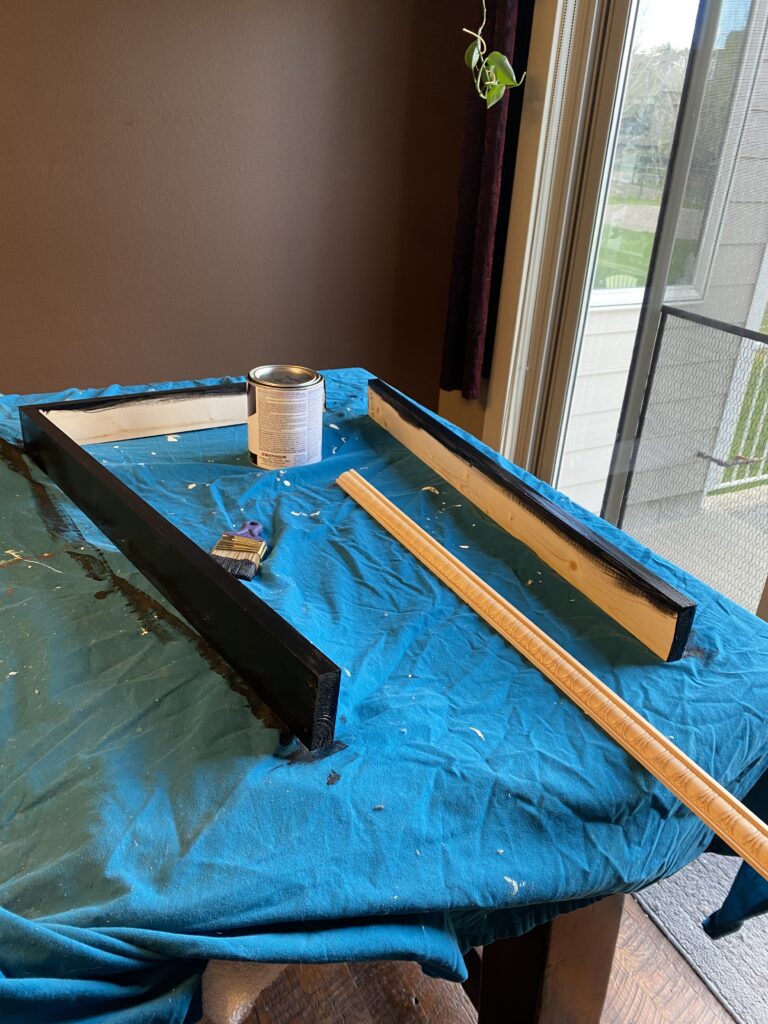
In the photo below you can see the top three sides of the frame just sitting on the bottom one secured to the wall.
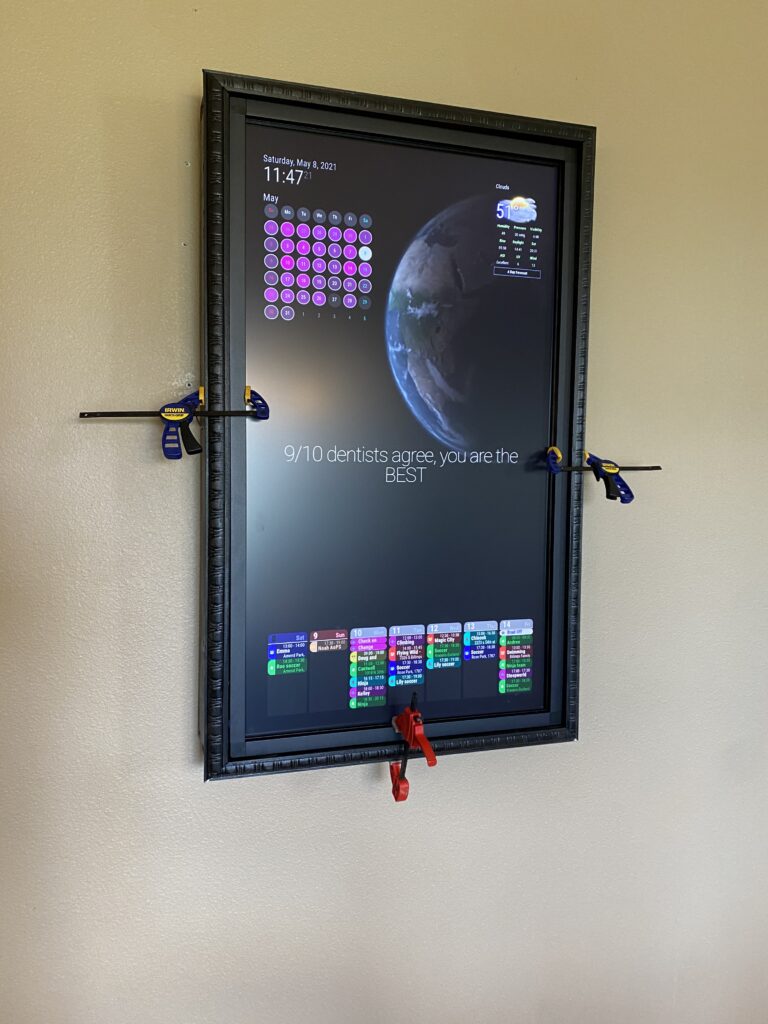
I felt like I could have stopped here but I had some molding that I thought would look nice around the edges of the frame to make it look more finished. Using our miter saw, I cut the molding ends at 45 degrees to frame the edges. Don’t be afraid to cut the pieces a little too long and then keep slicing small pieces off to get the molding to just the right length. It beats having to go back to the store because you wasted an entire piece on a cut that’s too short.
After I had the frame the size set, I glued each piece individually to the 1×3’s of the main frame, but not together at the corners. This way I could remove each side individually if I need access to the monitor or Pi in the future.
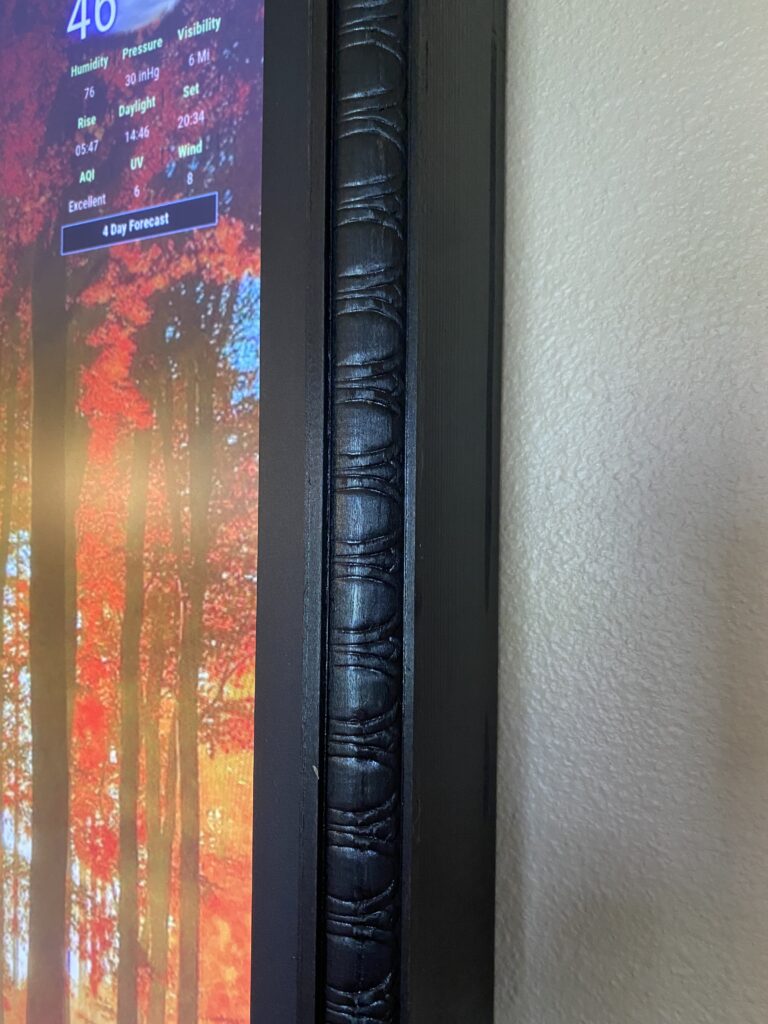
Here are a couple close-ups of the molding:

It turned out pretty nice! Now I need to play with the Magic Mirror modules a bit and tweak the screen setup.
I’m working on future posts about how to use Magic Mirror. If I can do it, with absolutely zero coding experiences, you can too!


You May Also Like

4Runner Dash Mount Install by ICS Fab

Devils Garden and the Primitive Trail Loop – Arches National Park
