

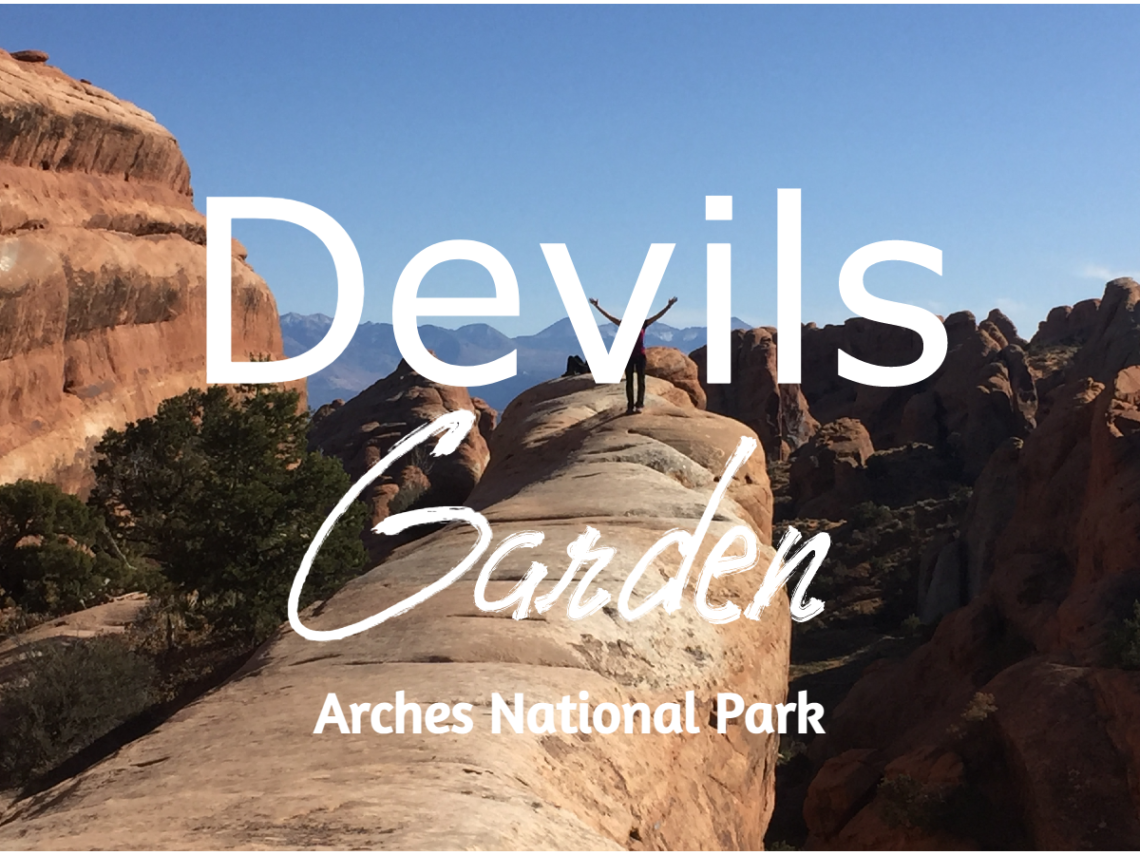
Devils Garden and the Primitive Trail Loop – Arches National Park
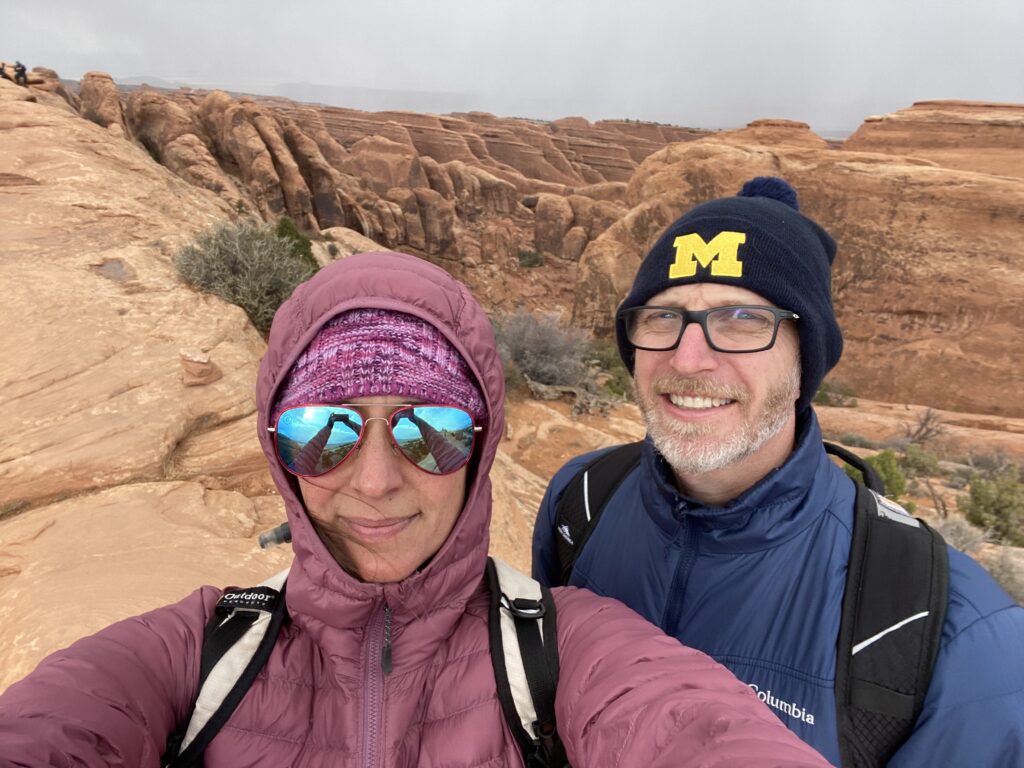
Devils Garden has something to offer every hiker and is one of my personal favorites in Arches National Park. This section has a plethora of sights to see, including arches, windows, towering rock fins, and beautiful views of the valley. Some of these vistas can be found via a short hike down an easy path, but others require a more adventurous route.
Want to read more about Arches National Park?
This post is part of a series on Arches National Park. You might also want to check out Park Avenue, The Windows, Delicate Arch, Sand Dune Arch , and Skyline Arch.
Logistics:
- Distance: Anywhere from 2 miles (3.2 km) to 8 miles (12.9 km), depending on which arches you visit
- Elevation: Varies from flat and hard-packed to Landscape Arch, to rock scrambling
- Difficulty: Easy to difficult
- Facilities: Pit toilets
- Dogs Allowed: No
- Parking: At trailhead
Getting there:
First Head to Arches National Park
You will need to pay an entrance fee, which is good for 7 days, or have an America the Beautiful Pass. There are also certain Fee Free days and did you know that 4th graders can get a free annual pass?
Devils Garden trailhead is at the furthest point you can drive on the main road in the park. It may be at the end of the road but it’s worth the trek. The drive is 18 miles from the Visitors Center and takes approximately 45 min. You will know you are almost there when you see the Devils Garden campground.
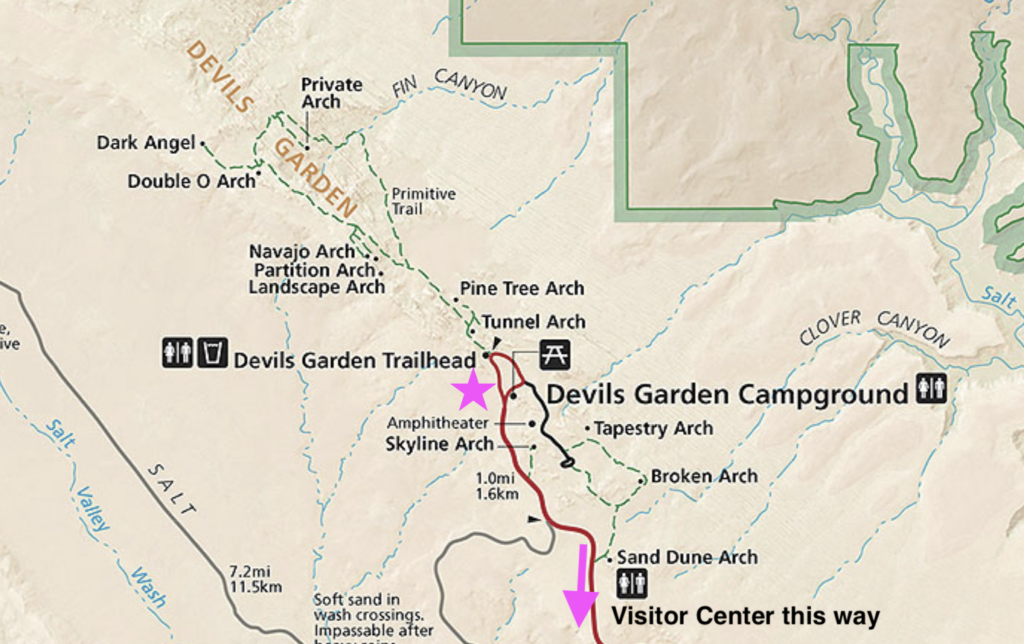
The Devils Garden area encompasses many arches and other features in a loop. You can take an easy hike to see the famous Landscape Arch and head back in about 2 miles (3.2 km). Or you can make a longer excursion and do up to about 8 miles (12.9 km) if you visit all the arches and include the primitive loop. It’s a choose your own adventure kind of hike.
Here’s a map of our first time there on Gaia GPS:
Tunnel and Pine Tree Arches
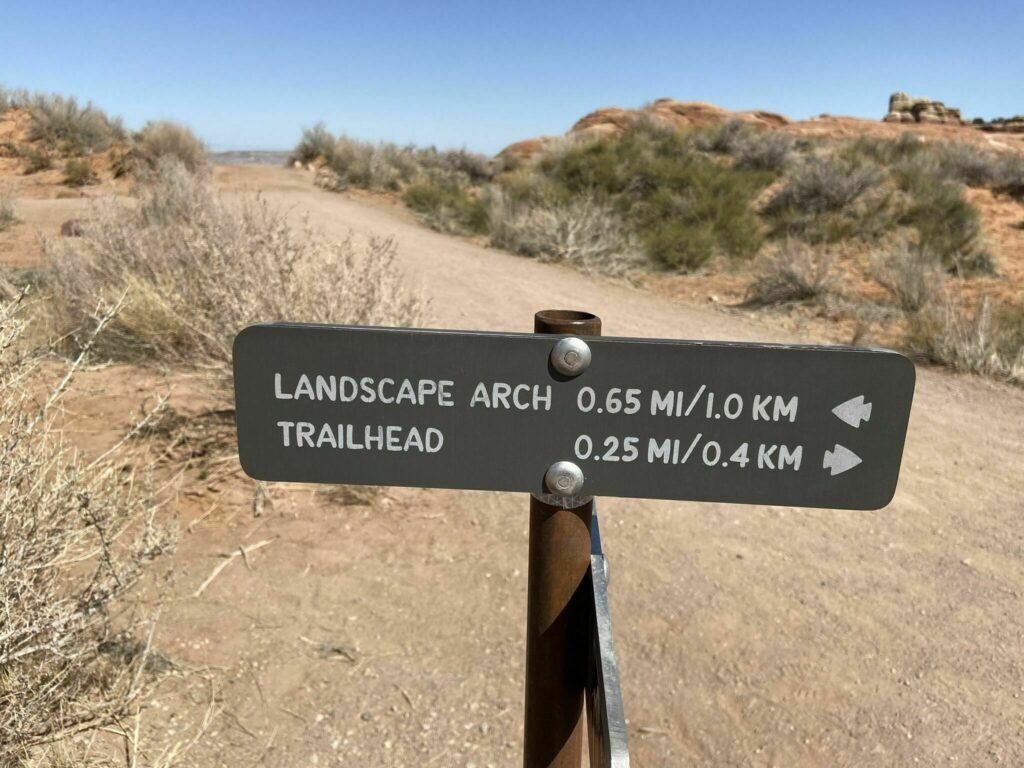
As you start out from the trailhead, the beginning path is hard-packed and relatively flat. At about 0.25 mile (0.4 km) you have the option to turn right on a short, easy spur trail that leads to Tunnel Arch and Pine Tree Arch. This side-trip only adds about 0.5 mile (0.8 km) to your overall distance.
If you’re just here to see the famous Landscape Arch, continue on straight ahead.
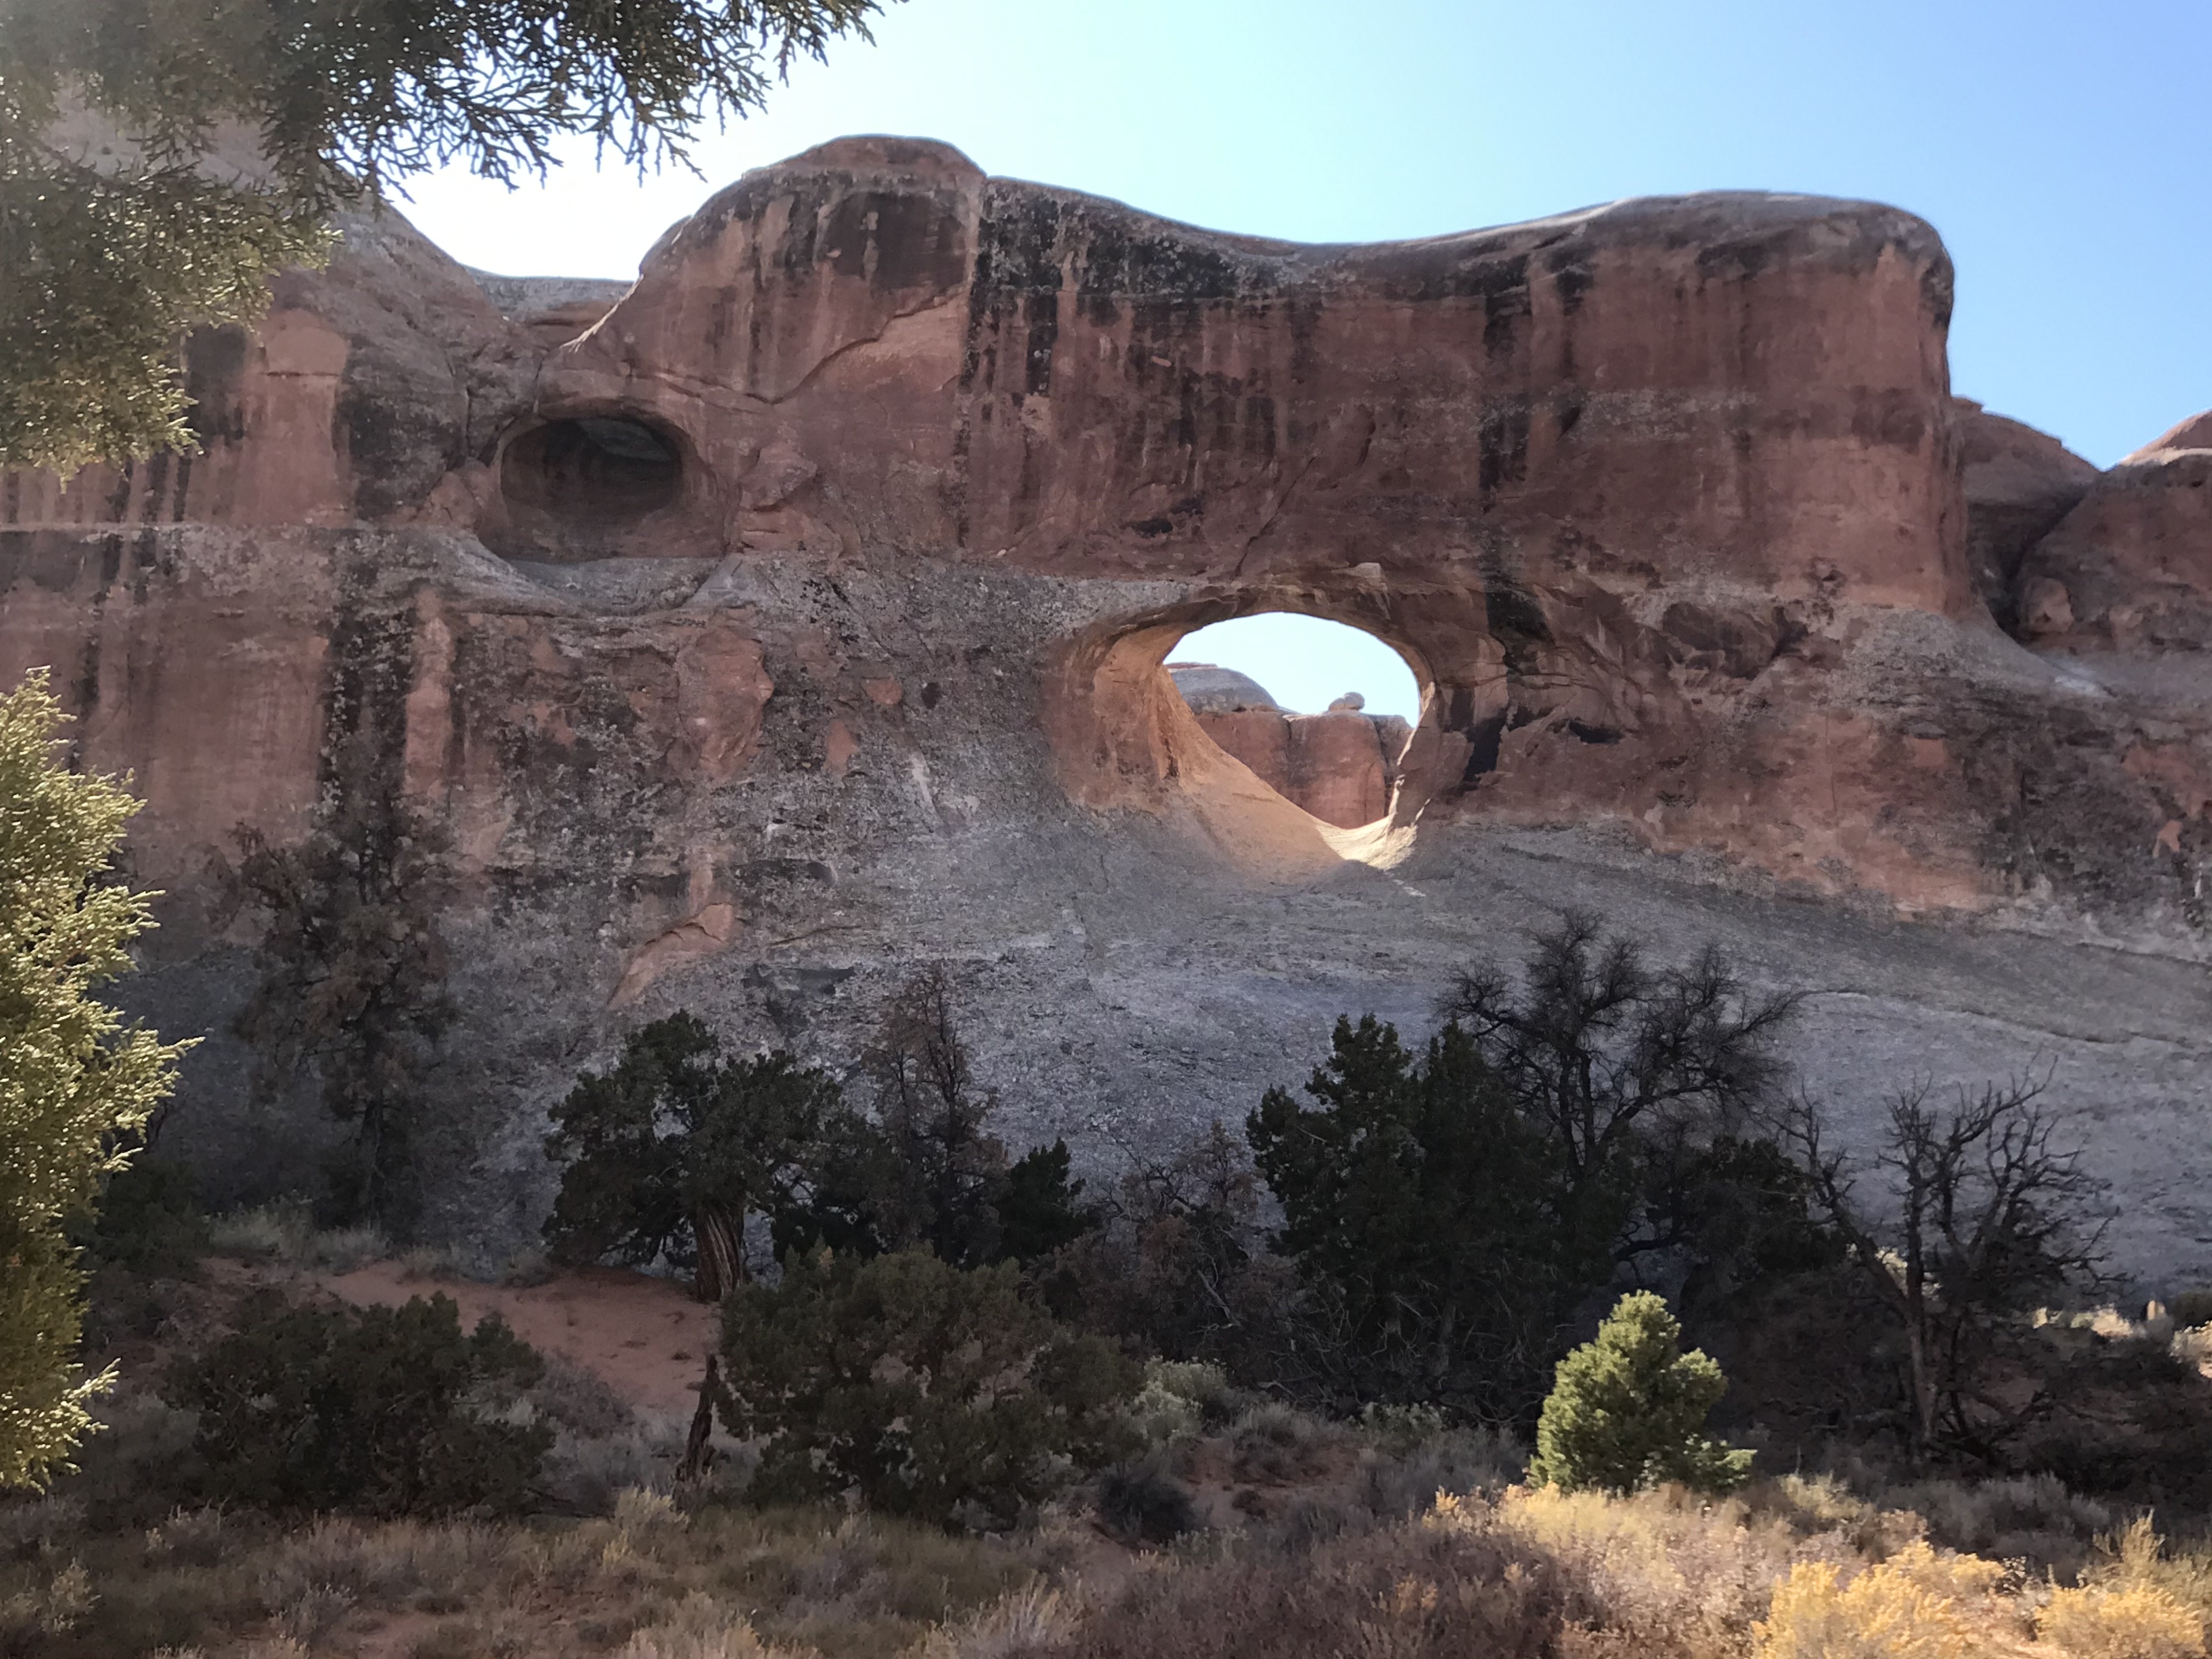
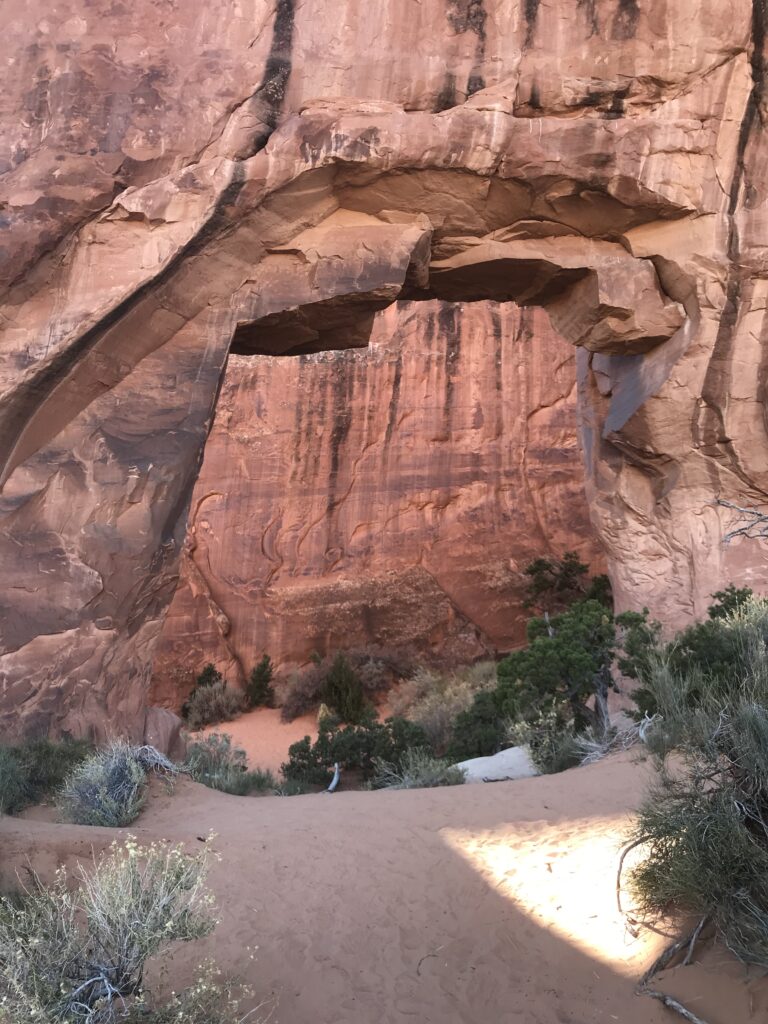
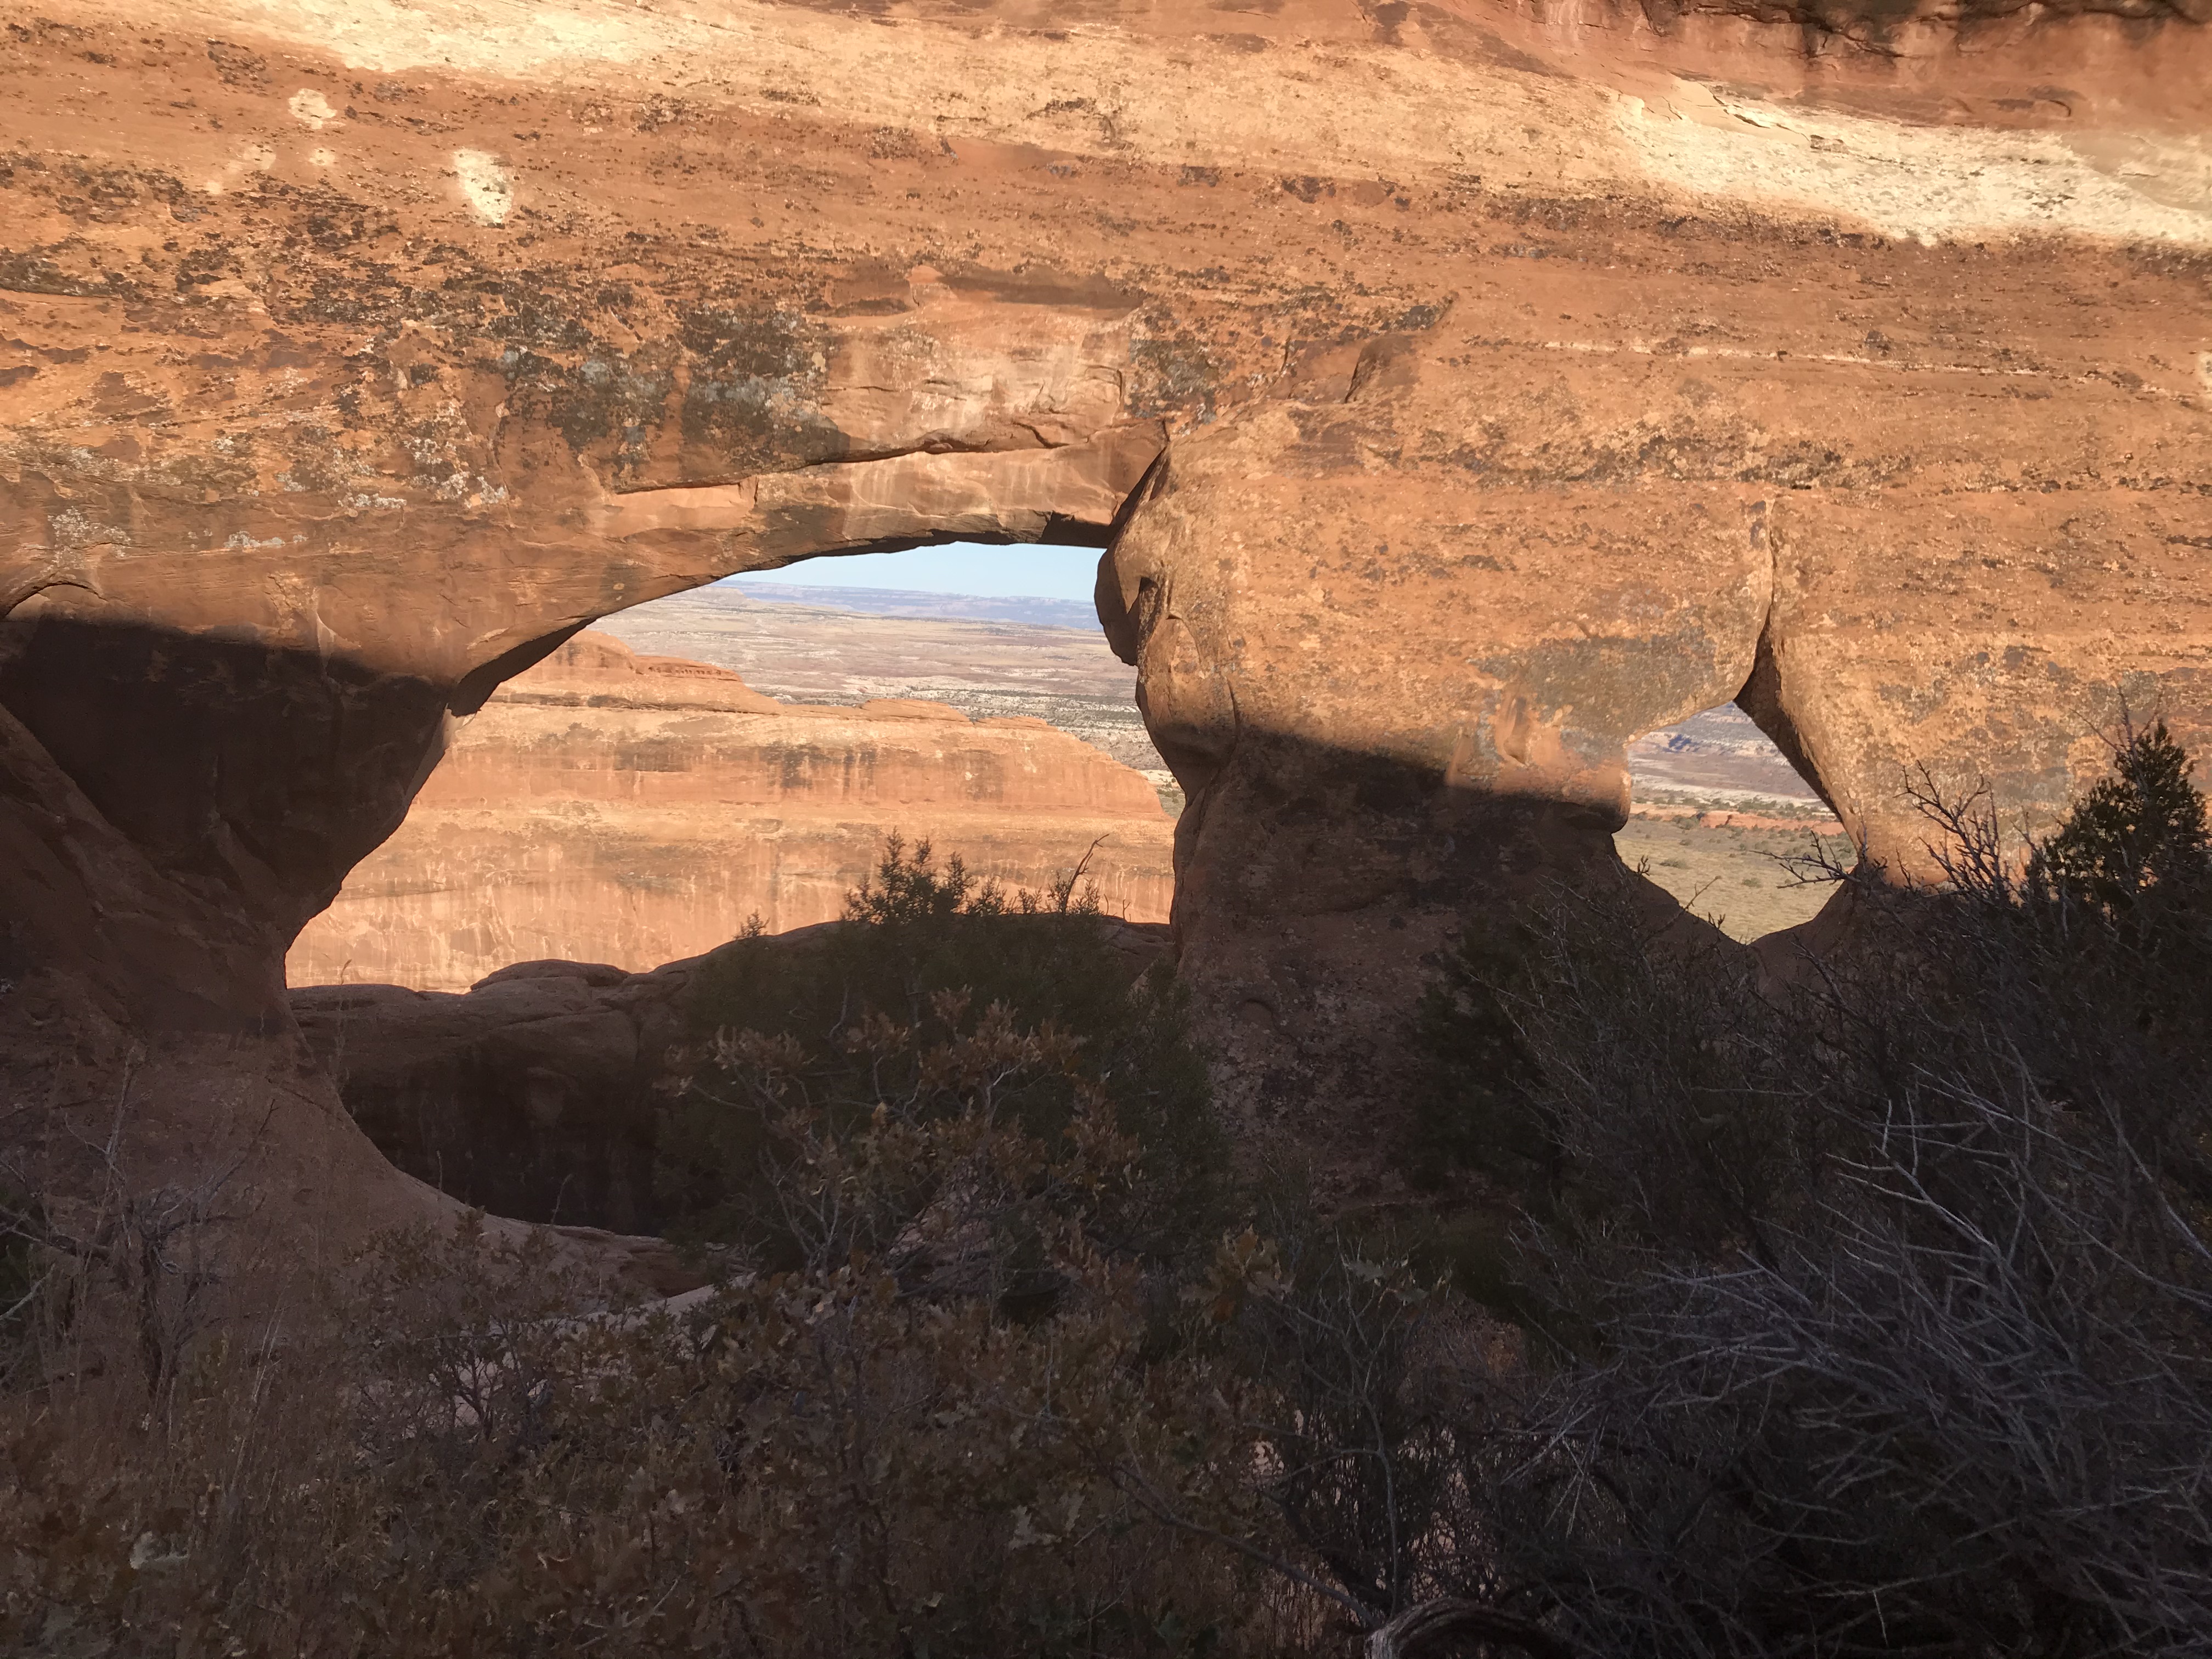
Tunnel Arch
After you head down the spur trail, this one is off toward the right. In the image below you can see Tunnel Arch on the right and a smaller, unnamed arch on the left.
Pine Tree Arch
This arch is fun to visit because you can go through and see it from both sides.
After viewing Tunnel and Pine Tree, head back to the main path and turn right to continue on toward Landscape Arch.
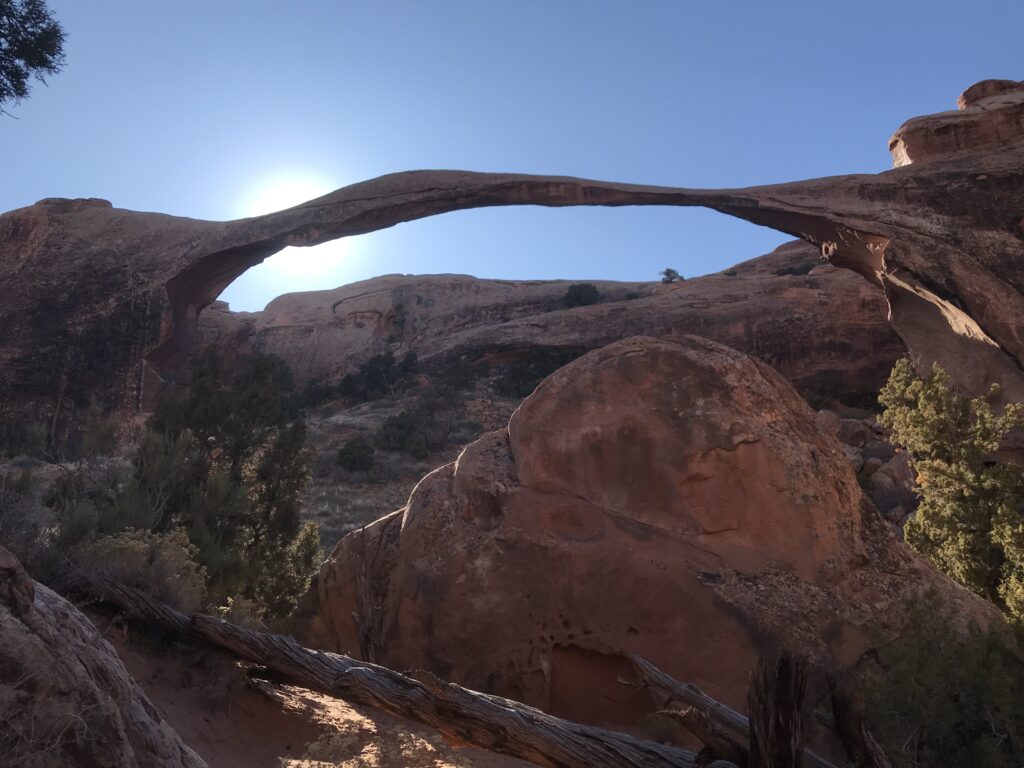
Landscape Arch
This is the last stop on the flat, hard-packed trail, at approximately 1 mile (1.6 km) after the start, if you didn’t stop at Tunnel and Pine Tree Arches. Just before you get to Landscape Arch, you will see the start/end of the primitive trail to the right. Keep on the main trail for Landscape and a clockwise route of the loop.
A little background:
Landscape Arch is one of the world’s longest at around 290 – 306 feet (88.4 – 93.3 m), depending on the source. The Natural Arch and Bridge Society considers Landscape Arch the fifth longest natural arch in the world, after four arches in China.
It is only about 11 feet (3.4 m) thick at its center so it appears to defy gravity. There used to be a trail leading under the arch but after multiple large rockfalls in the 1990’s, it was closed due to safety concerns. You can see some of the car-sized chunks below the arch that remind you how small we are compared to these massive features of Earth.
Beyond Landscape Arch
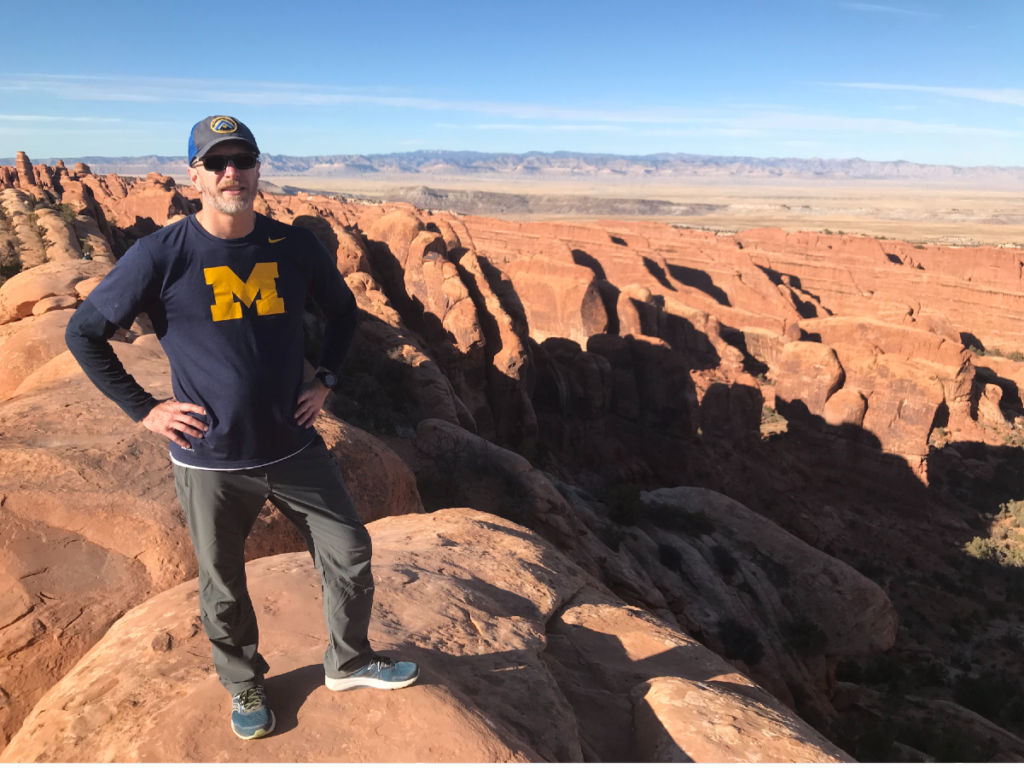
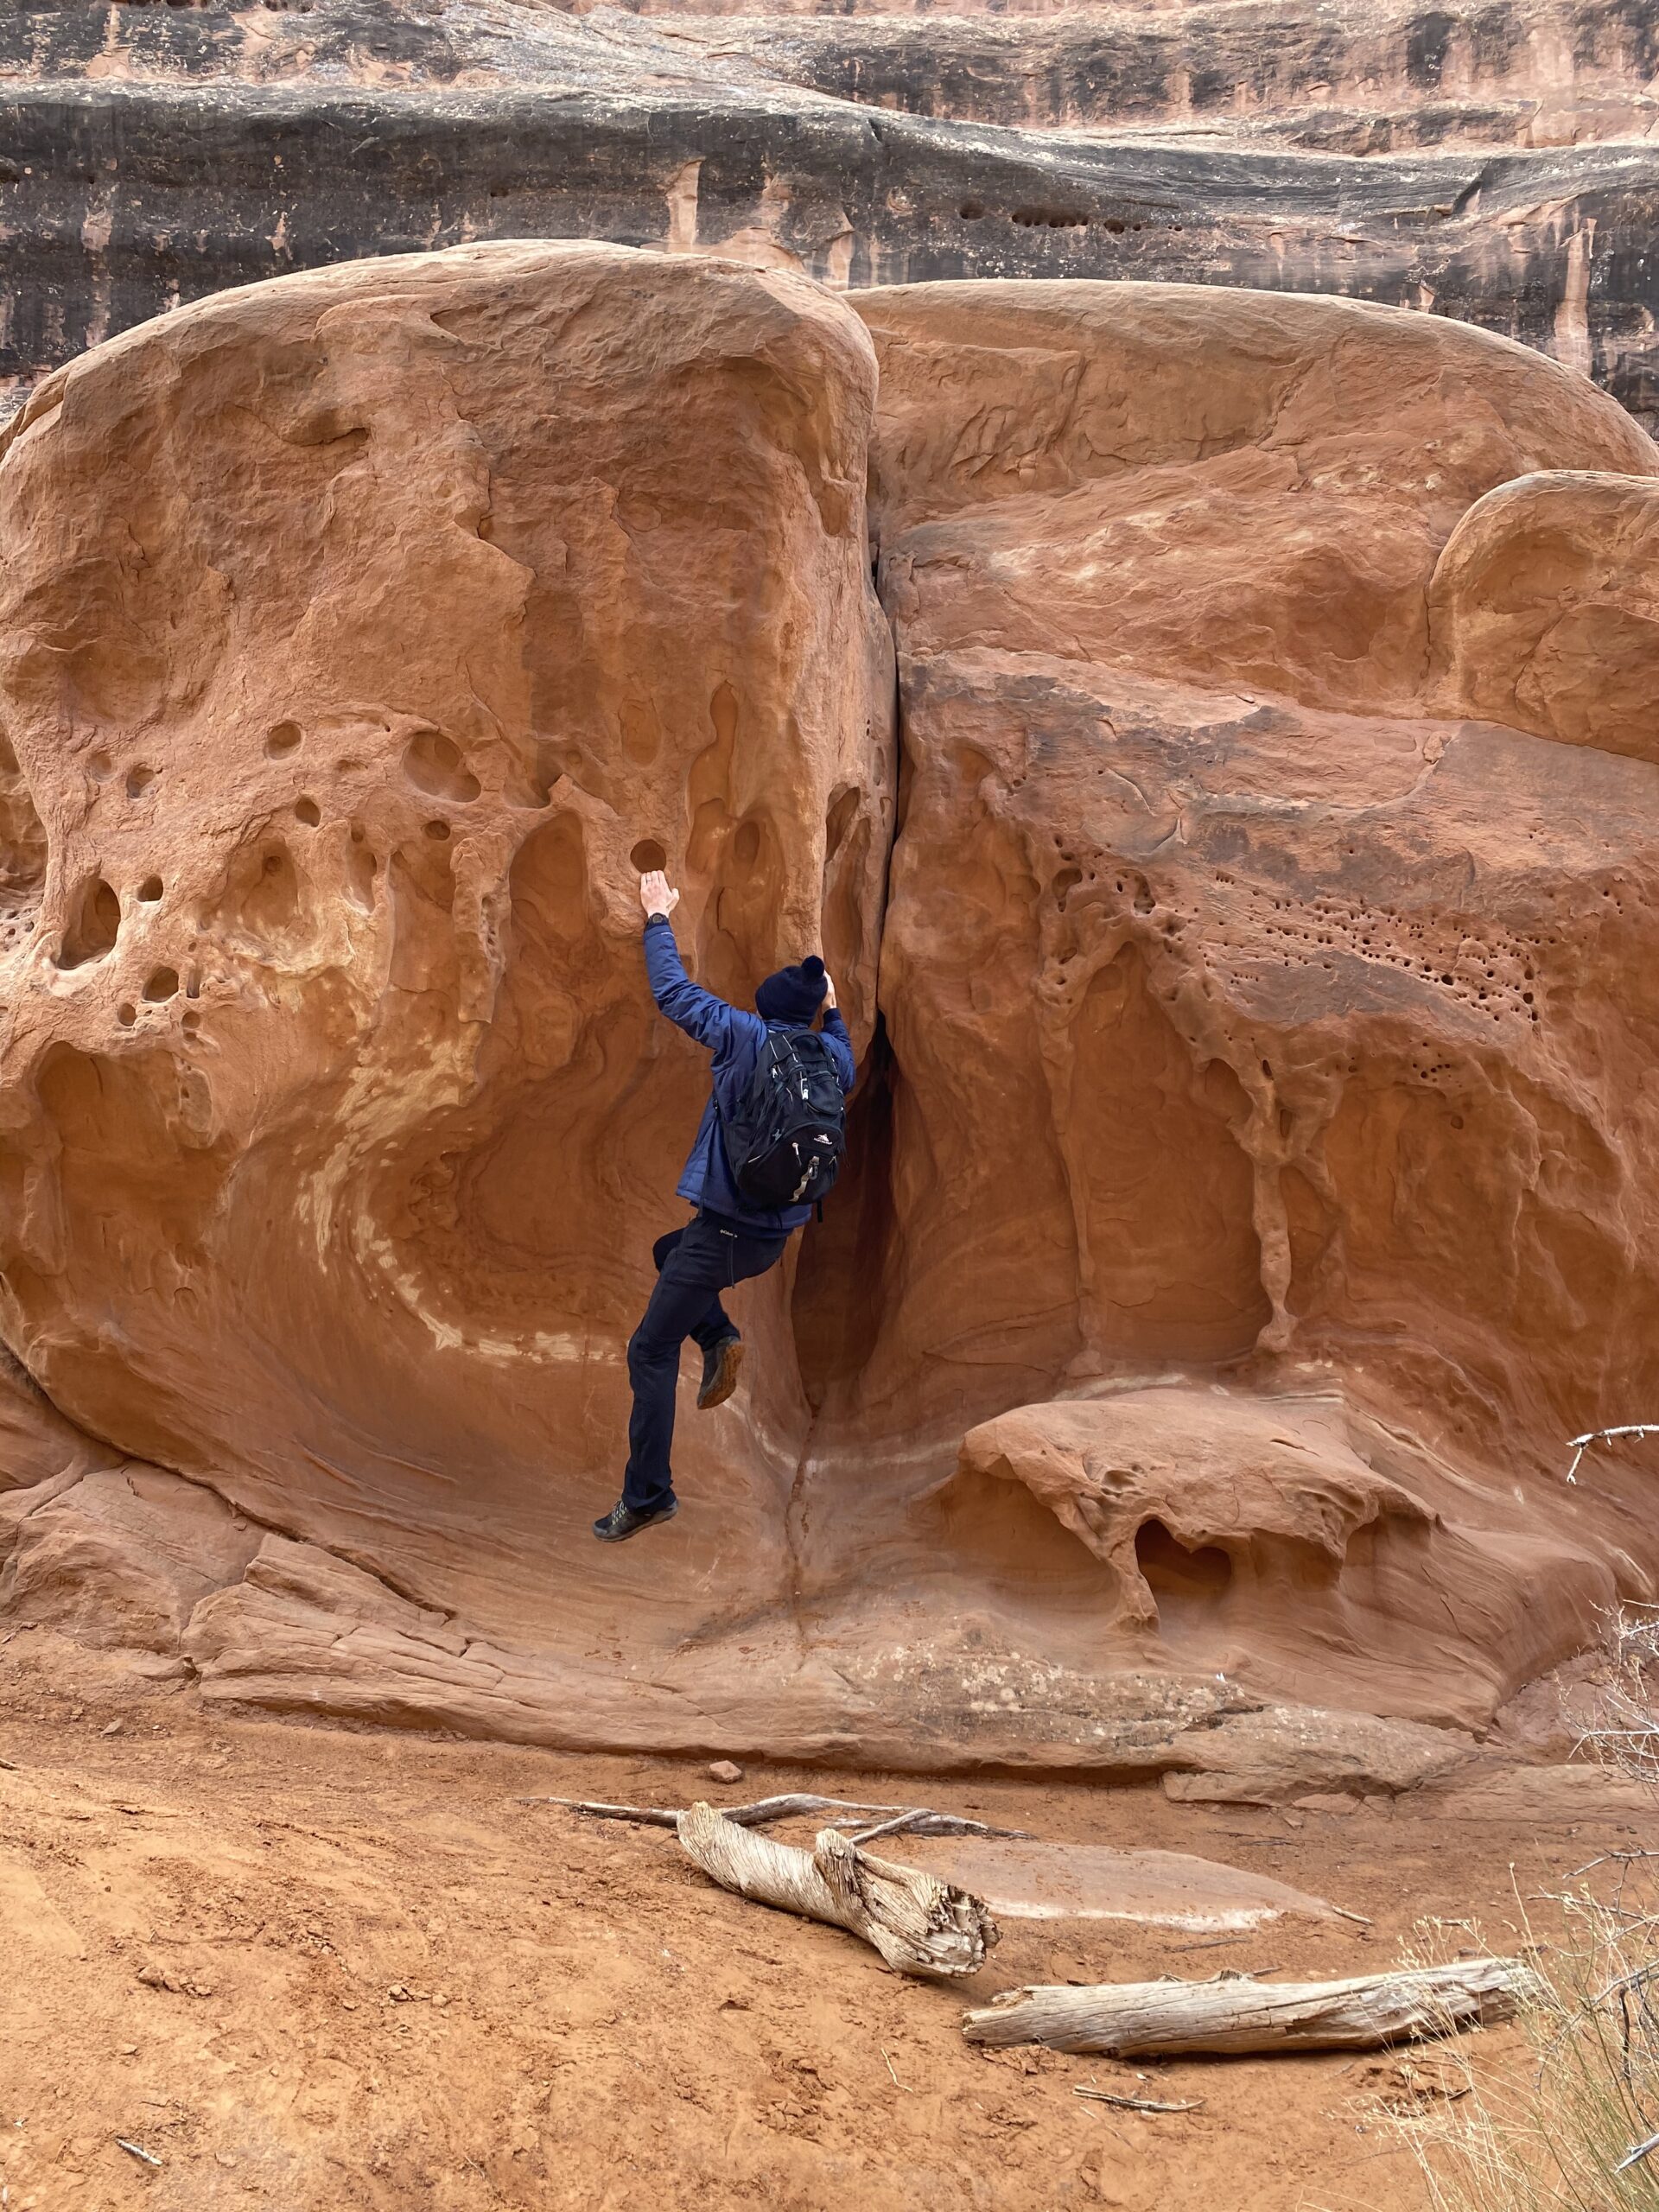
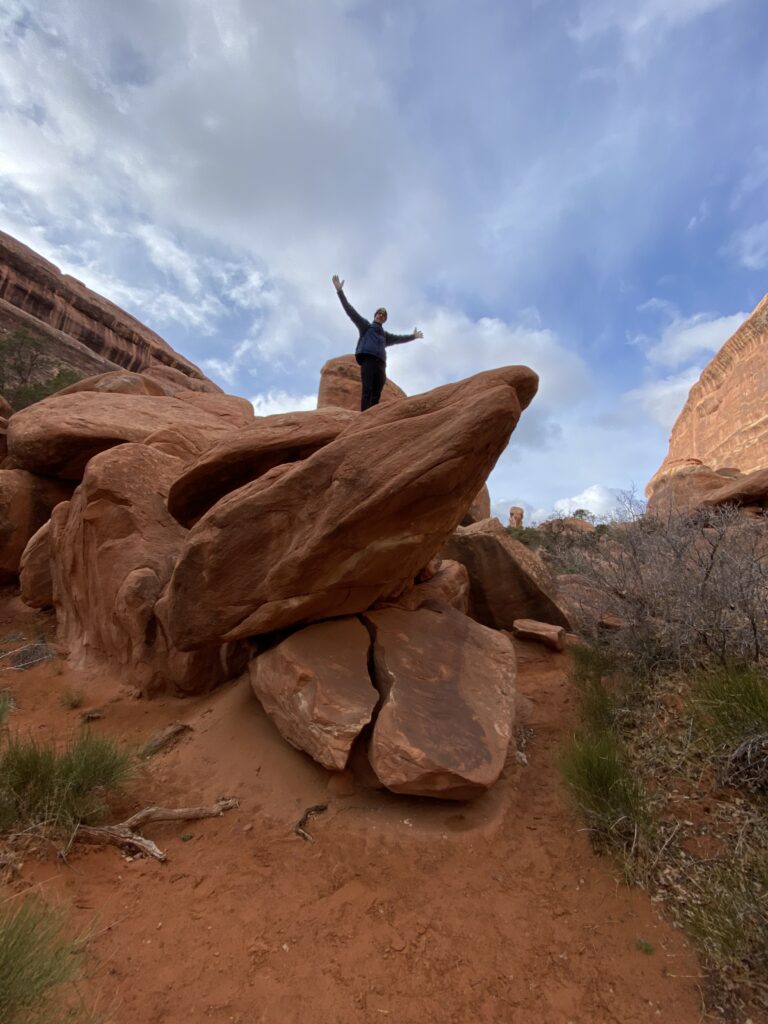
If you’re up for a bit of a challenge, you can continue on past Landscape Arch. The trail quickly becomes more difficult as you scramble up the rock fins to reach areas with narrow ledges and steep drop offs. You will definitely need to watch your step. Technical rock climbing skills aren’t necessary but you may need to use your hands to help pull yourself up some of the rocks. The view will be worth it though!
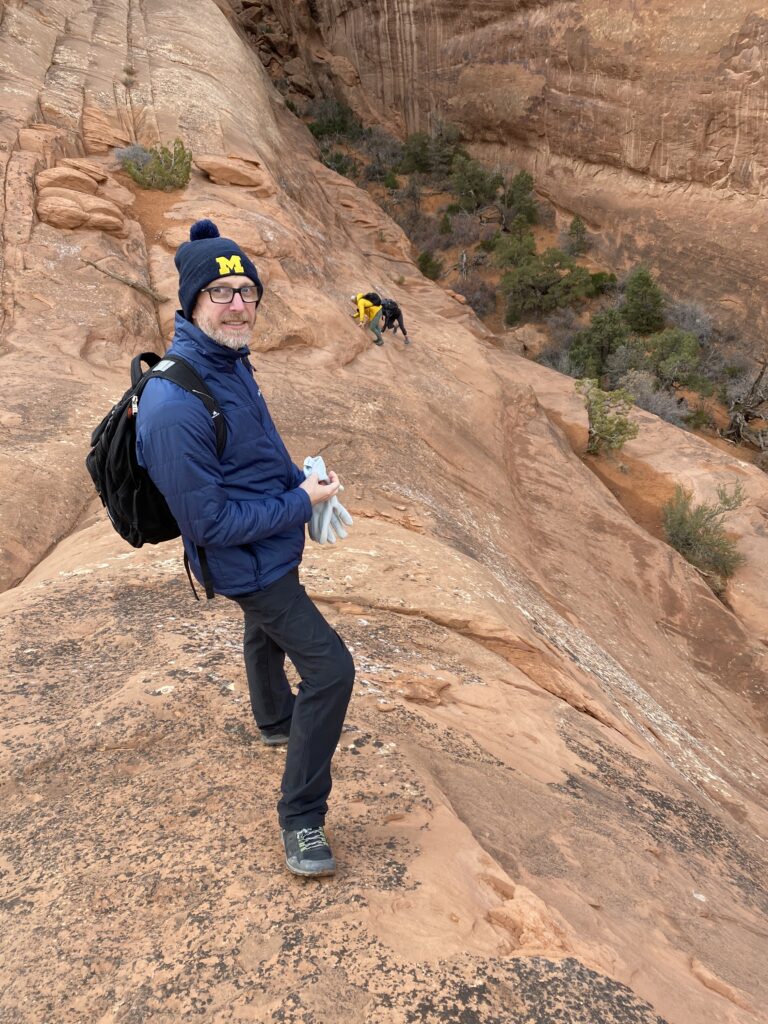
In the images below, you can see the beginning of the climb up past Landscape Arch. All but the first one are looking back toward the trailhead.
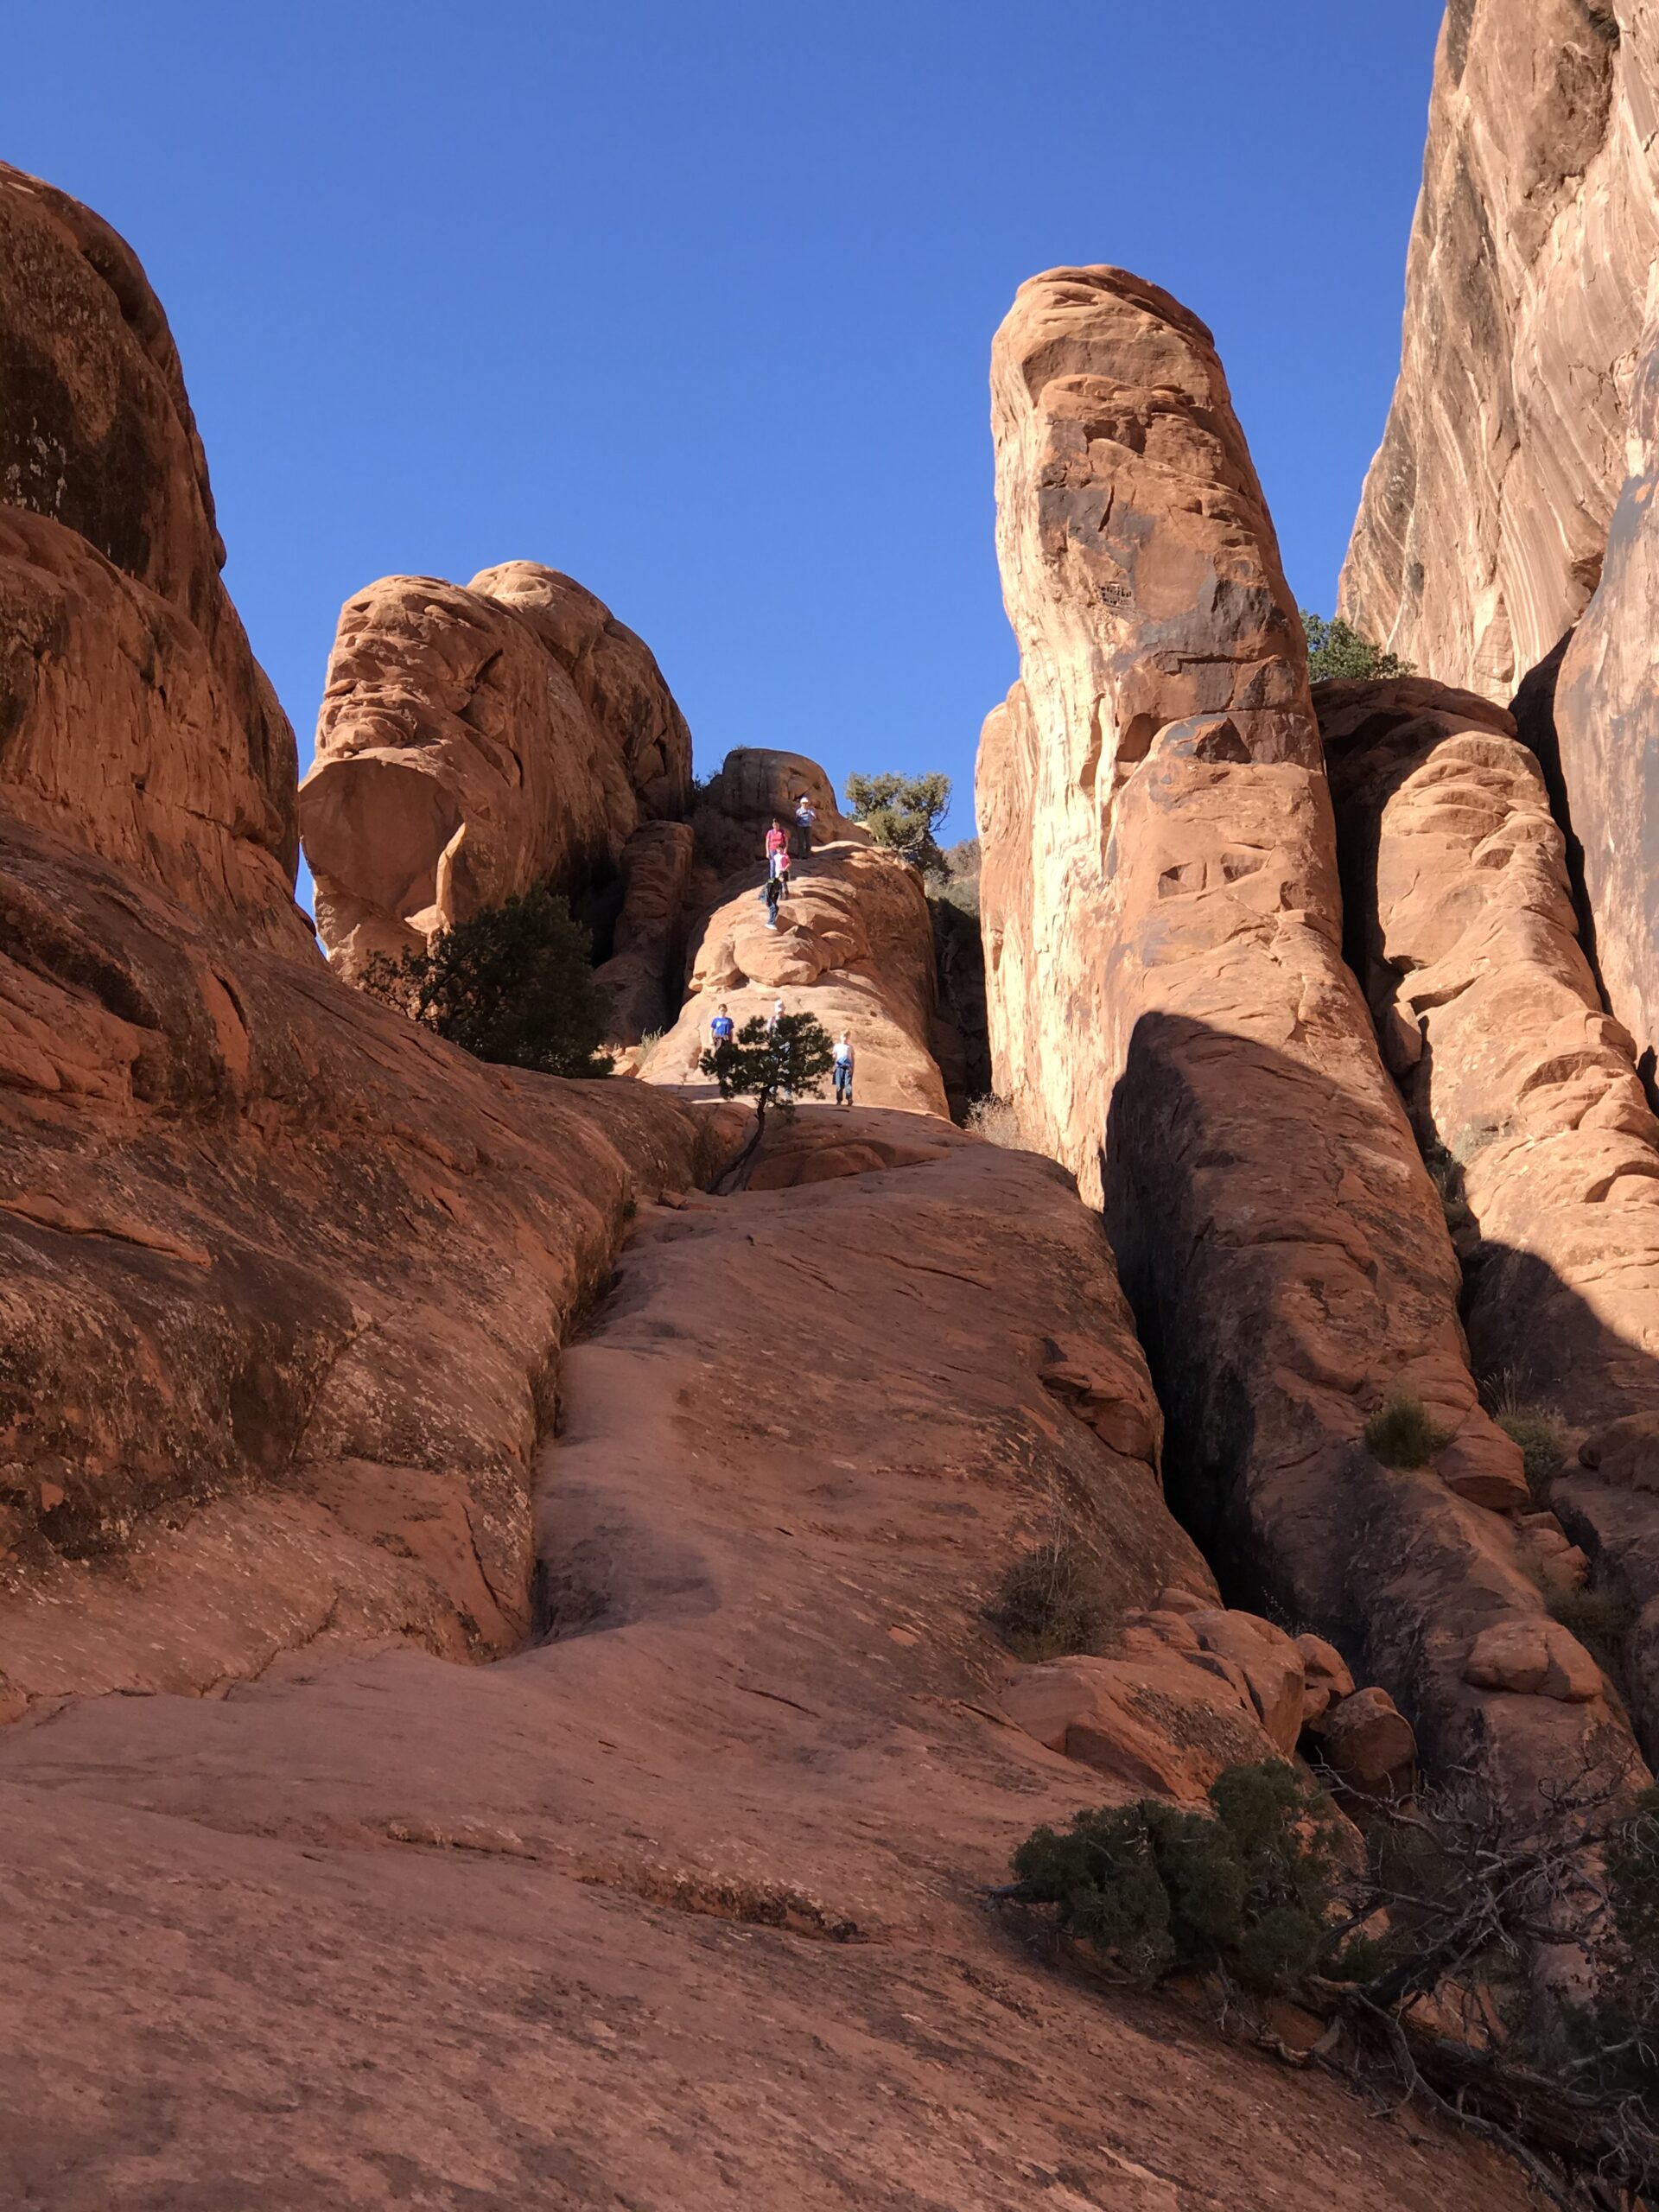
Here’s what you need to climb 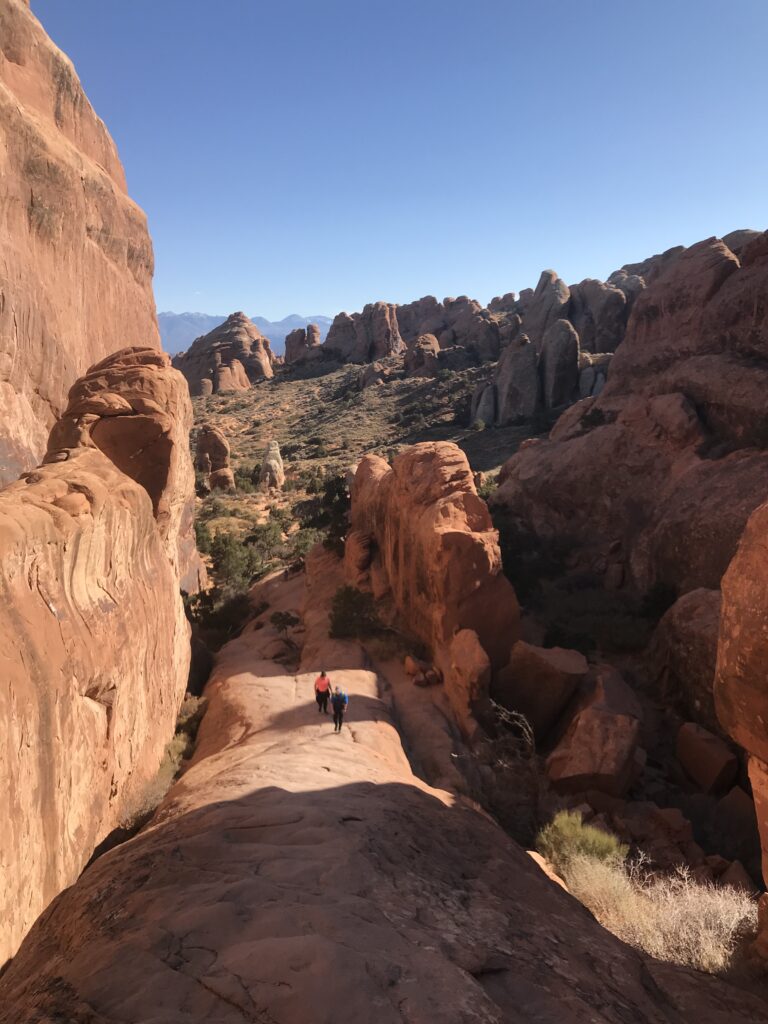
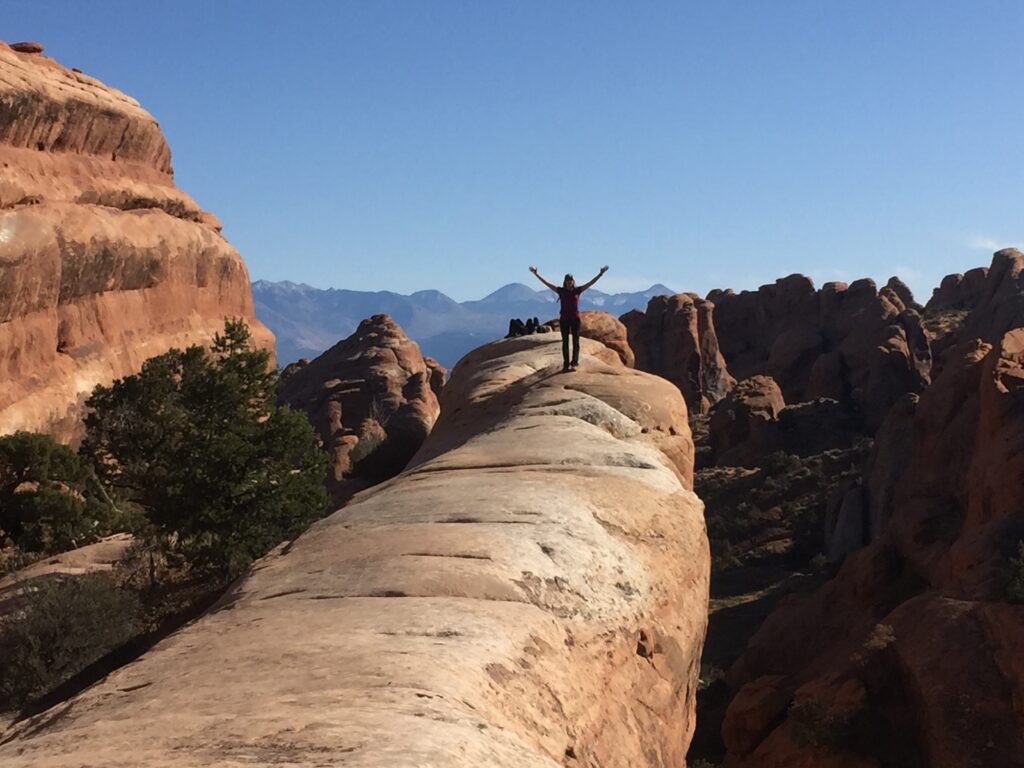
Looking back down from near the top
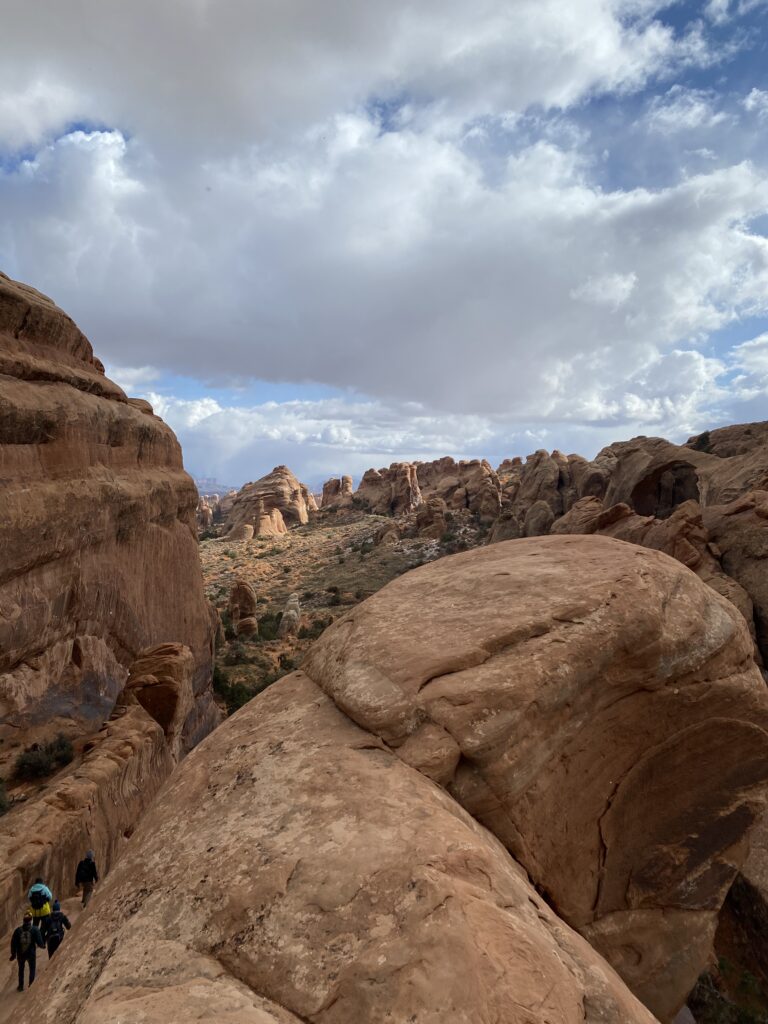
See? I told you it would be worth it!
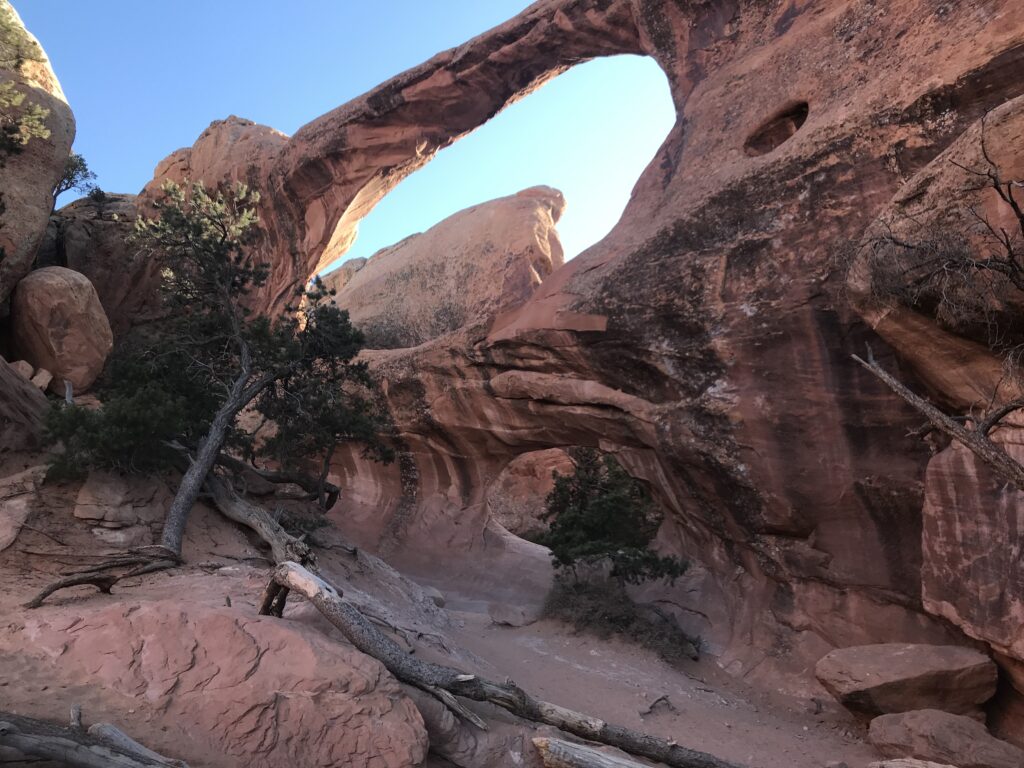
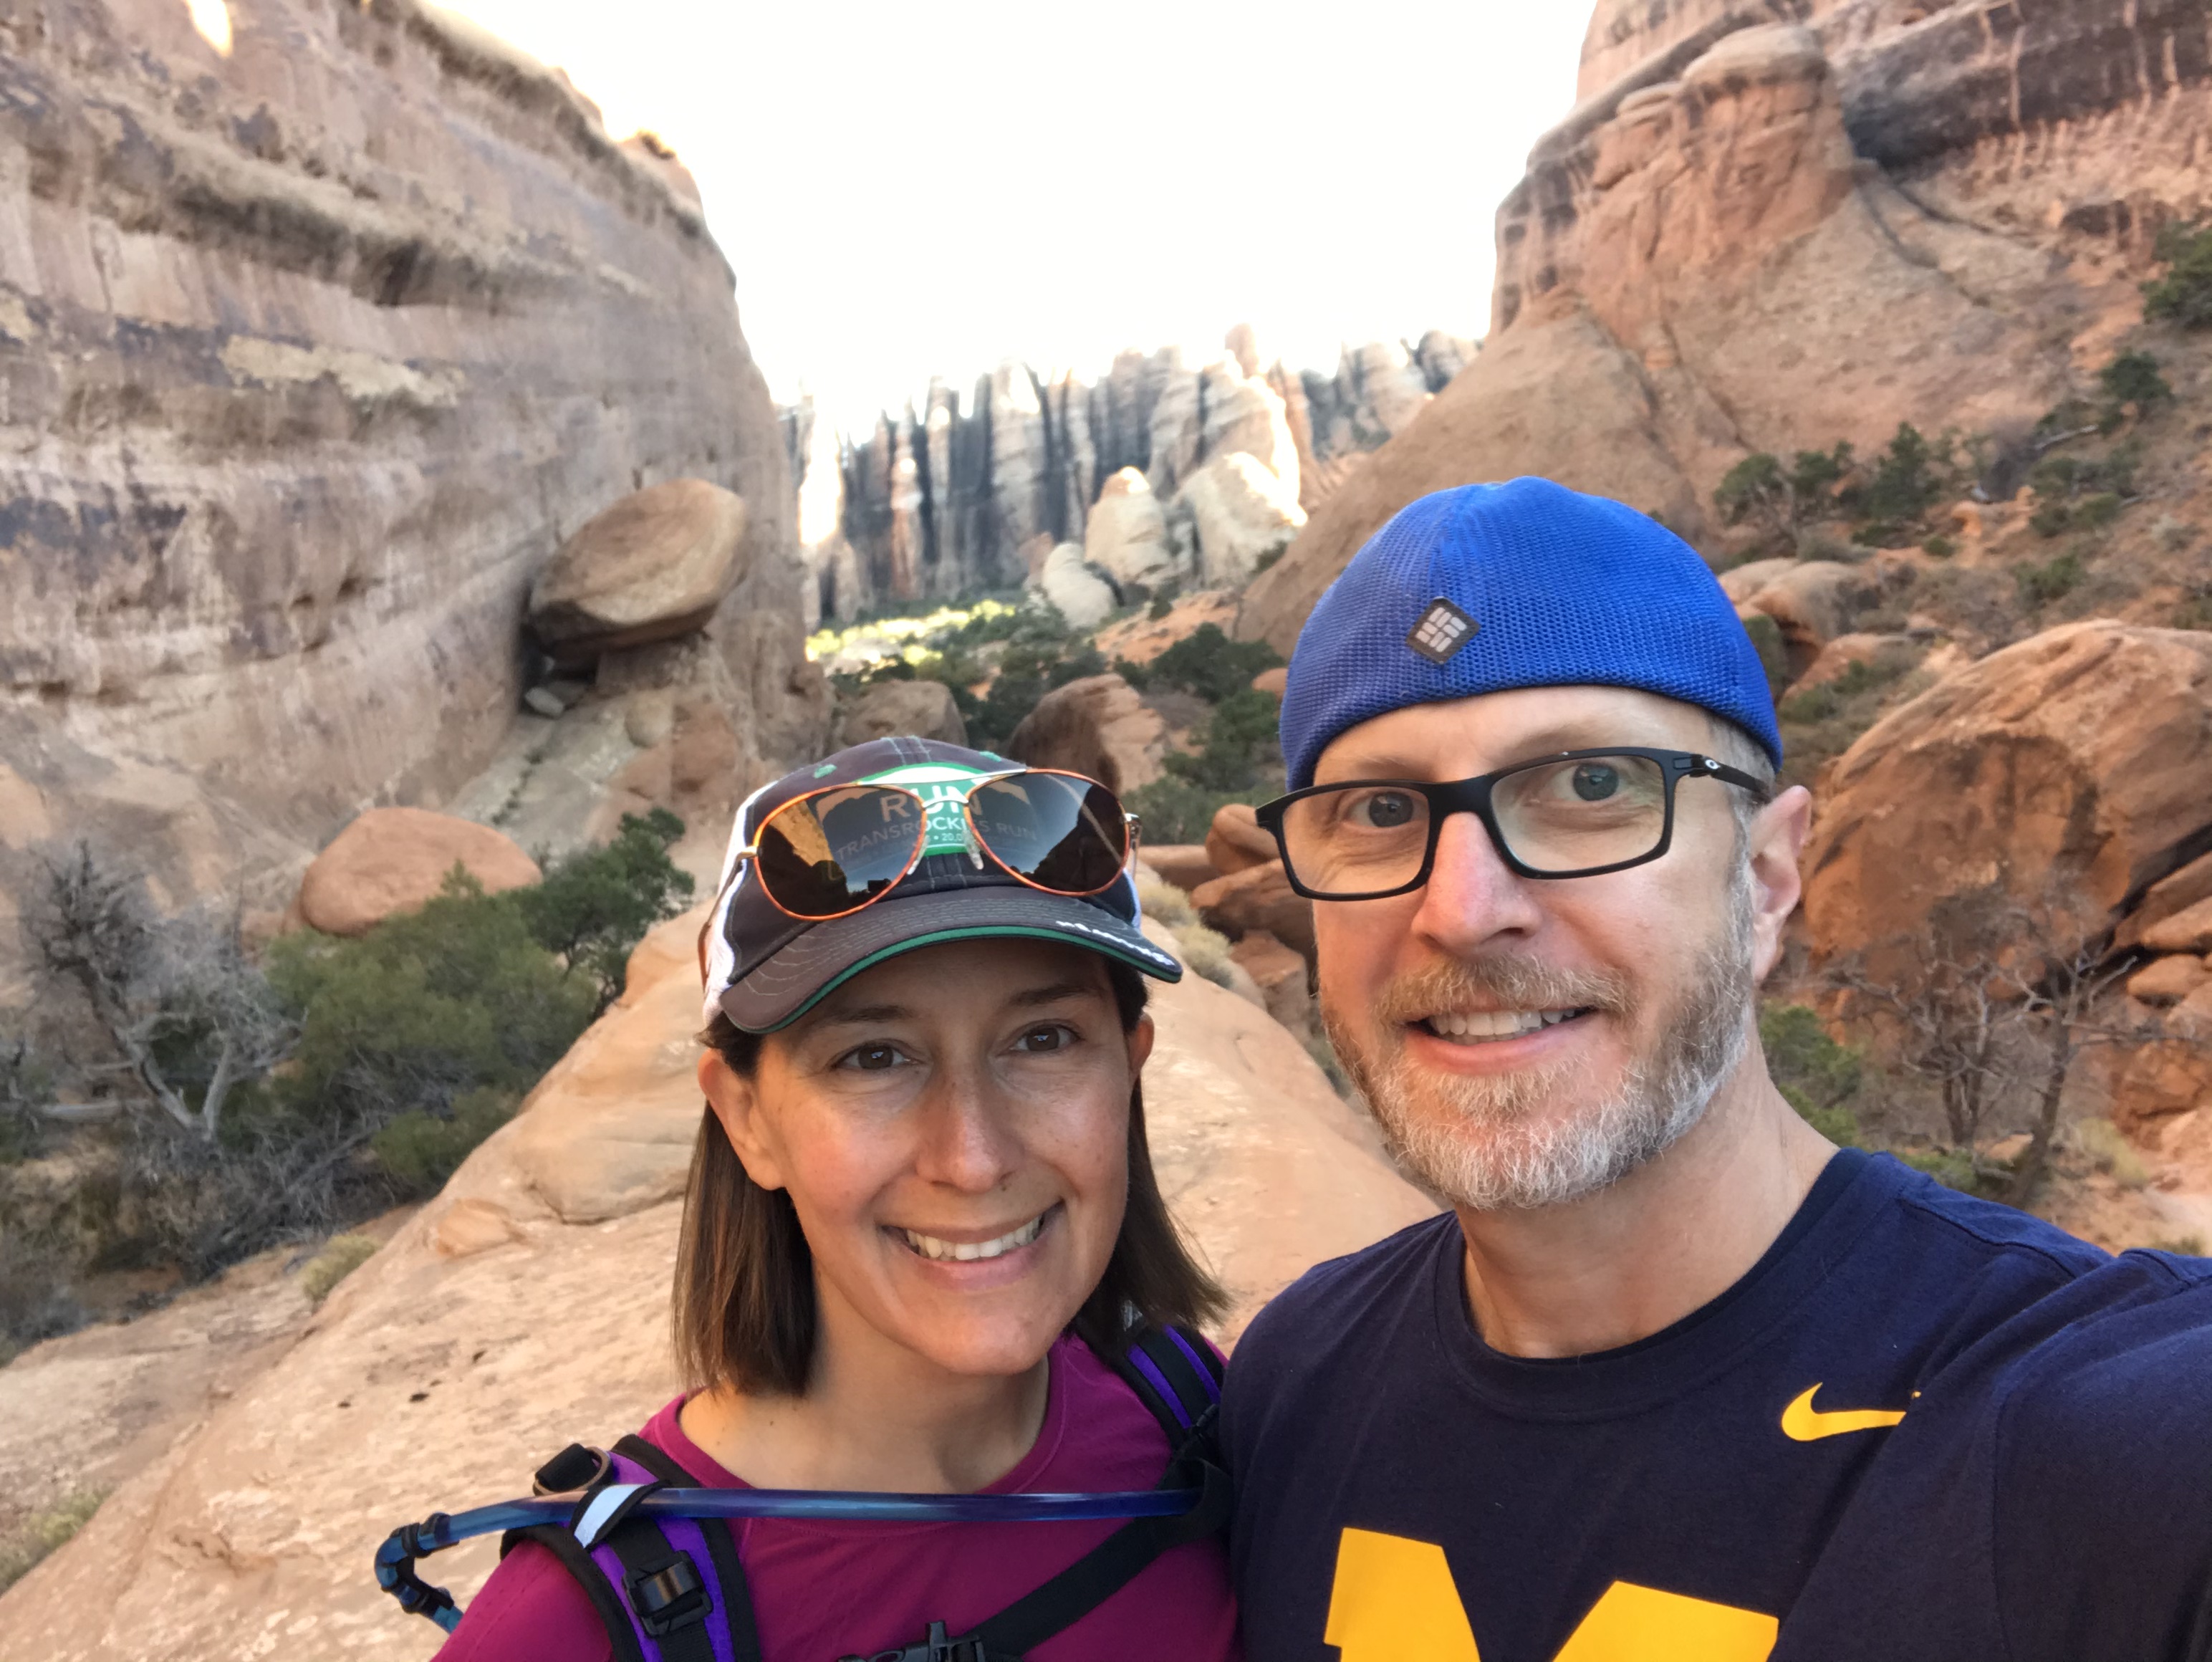
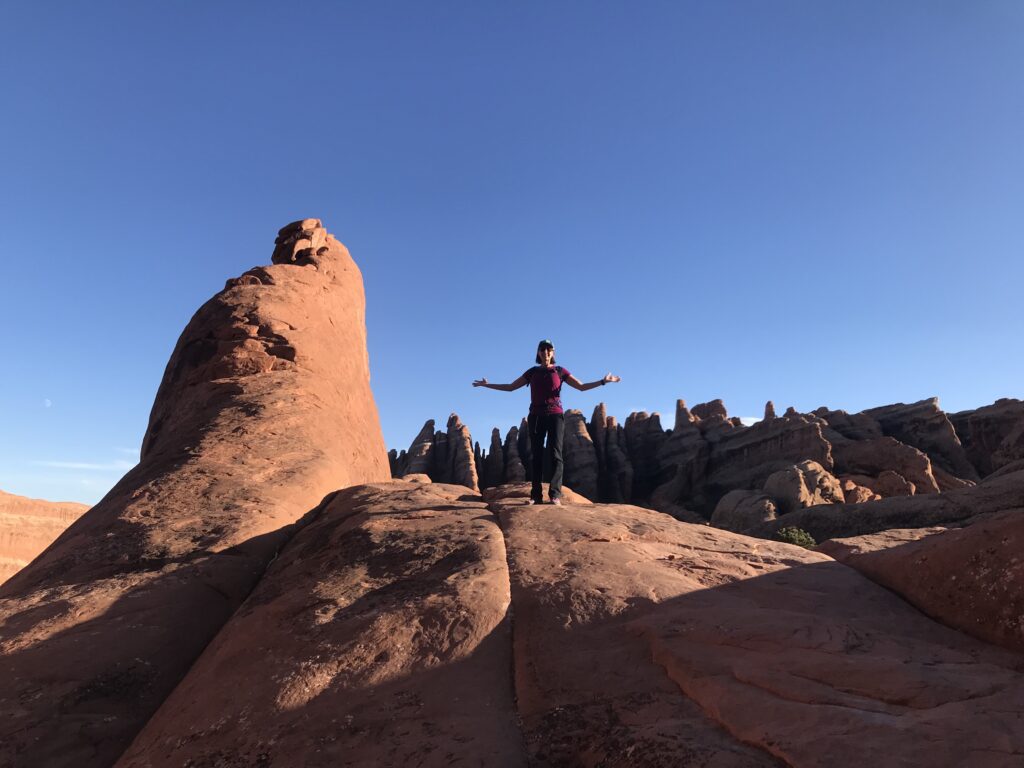
Navajo and Partition Arches
About 0.3 miles (0.5 km) down the main trail after Landscape Arch, there is a spur trail to the left to get to Navajo Arch and Partition Arch. This side trip adds about 0.8 miles (1.3 km). I highly recommend these ones. Navajo Arch is one that you can walk under, and you will be above Landscape Arch and see incredible views of the valley below looking through Partition Arch.
Navajo Arch
This arch is one you can get up close and personal with. You can head under it and explore an area surrounded by the sandstone rock fins. It gives you the feeling of being in a cave with onion ceiling. The picture here shows a view from inside looking out.

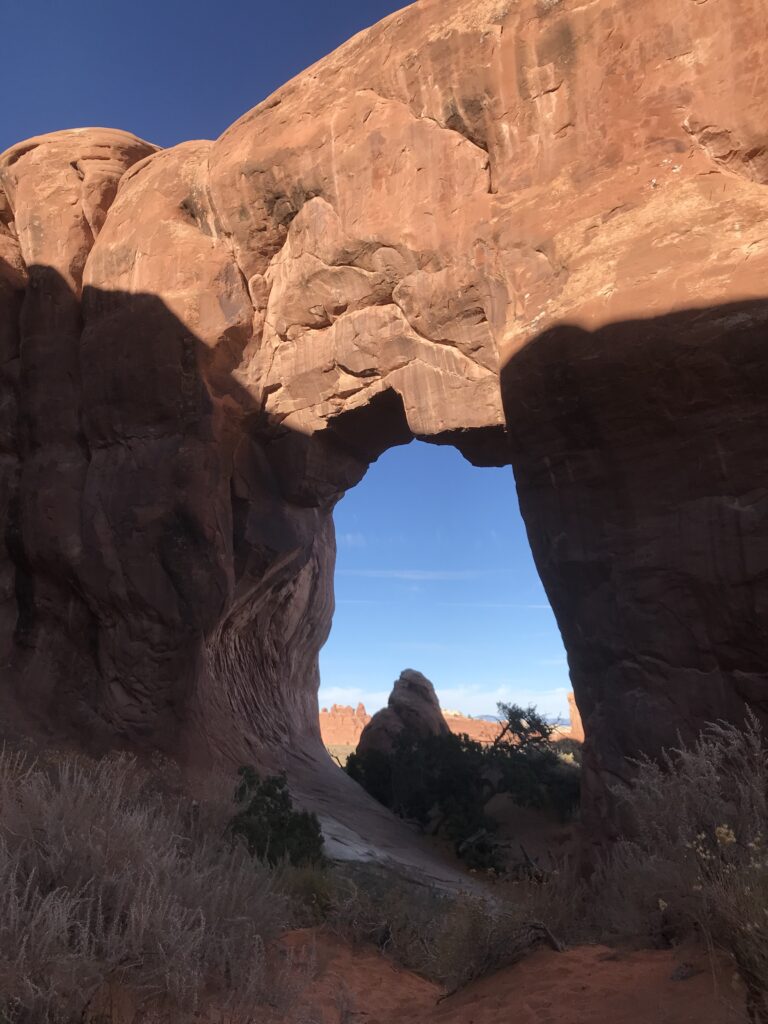
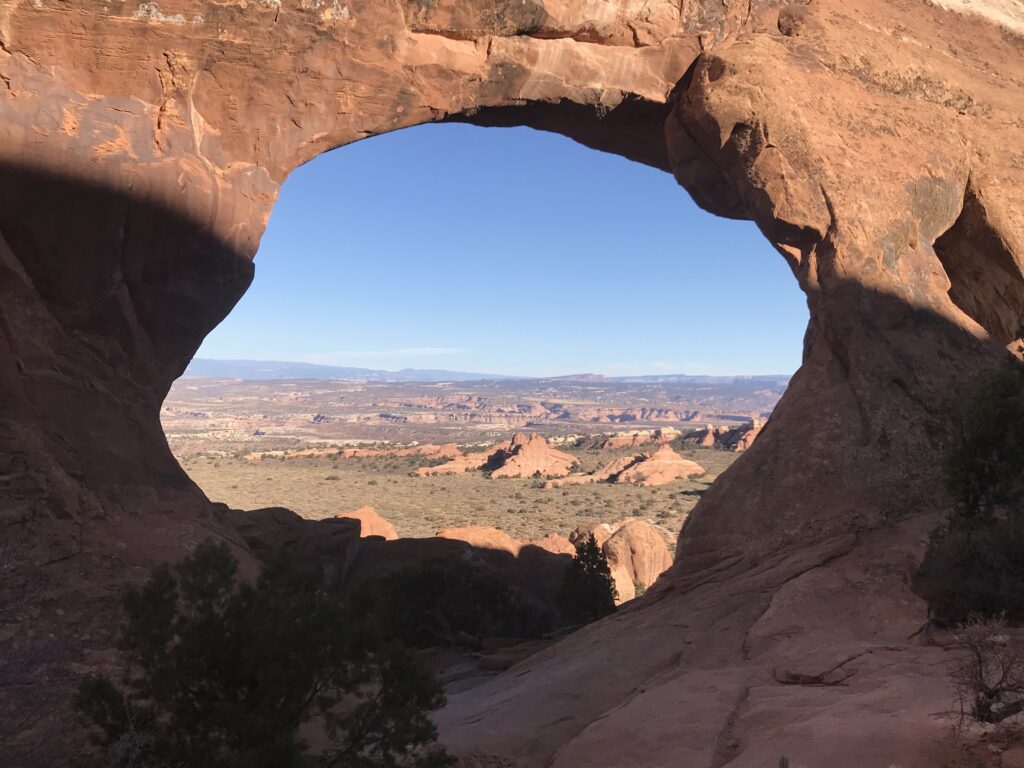
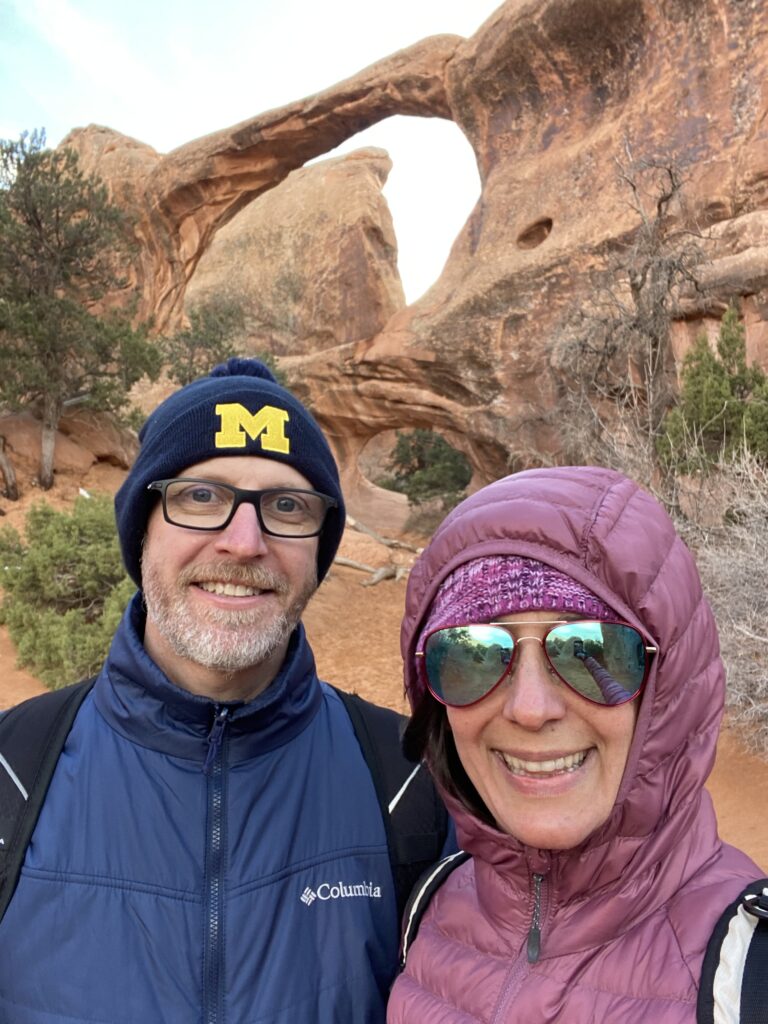
Partition Arch
Partition Arch has great views of the valley below. I could imagine waiting up here at sunset for some amazing pictures. At this point you are standing above Landscape Arch.
Don’t spend all your time soaking in these sights because there are many more to come. From the main trail, after visiting Navajo and Partition Arches, take a left and continue on toward Double O Arch, or head right back to the car.
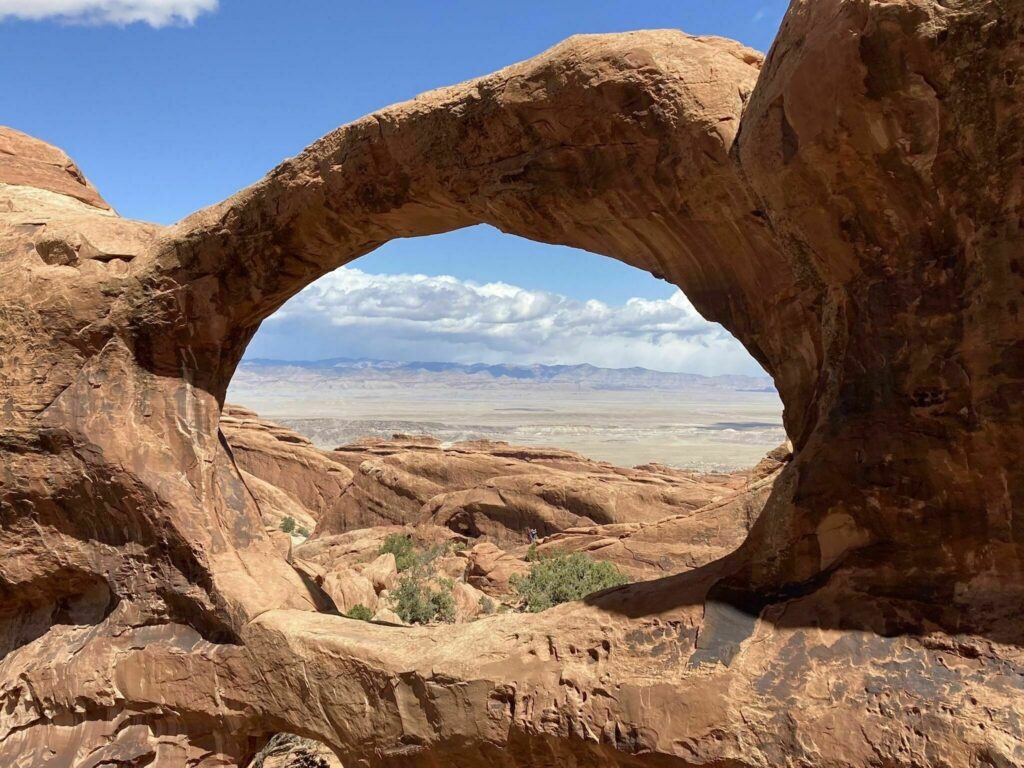
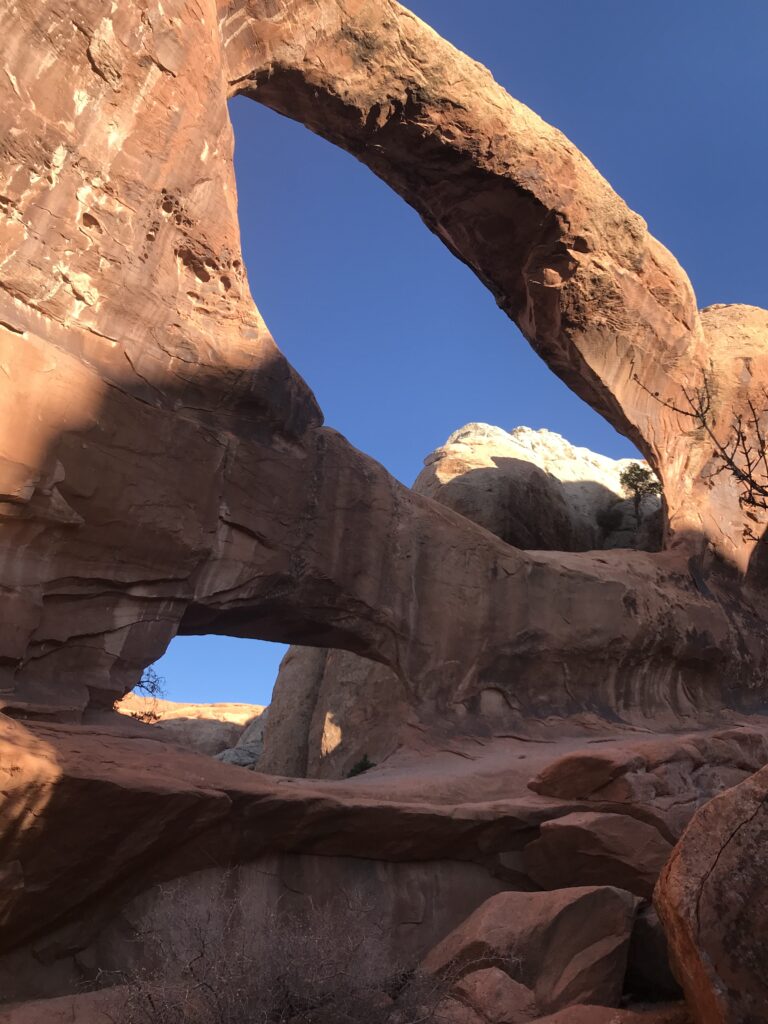
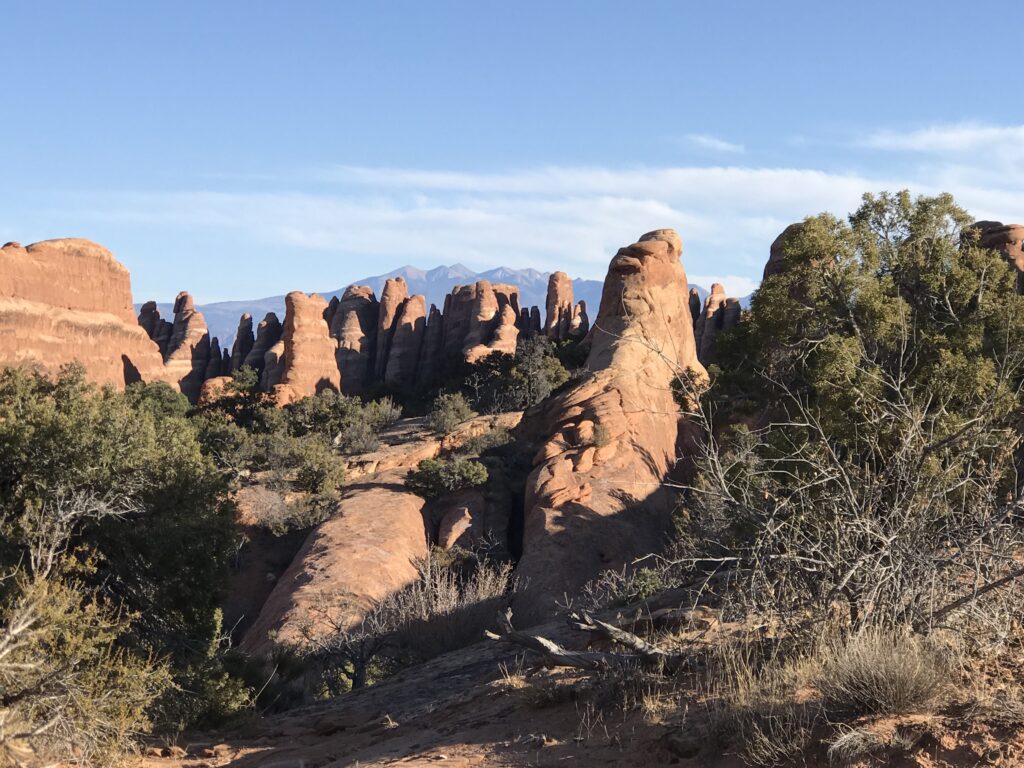
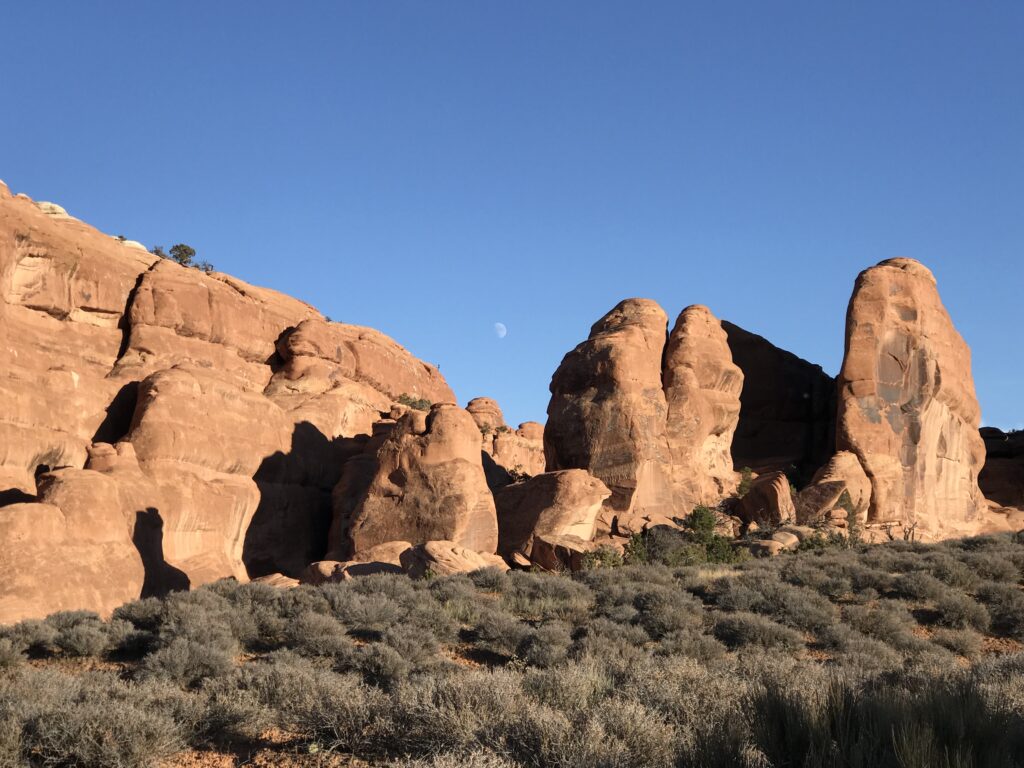
Double O Arch
Once you head left on the main trail after visiting Navajo and Partition Arches, you will reach Double O arch in about 0.8 miles (1.3 km). This is around 2 miles (3.2 km) from the trailhead. The trail will sometimes be an obvious path but also will head up over slickrock. If in doubt of the way, follow the cairns.

You’ve made it! You can see why they called it Double O in the pictures below. Look for the smaller window below the main arch.
Here are a few shots from the other side of the arch.
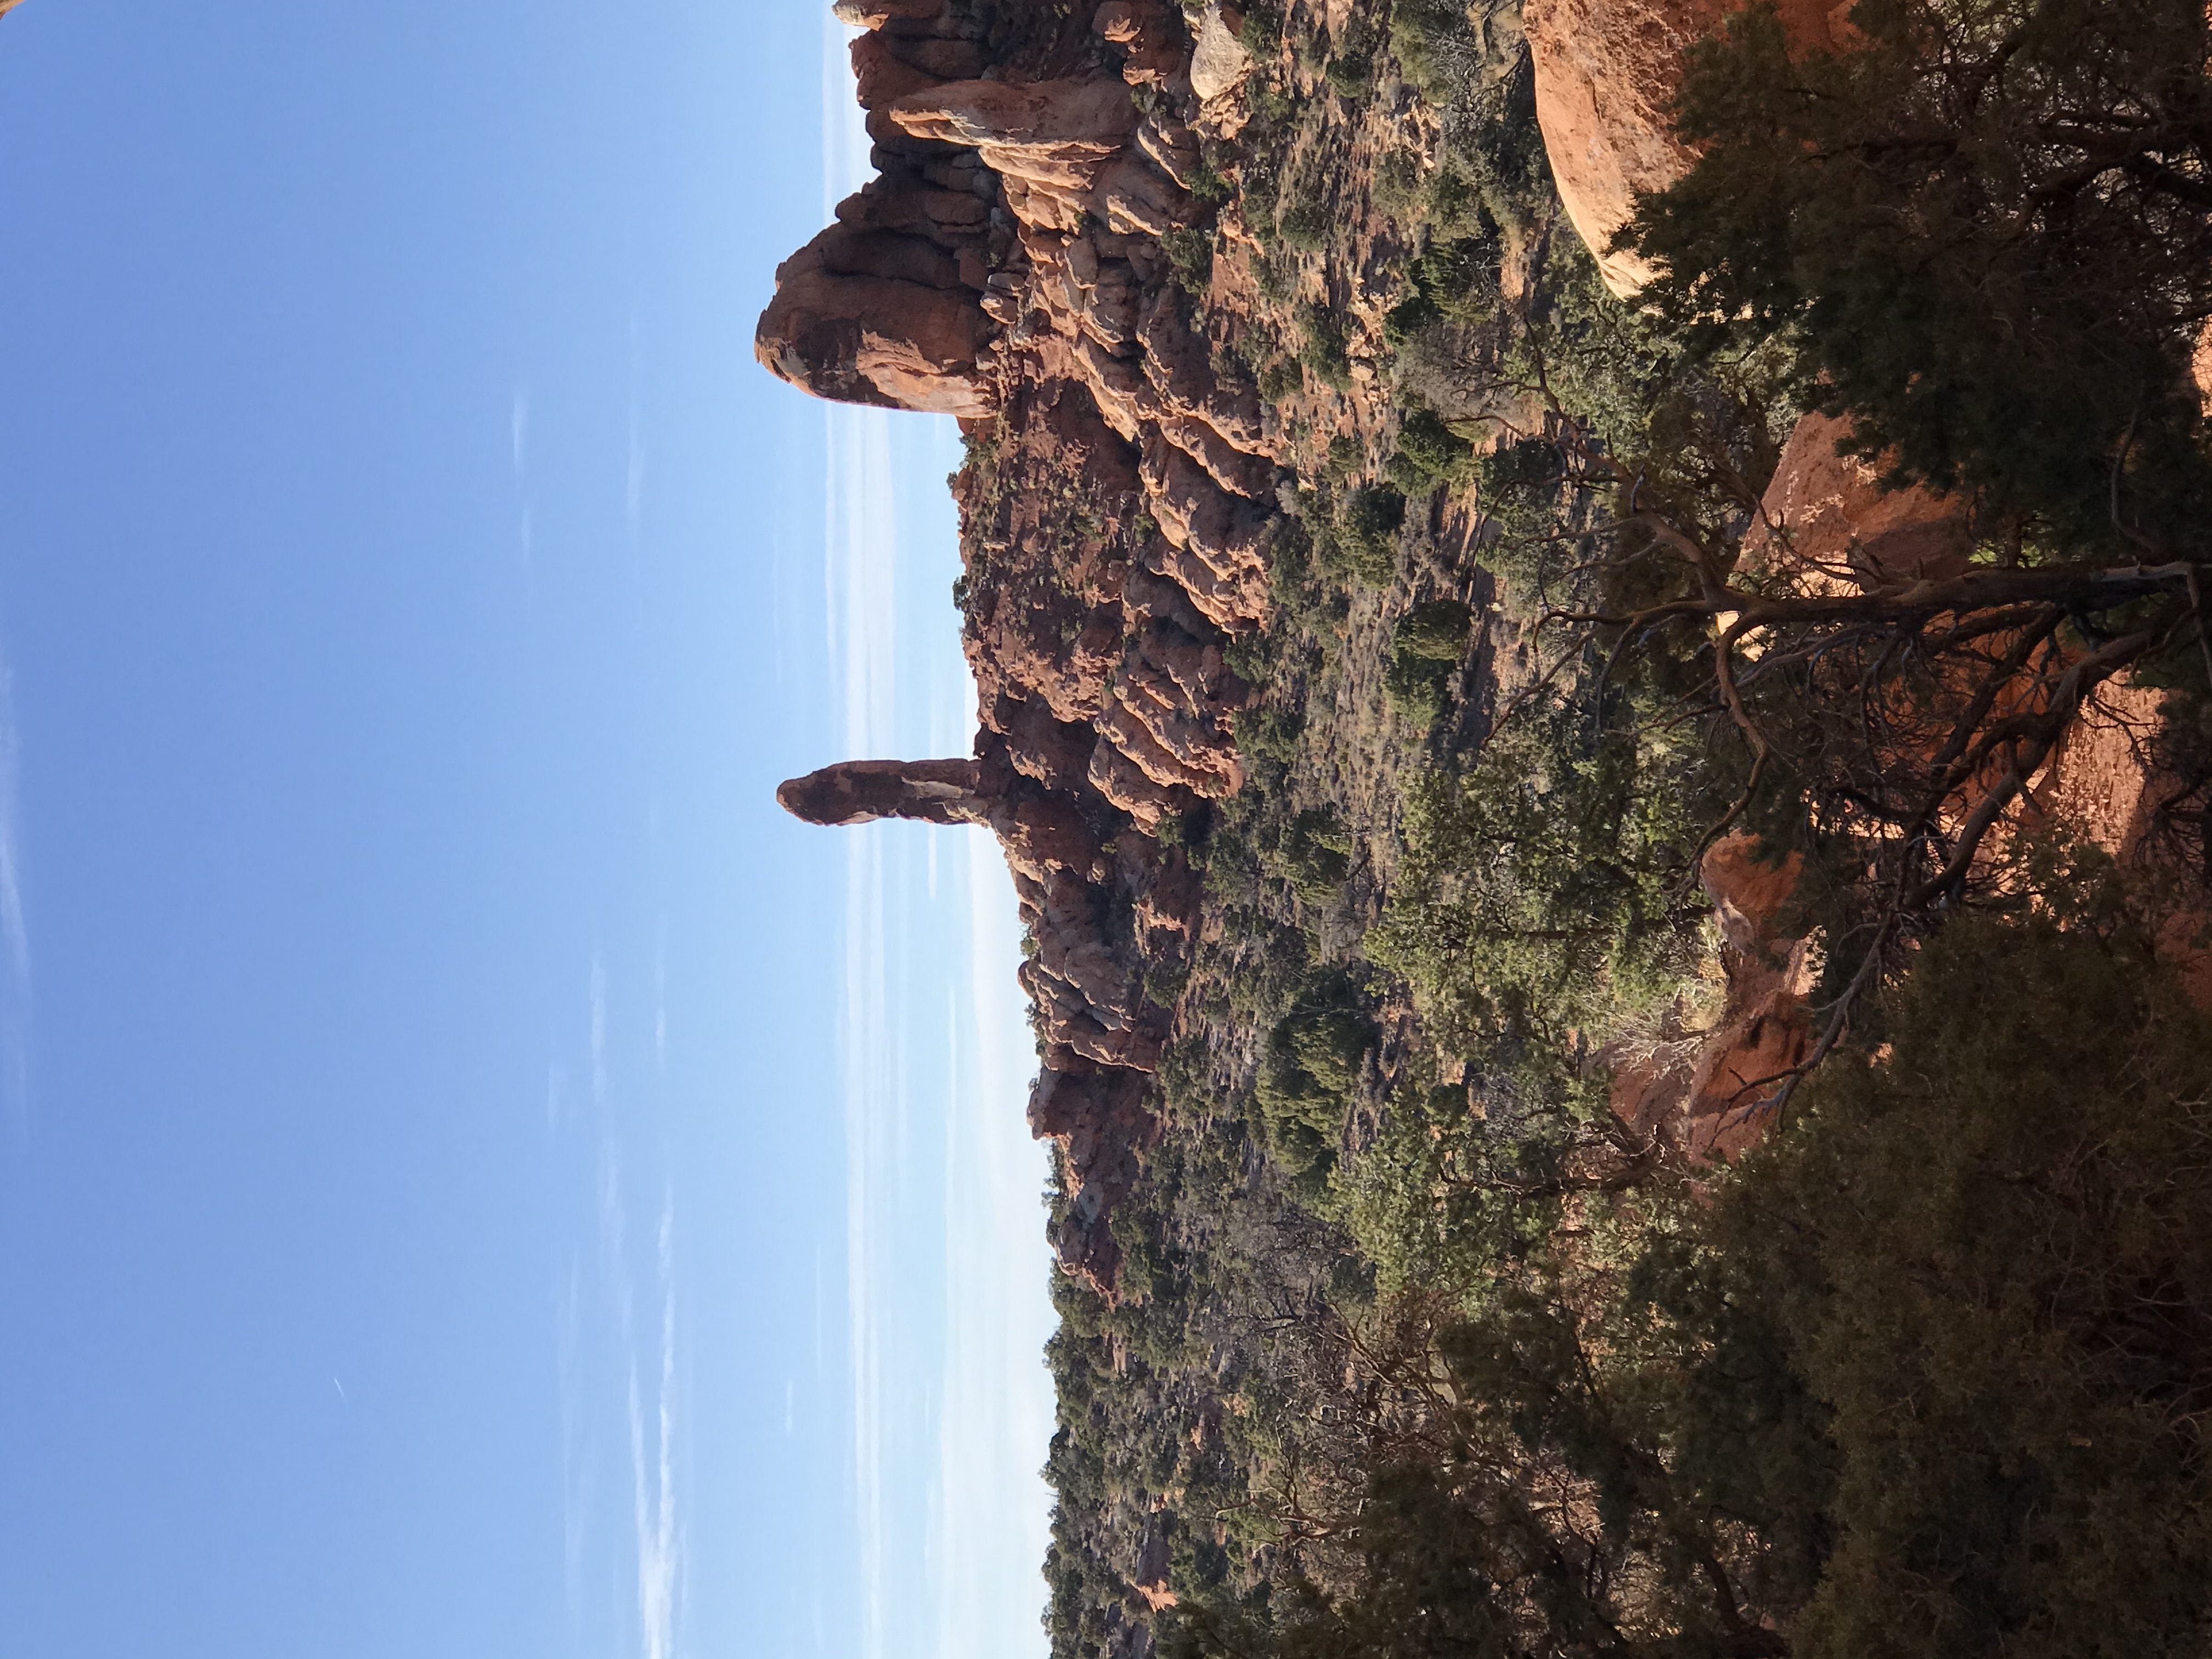
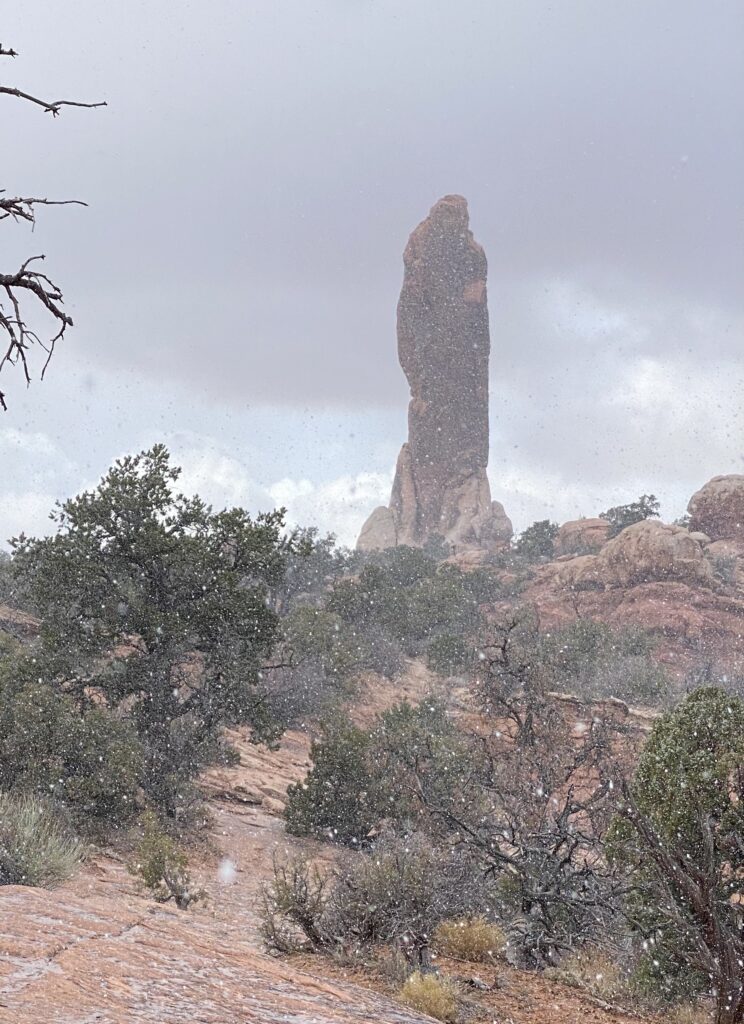
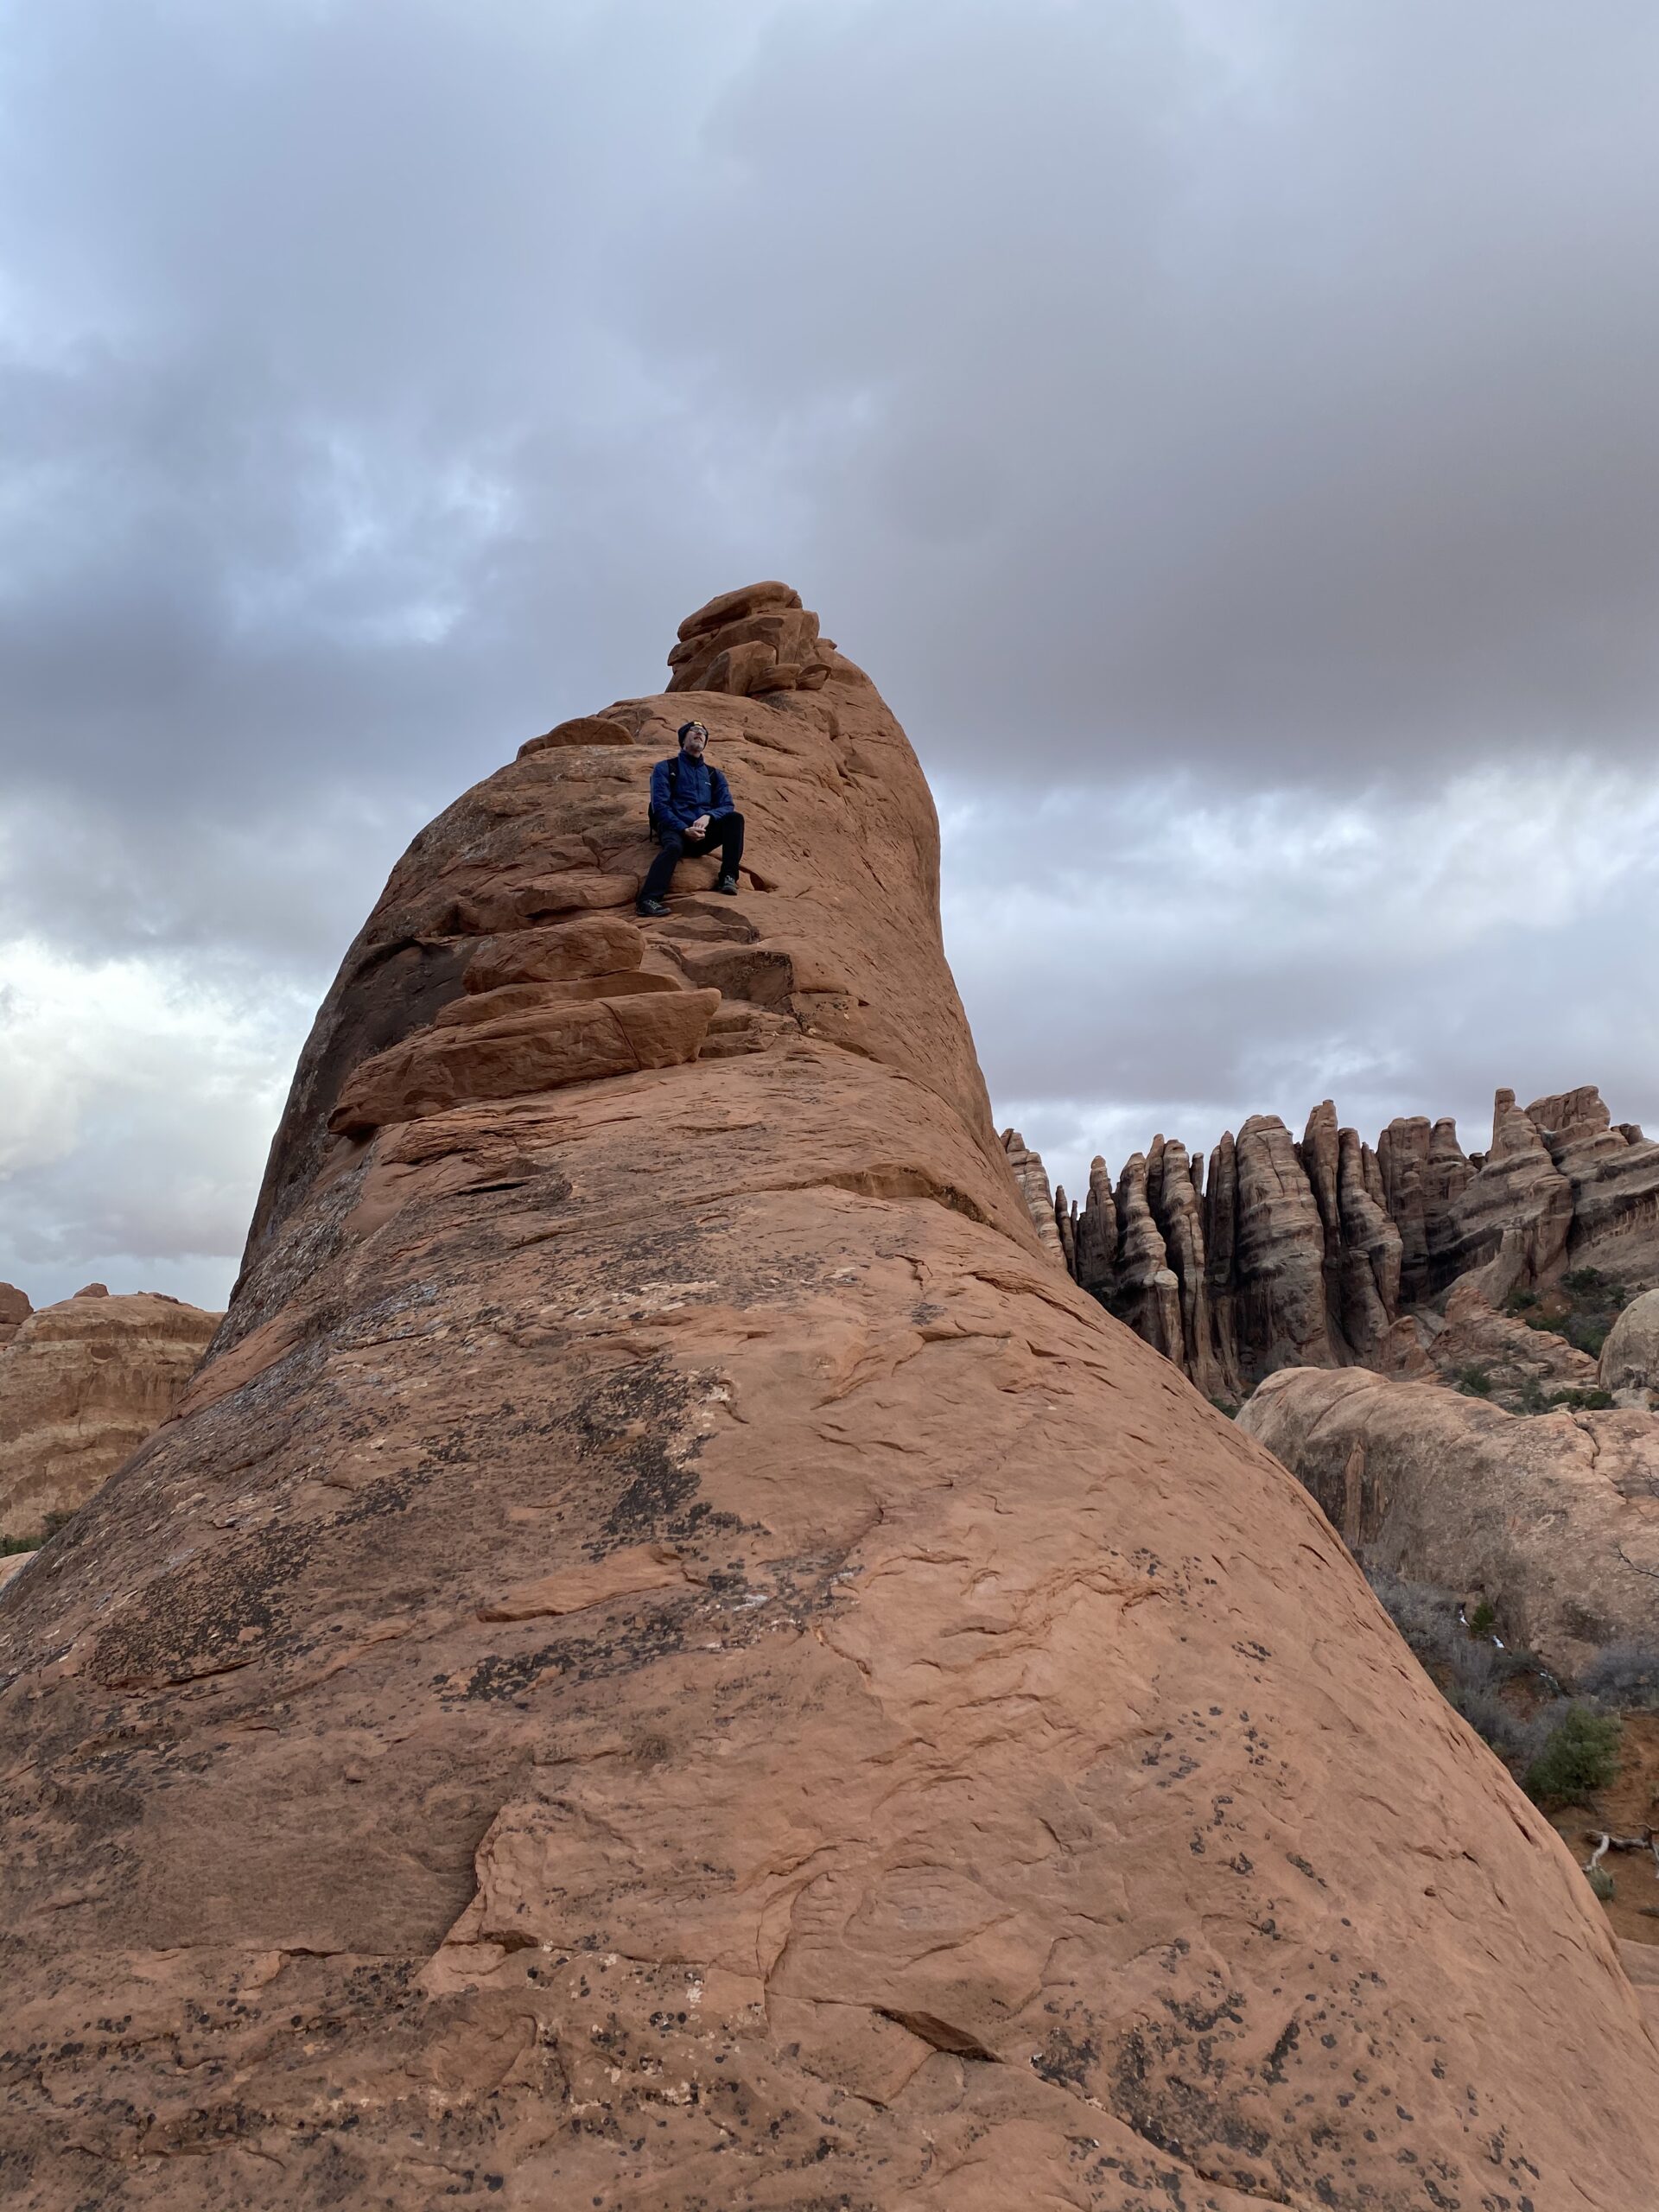
Dark Angel
There is a spur trail after Double O arch to get to a tall rock spire named Dark Angel. This will be approximately 0.8 miles (1.3 km) roundtrip from Double O and back. The spire itself is about 2.5 miles (4 km) from the trailhead on the main trail (clockwise in the loop), 6.25 miles counterclockwise in the loop if you came from the Primitive Trail.
Here is a view from Double O Arch.
Here are more on another trip. You can see in this photo why someone named it the Dark Angel.
Below you can see a peek of the Double O in the background as we were on our way toward the Dark Angel.
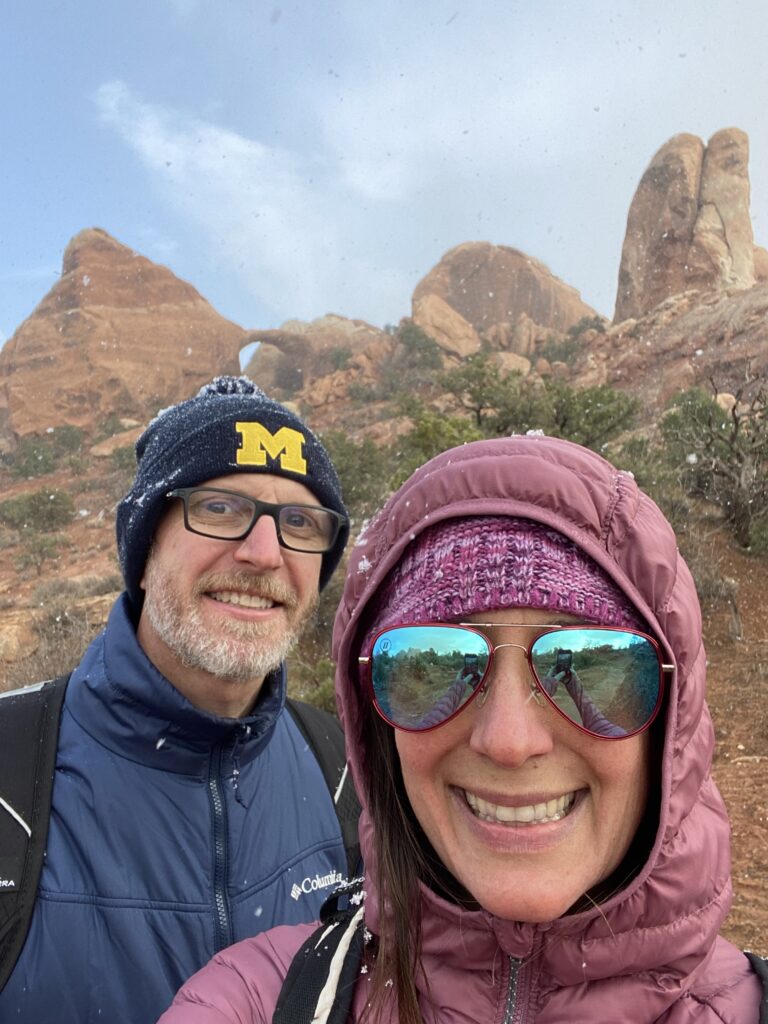
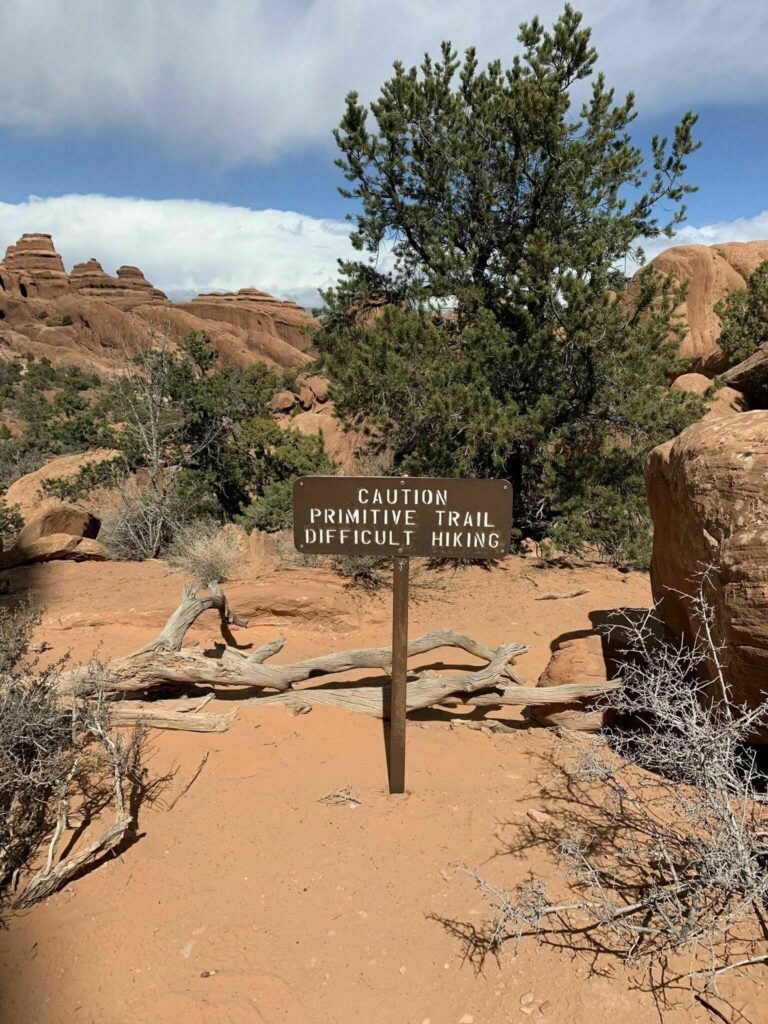
The Primitive Trail
Once you have reached Double O Arch and the Dark Angel, you have two options for heading back to the trailhead. You can take the main trail for around 2 miles (3.2 km) from Double O Arch. Or the alternative option is to take the Primitive Trail, which is 2.9 miles (4.7 km) (3.5 miles (5.6 km) if you’re adding in Private Arch).
This trail begins off to the right if you are facing the spur trail toward the Dark Angel. You will follow a wash for a ways and then follow cairns up and over slickrock before going back down into more wash.
A little warning:
The Primitive Trail is more difficult than the main route due to more steep slopes and drop-offs. If getting to Double O made you nervous, you might want to avoid this part. If you decide to go for it, watch closely for the trail as it can be difficult to find in places. There also may be a pool of water you’ll either have to cross or climb up and around. According to the National Park Service, “The Primitive Trail is not recommended when rock is wet or icy, or for those uncomfortable with heights”.
Don’t let me scare you (too much). It’s not bad if you’re an experienced hiker/rock scrambler. We didn’t have trouble with it but I’ve been told on several different occasions that I tend to underemphasize hike difficulties. I guess I forget the hard parts after we’re home.
Just be forewarned that both times we were there, we met people who weren’t quite sure where the trail was and some that turned back because they didn’t want to scramble down what I call “the scary part”.
Side Note:
We use Gaia GPS a lot for our hikes. You can preload routes and download maps ahead of time if you think you’ll end up in an area with no cell service. We never rely solely on this for route-finding but sometimes it’s nice to check if you’re on the correct path. I’m not affiliated with Gaia GPS at all and I don’t make any money from telling you this.
Private Arch
There is another spur trail that leads to Private Arch that is about 0.4 miles from Double O Arch if you’re going clockwise in the loop. We haven’t explored this one yet. Does anyone have any photos or experiences they want to share? Please email me if you do. I’d love to hear about it!
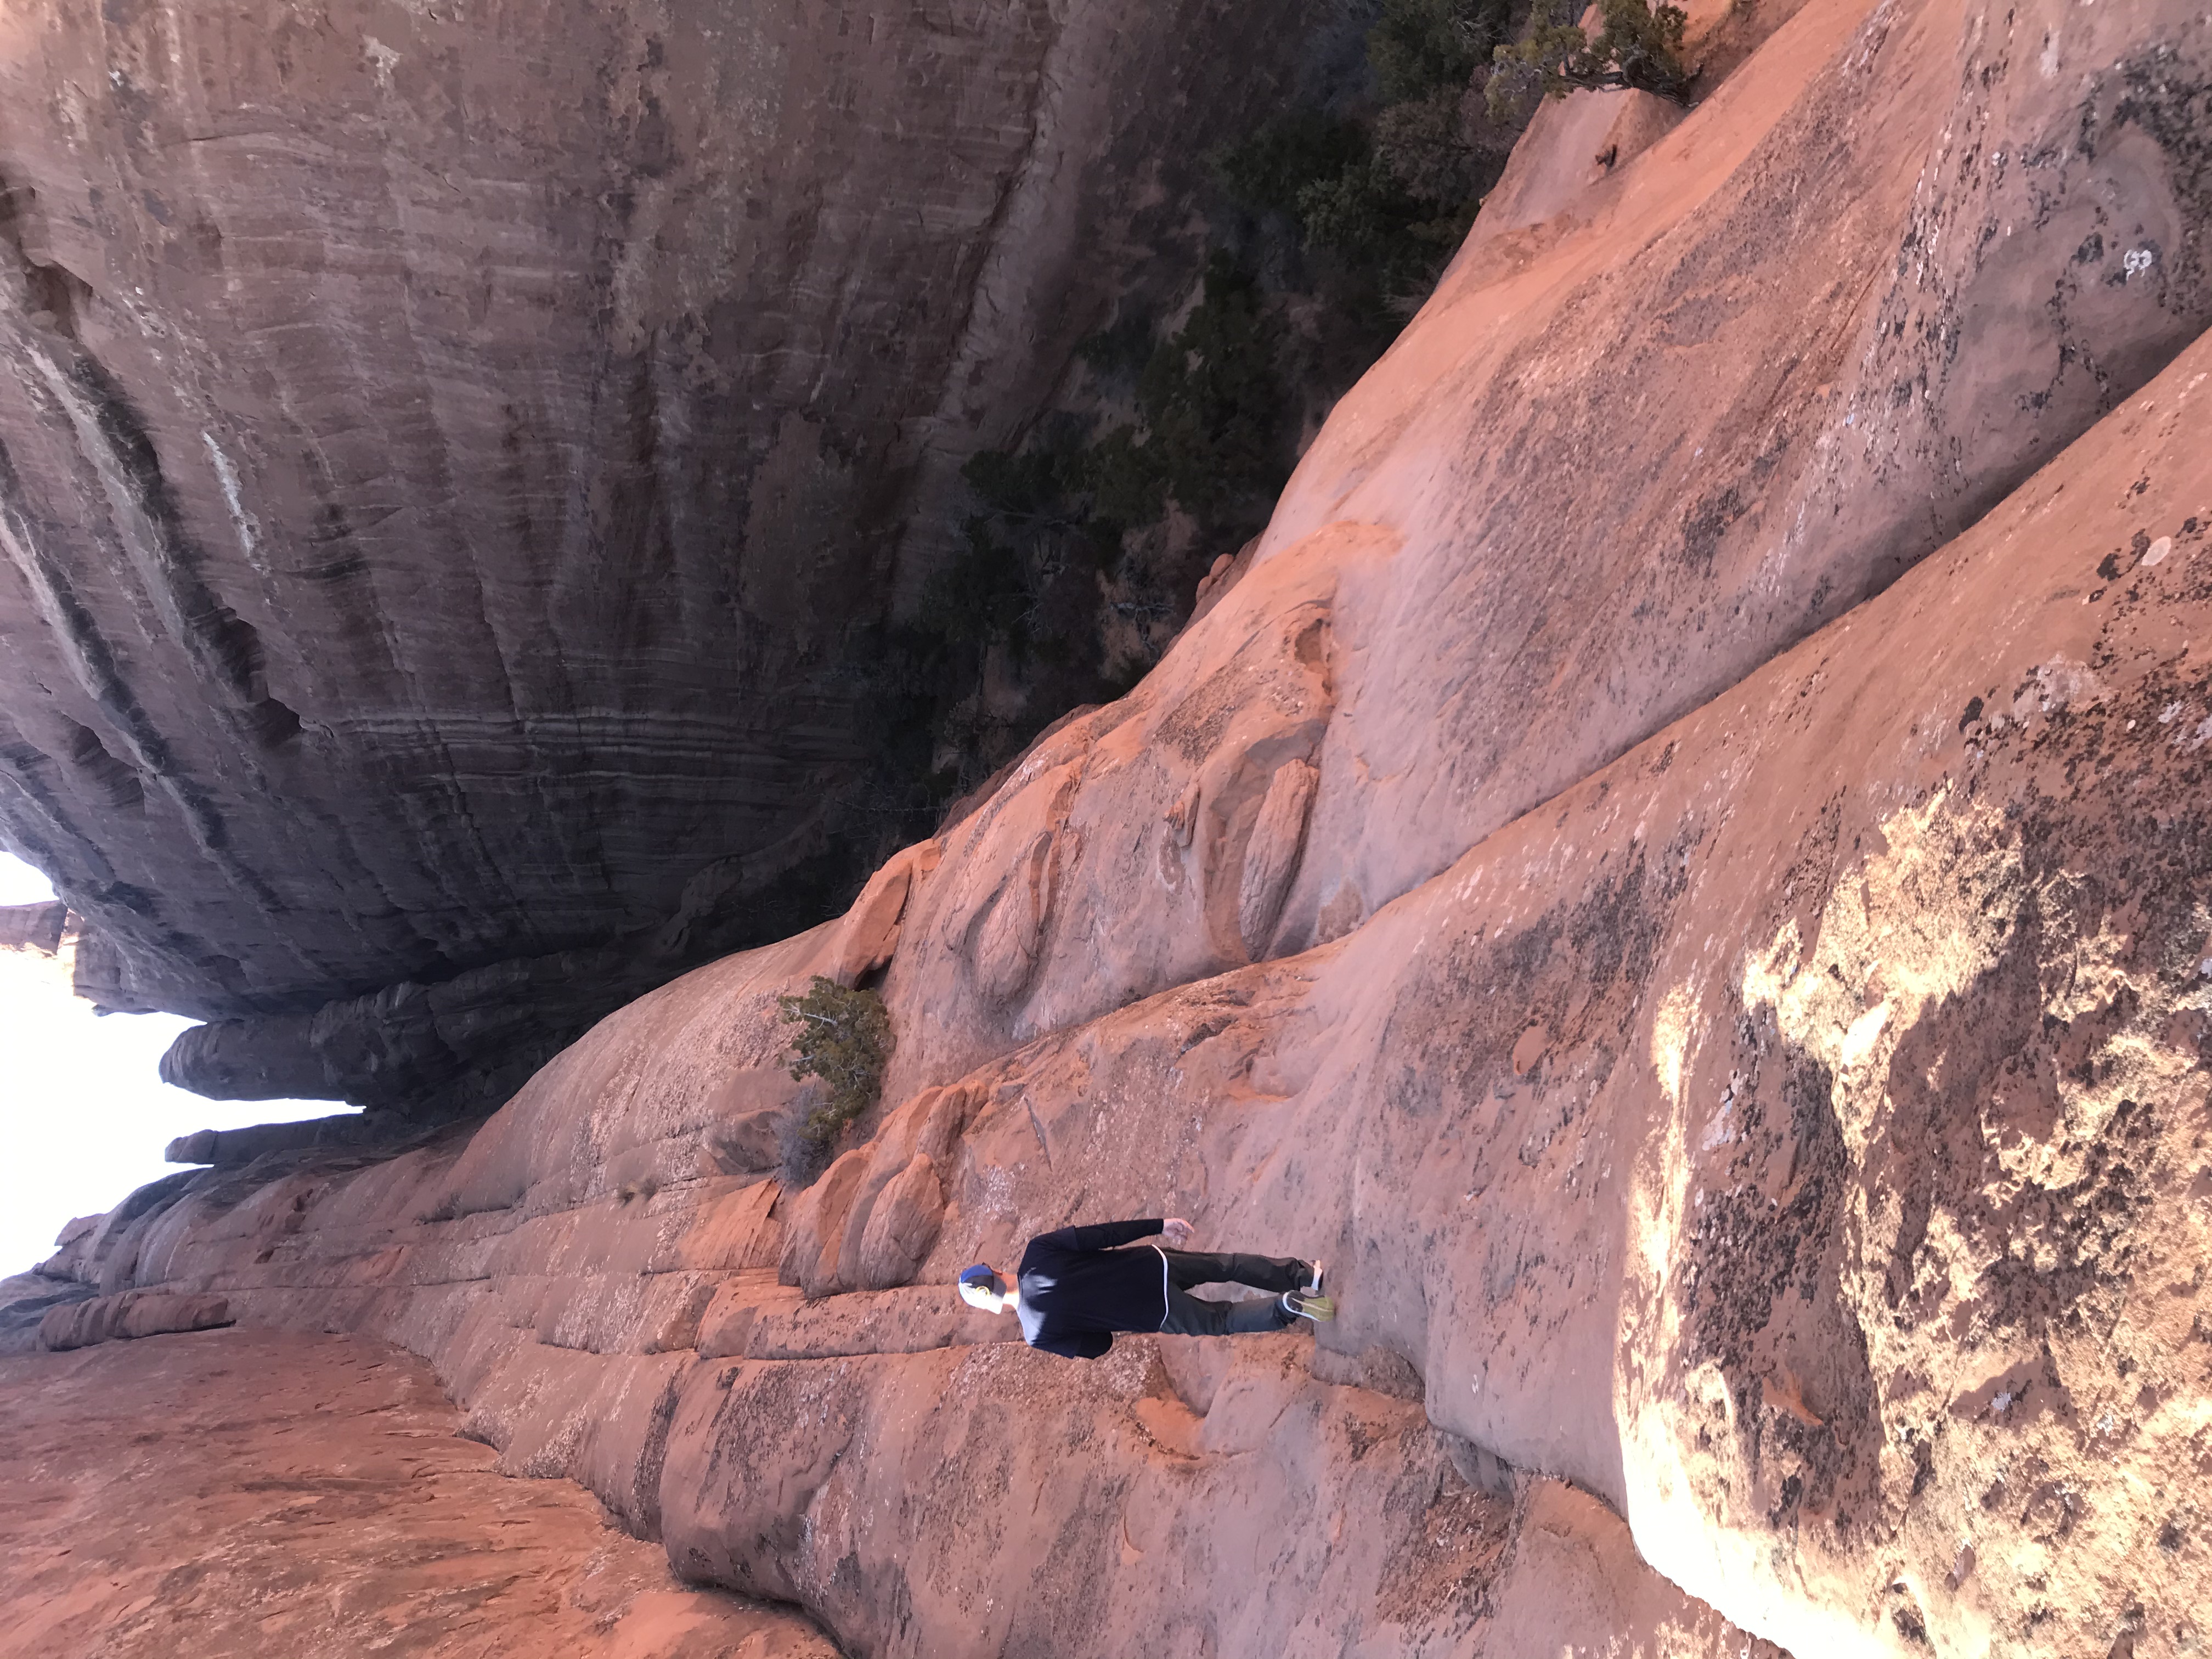
Continuing on the Primitive Trail
Continue following either a large wash following cairns up and over slickrock. Keep an eye out ahead and if you don’t see either trail or a cairn, you might be going the wrong way.
Don’t forget to “tip-toe around the crypto”. The desert floor in this area contains cryptobiotic crust that is extremely fragile. One step will kill it. It’s alive, protects the desert, and may take decades to recover, if ever, once destroyed by human footprints.
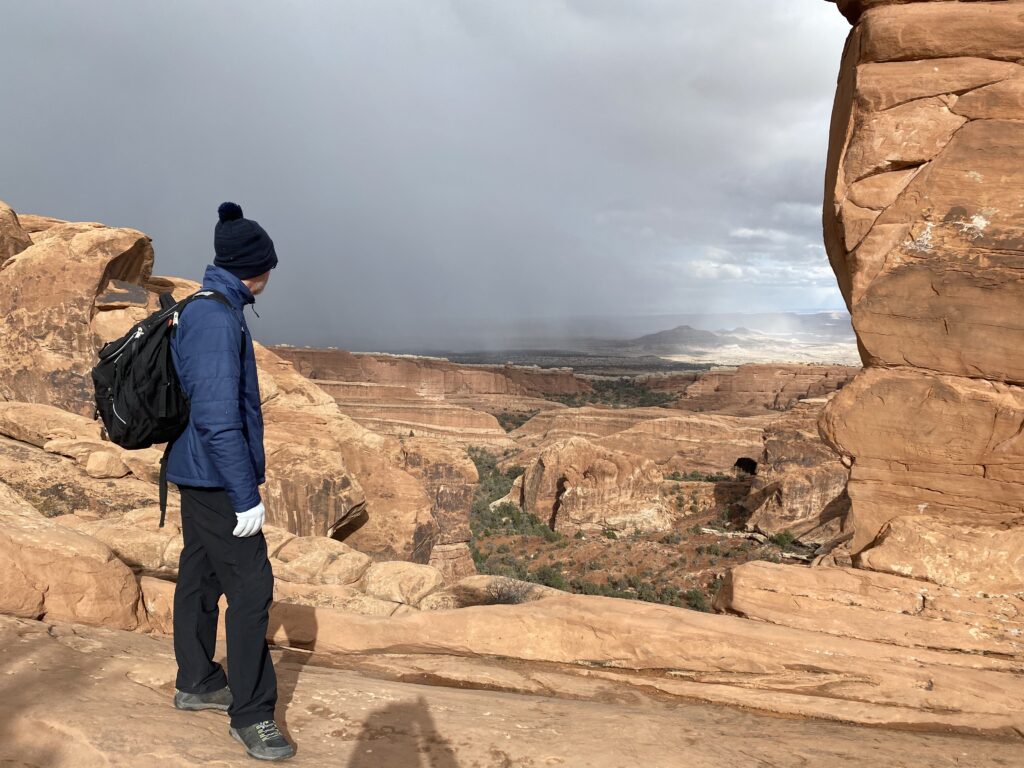
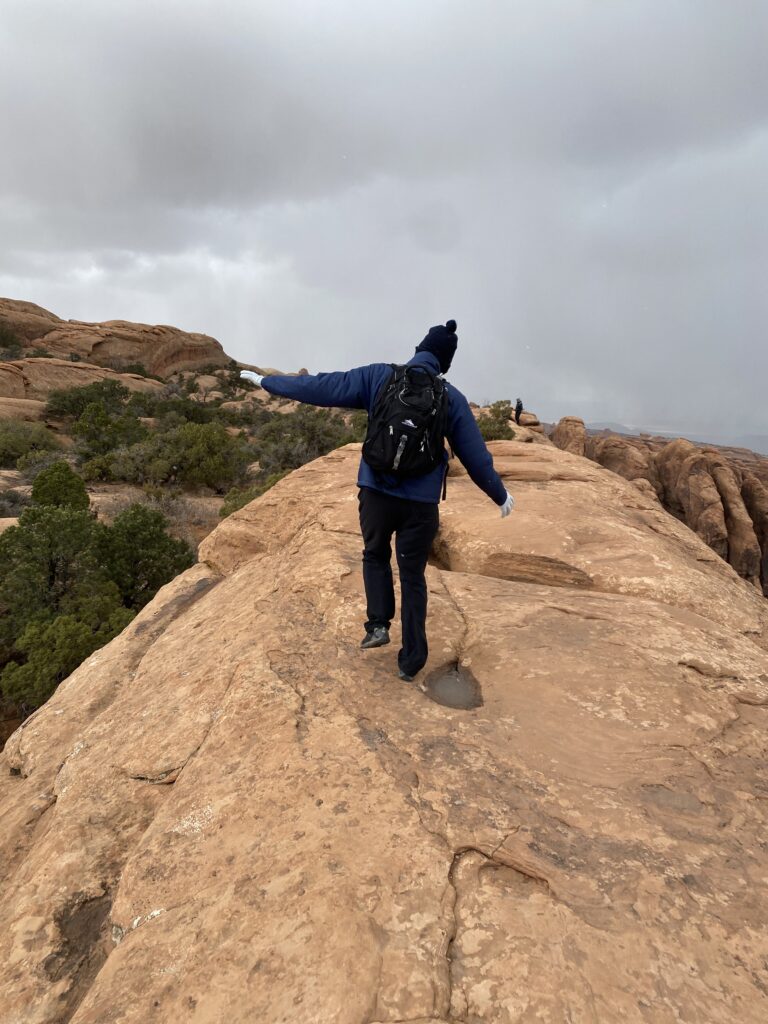
Ok, remember that scary part I was telling you about? Here it comes. The pictures below don’t quite give you the full sense of the decline. In the first one, you can see Brad walking down toward it. You need to end up on the trail in the lower right corner of the image. The second picture shows people climbing up from the other direction. I think it scares me because the rock is smooth and once you start sliding, there wouldn’t be much to grip to stop yourself. This part is what I think of when I read what the NPS said on their website about avoiding the Primitive Trail when it’s wet or icy.
Whew! Made it! After that part, the rest of the trail is easy.
You’ll make your way down to the valley and finish on relatively flat sand until you reach the junction with the main trail on which you began.
When you get back to the main trail, turn left for the trailhead. I hope you enjoyed Devils Garden as much as we did!
As always, I recommend checking out the Arches National Park Service website before you go for operating hours, alerts, information about road conditions, and other pertinent information. You don’t want to drive all the way to your destination only to find out that something is closed.
Next up in the Arches National Park tour is the Eye of the Whale and Herdina Park.


You May Also Like

Axolotl Tank Setup

Ikea Hack Bookcases for a Home Library