


4Runner Dash Mount Install by ICS Fab
I have some exciting news to share. I got a new (to me) 4Runner! This is my first non-minivan in a LONG time. Too long. Don’t get me wrong- minivans are great. They can haul a lot of people, animals, and gear. They’re also great for bringing lumber home for DIY projects. You can fit 8-ft boards inside with the doors closed, longer if you’re willing to be that crazy woman driving with boards hanging out her window. It’s just that I’ve really missed driving a “fun” vehicle that that can handle a little off-road and towing.
One of the first to-do’s on my new car mod list was to figure out a solid phone mount solution. I use my phone a lot for directions and I wanted something where I could see it out of the corner of my eye without having to look down. With previous cars, I hadn’t found something I really liked. They were always flying off the mounts, usually when I needed them most. Apparently, I drive on rough roads a lot. Yes, even with minivans.
Now that I have a car that is more off-road friendly, I wanted to make everything more secure. Plus, it would be nice to mount not only my phone, but also a few other accessories. Who knows, I might go on fun adventures where I want to have a GoPro up there.
Enter ICS Fab Dash Mount
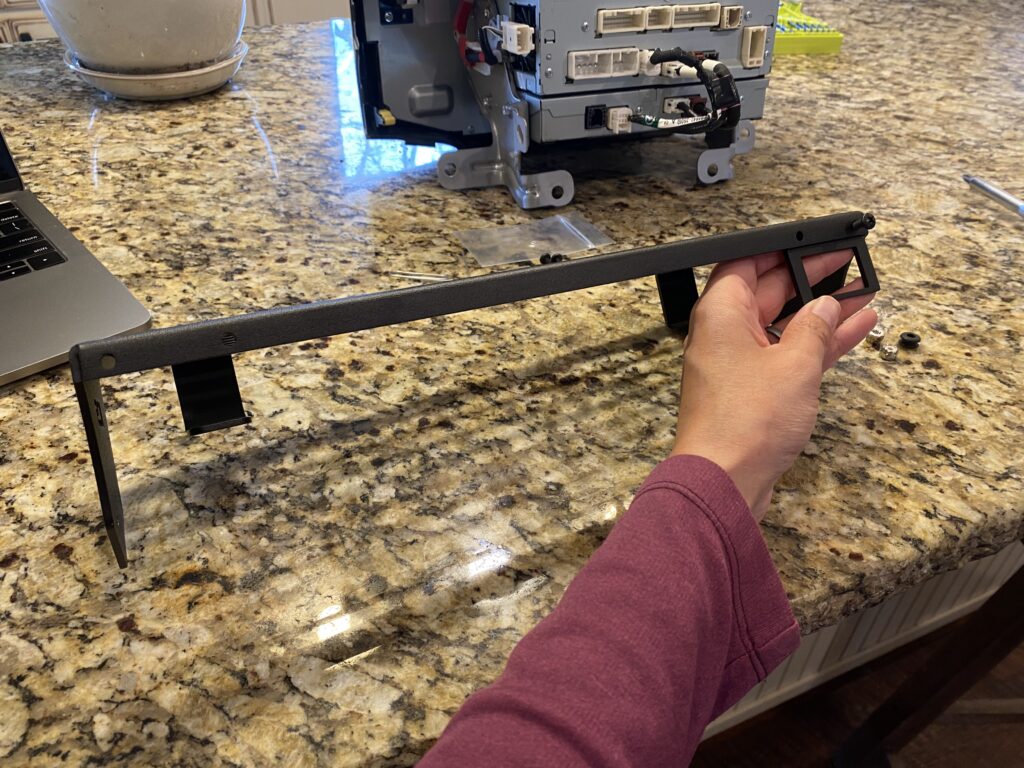
I found ICS Fabrication’s 5th Generation 4Runner dash mount one day while checking out others’ 4Runner builds online. That can be dangerous to your wallet, by the way. After reading the reviews, it looked like the one for me. I can attach more than I’d ever want to and nothing will be flying off while driving.
By the way, I’m not associated with ICS and this is purely my personal opinion. I just wanted to share my installation in case it might help others with theirs. ICS Fab has a great installation how-to video, which I’ve included at the end of this post. However, sometimes I find that written instructions with pictures help too.
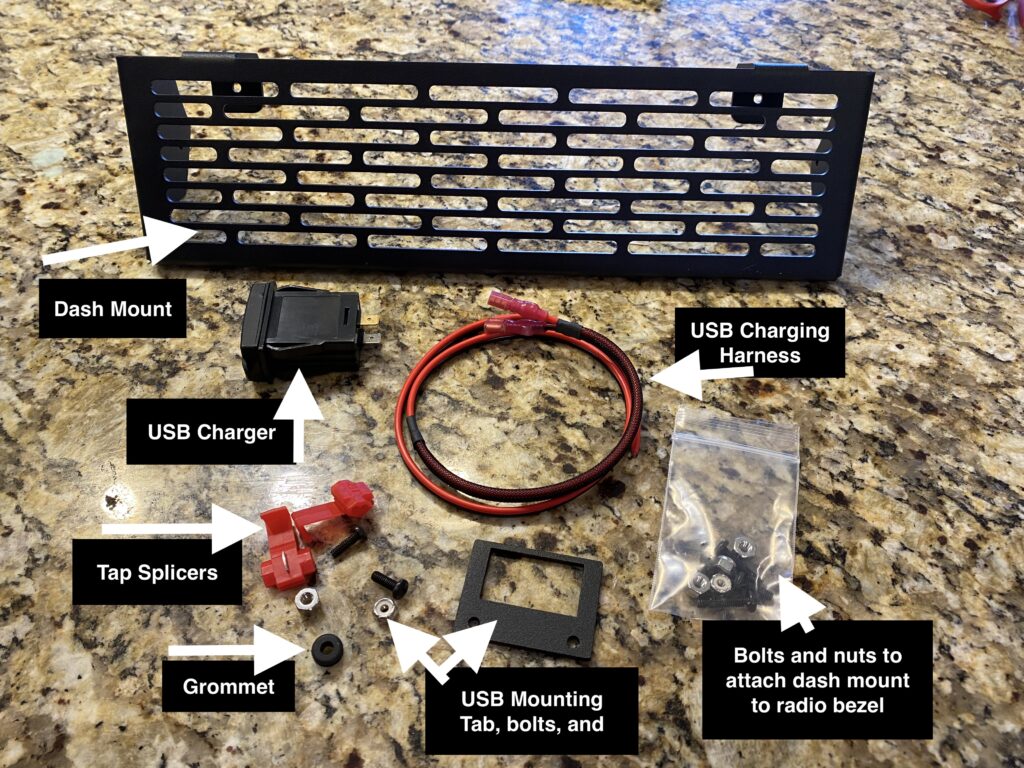
Supplies:
- Painters tape
- Drill
- Drill bits: 9/64″, 1/4″, 5/16″
- Phillips head screwdriver (#2 head)
- Ruler/Tape measure
- 9mm wrench for attaching USB mount
- Wrench
- Pliers
- Straight pick to mark holes (Or a small screwdriver)
- Ratchet and 10mm socket with extension – size for 4 bolts to remove radio and then to install usb charger
- Way to cut thin plastic – Exacto/utility knife, plastic cutter, dremel, ect
- Straight trim tool – For reinstalling radio bezel into dash (I ended up using a plastic spackling knife)
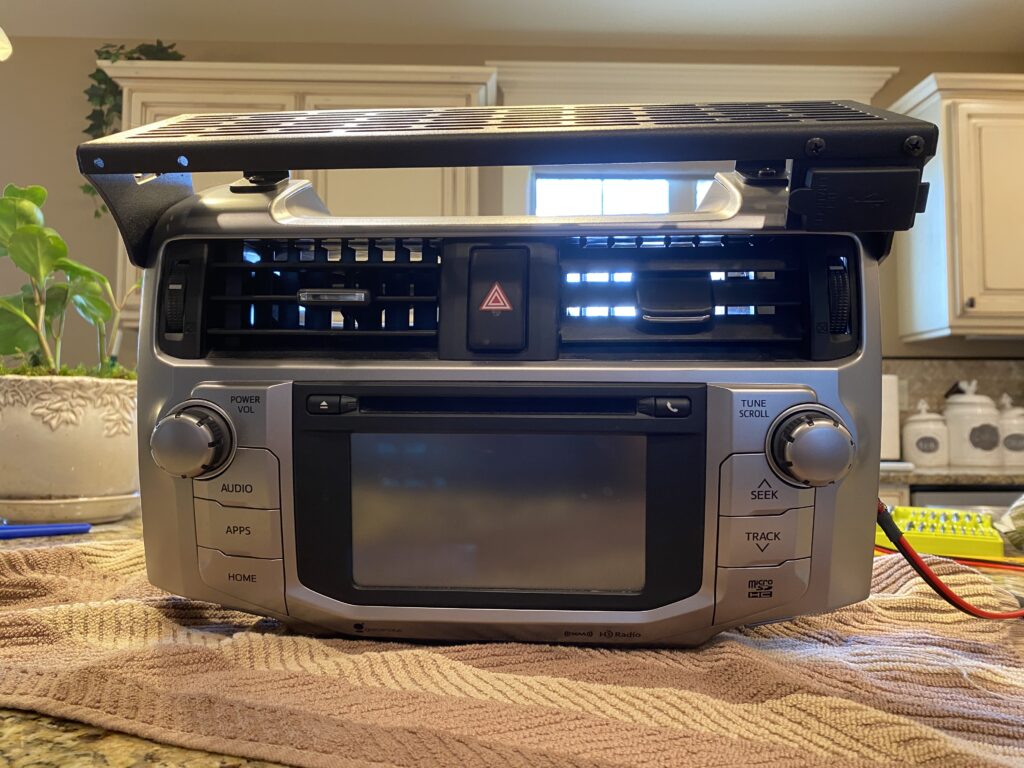
- ICS Fabrication 5th Gen 4Runner Dash Mount Kit (you can also get it without the USB charging hub):
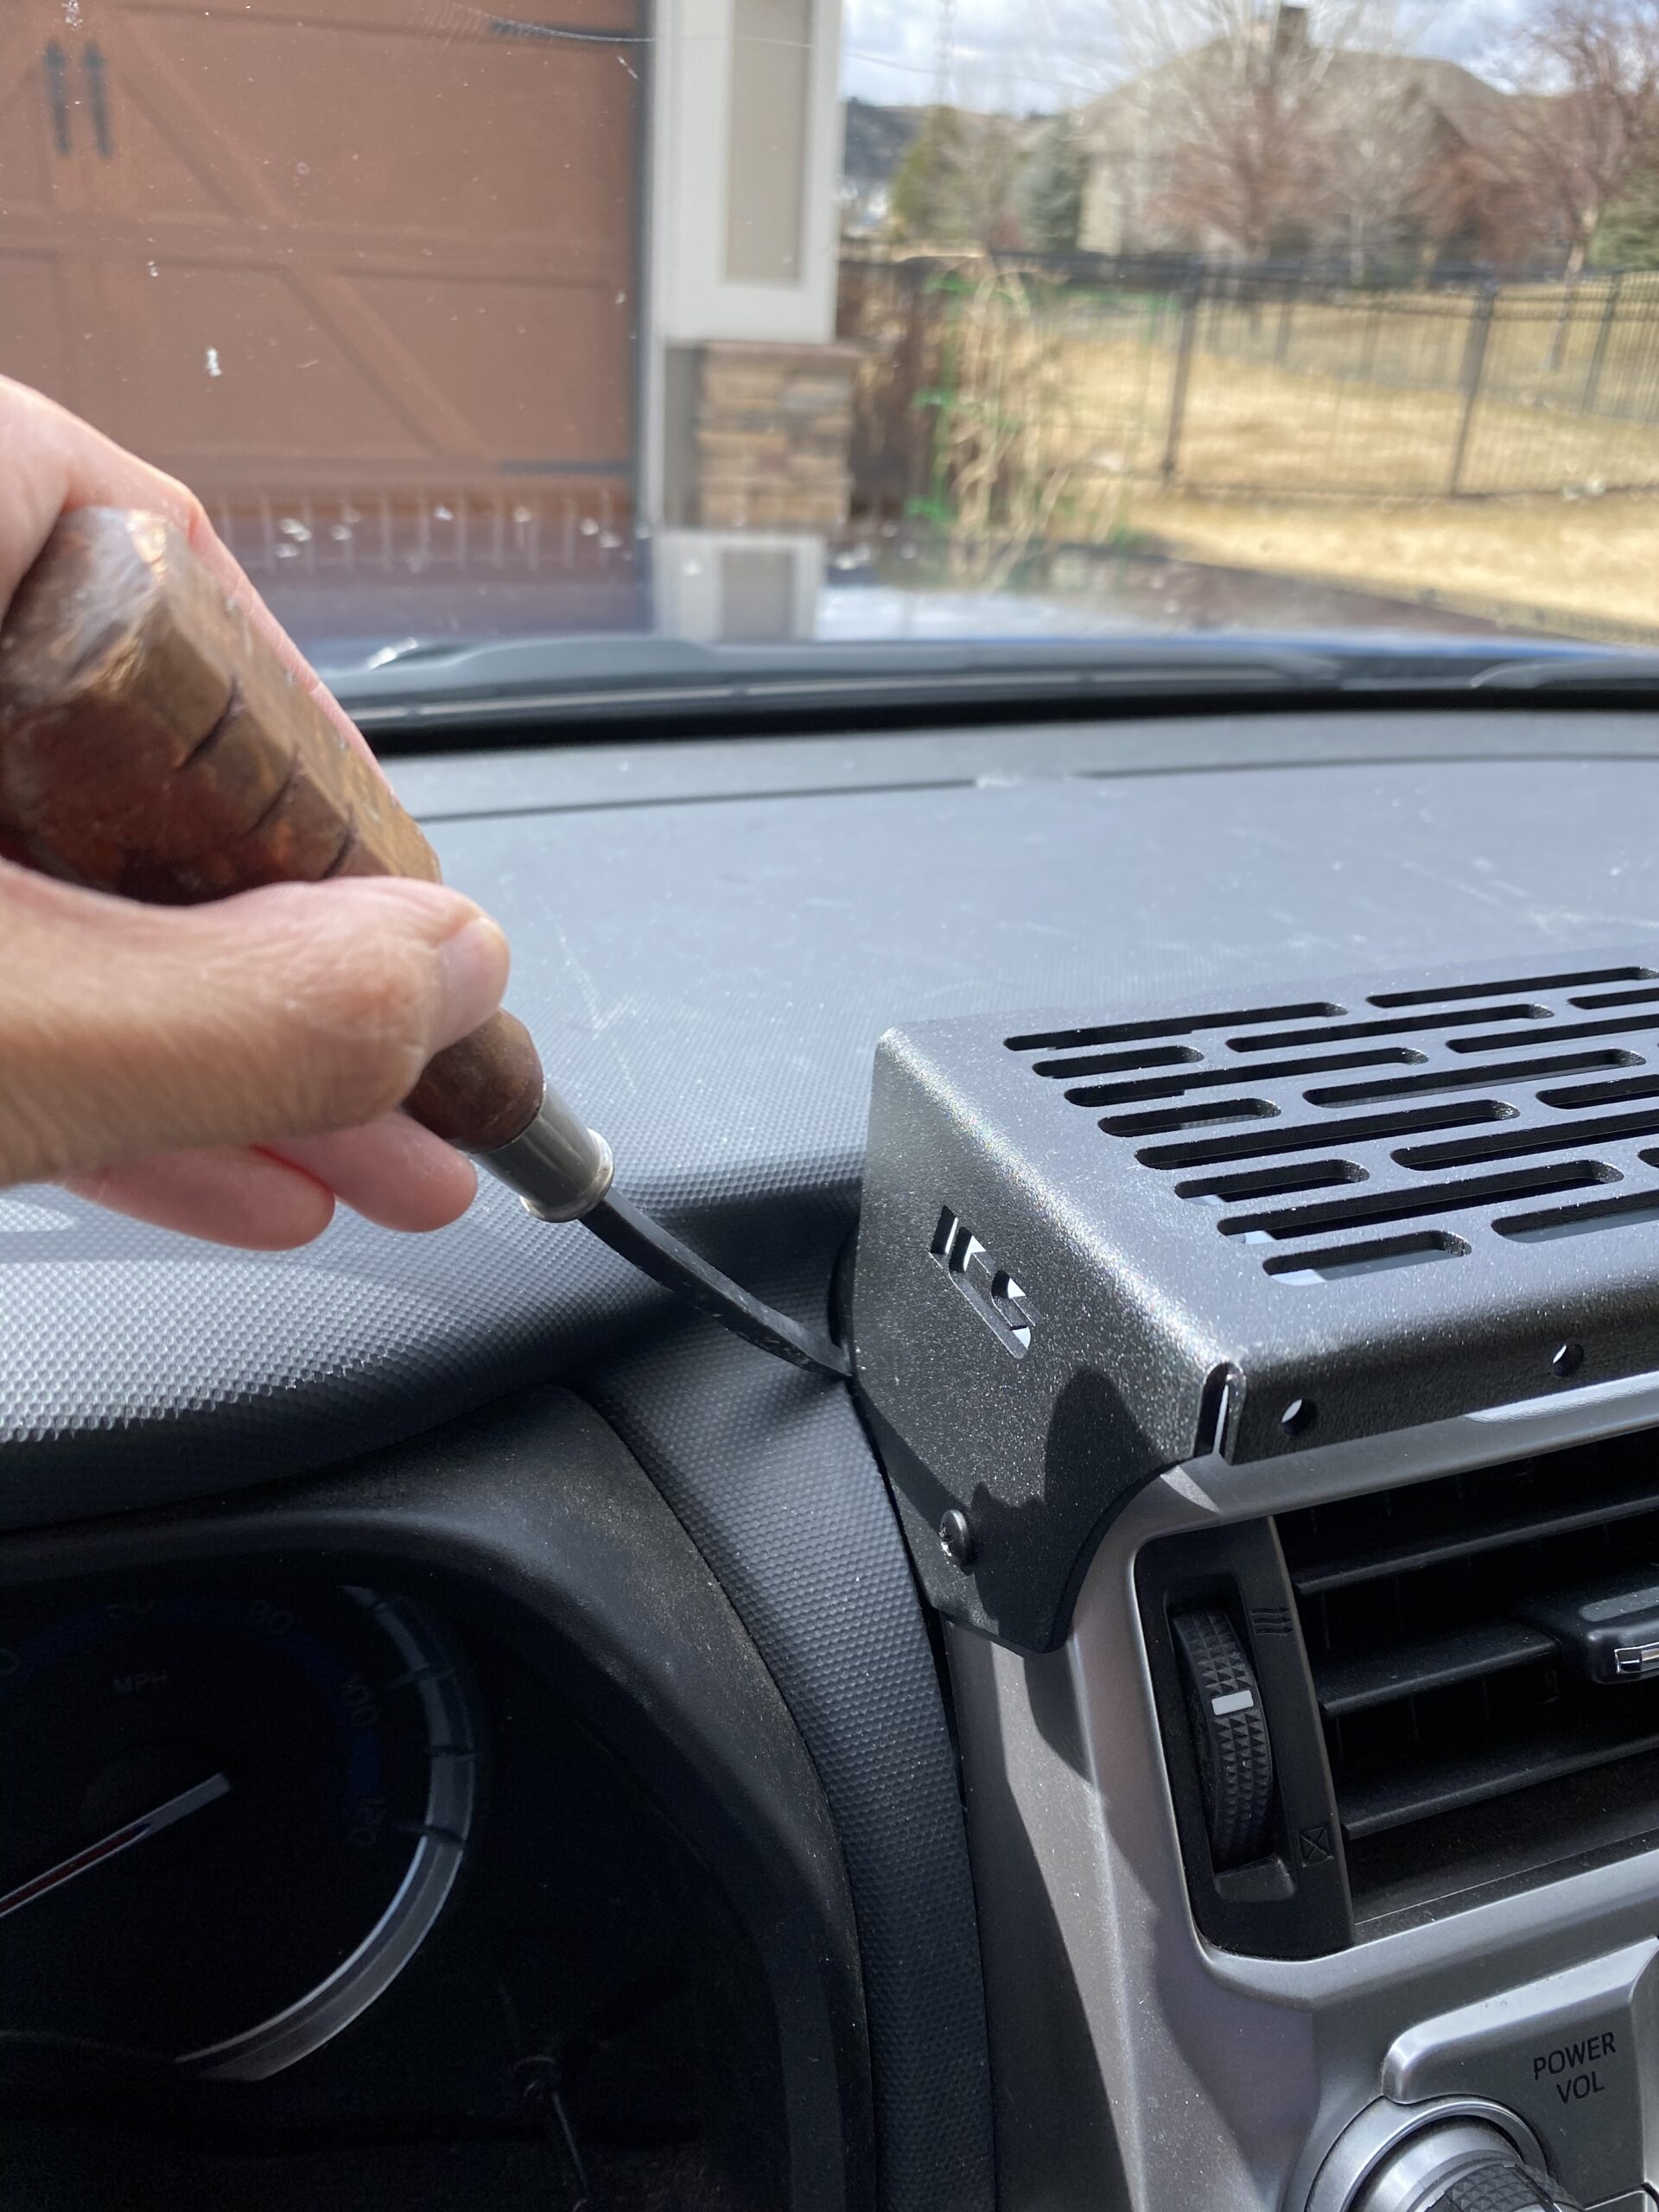
Step 1 – Marking drill holes
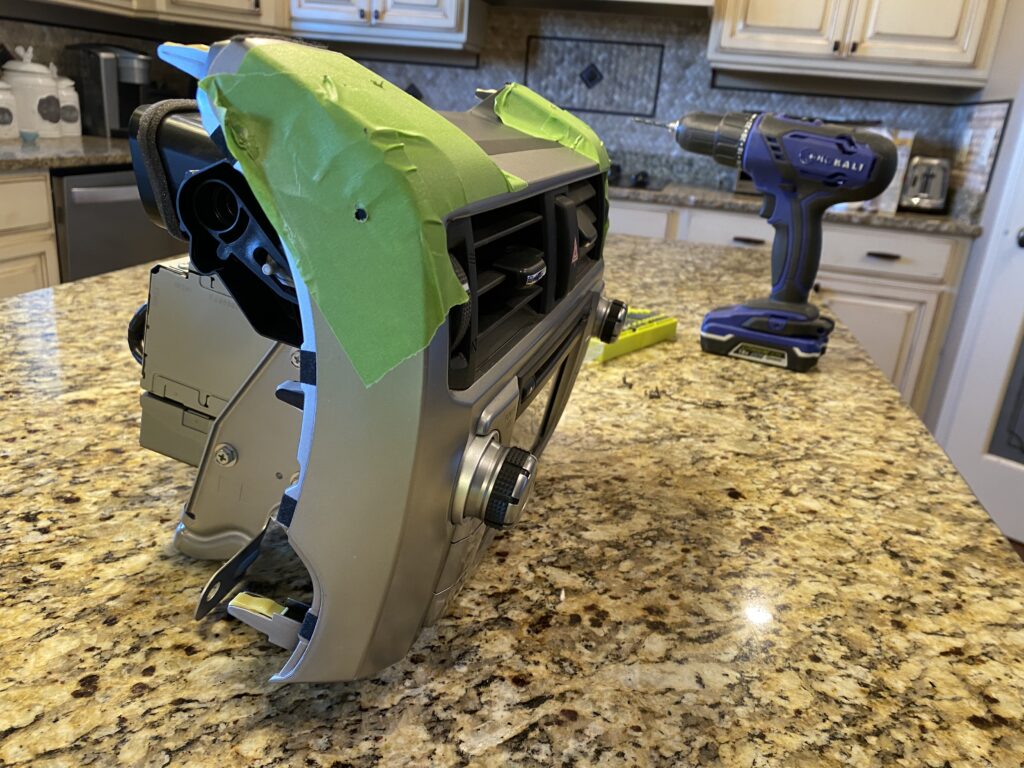
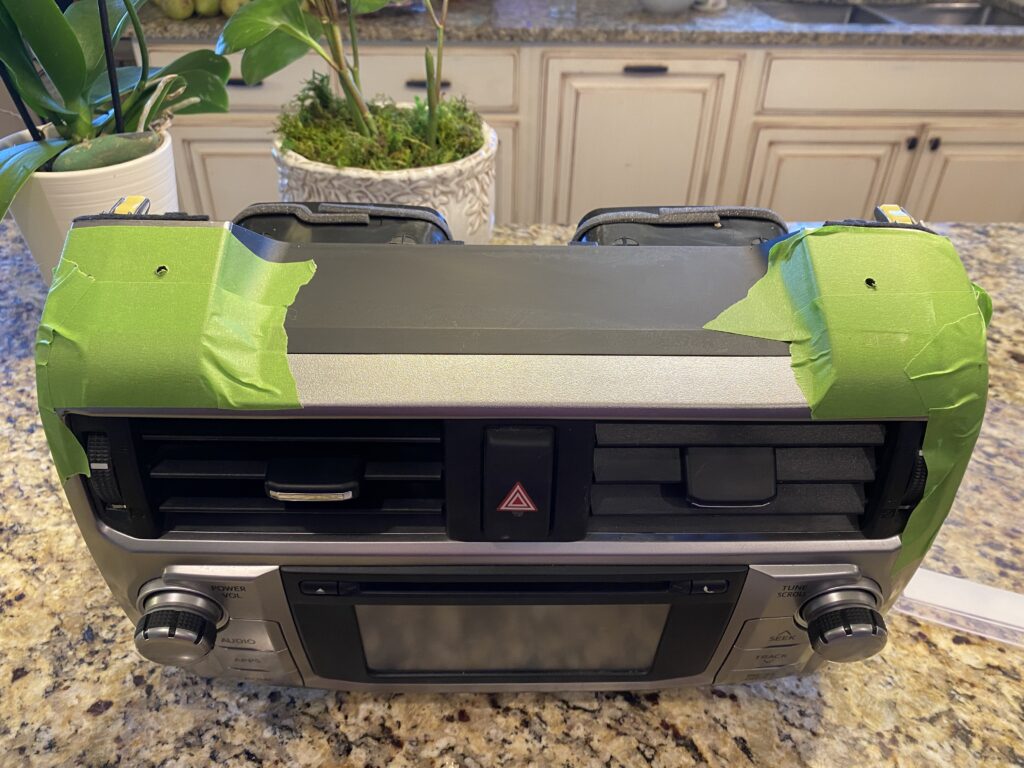
Place painters tape over the top and sides of the radio bezel. This will be used to mark where you want the drill holes.
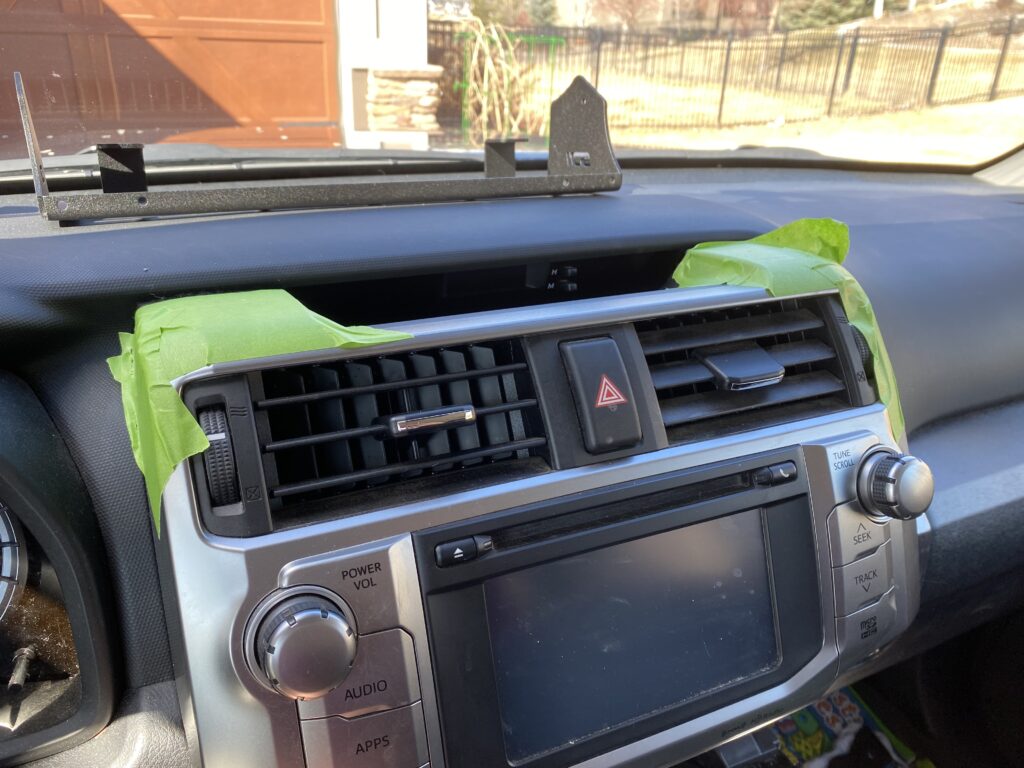
Set the dash mount into place. Make sure you push it as far as it will go toward the windshield and down so that the rear legs of the mount are in contact with the bezel. Then mark your drill holes and remove the mount. I’m showing this with a pencil in the picture below but the marking will show up better if you use a straight pick or small screwdriver.


Step 2 – Remove the AC panels
Firmly grip the sides of the panels and pull. If you’re careful not to scratch the trim, you can use a flat-head screwdriver to help you pry it out. Repeat on the other side.
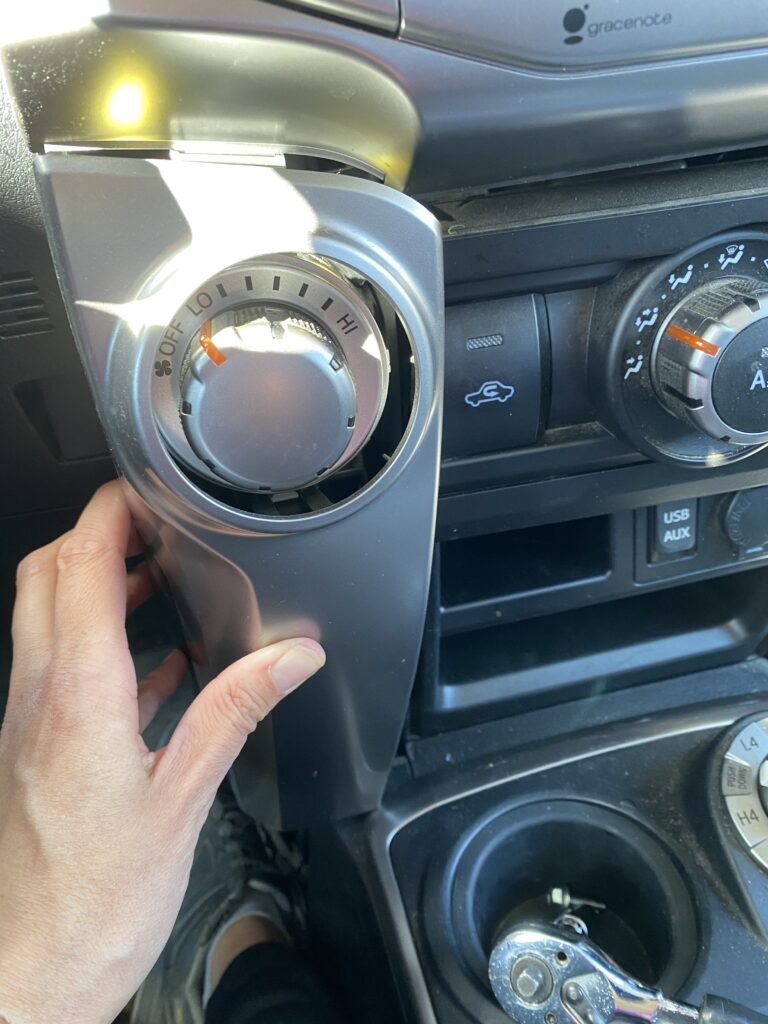
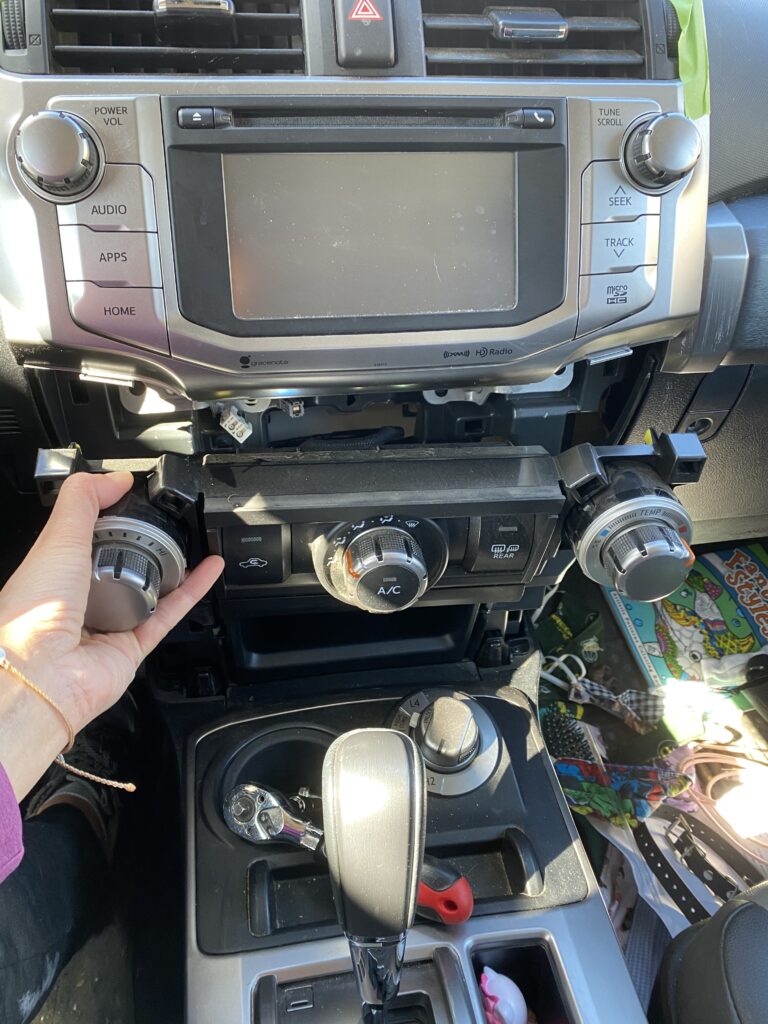
Step 3 – Remove the AC control knobs
Once both AC panels are removed, grab the bases of the AC knobs and pull to remove the entire piece.
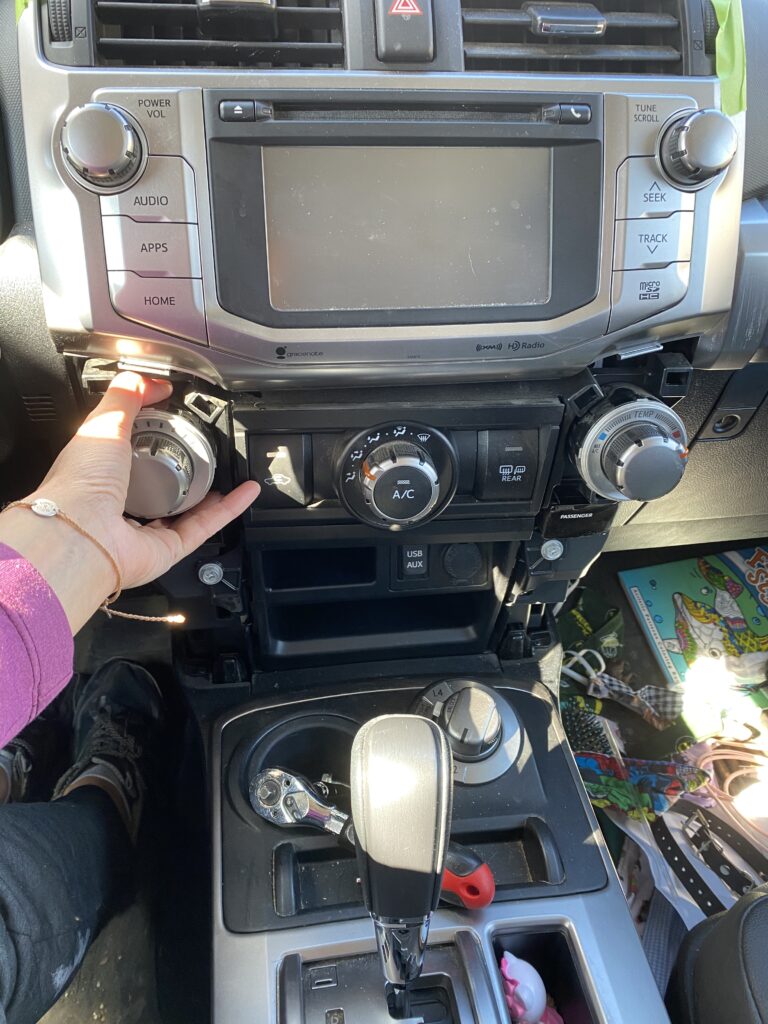
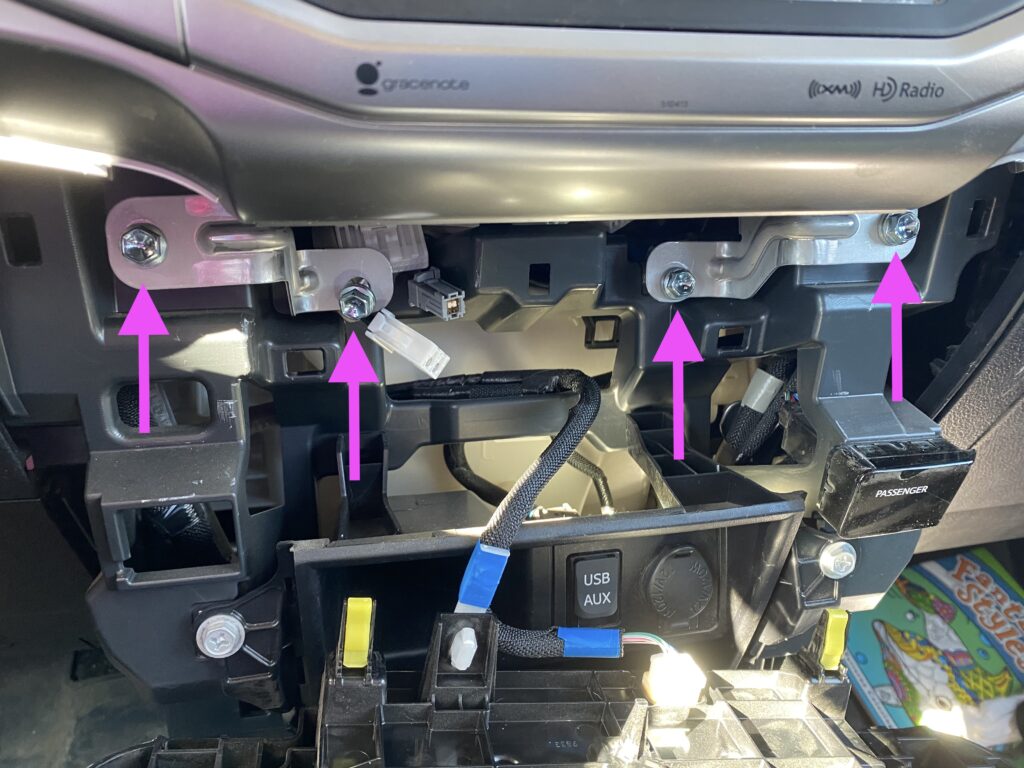
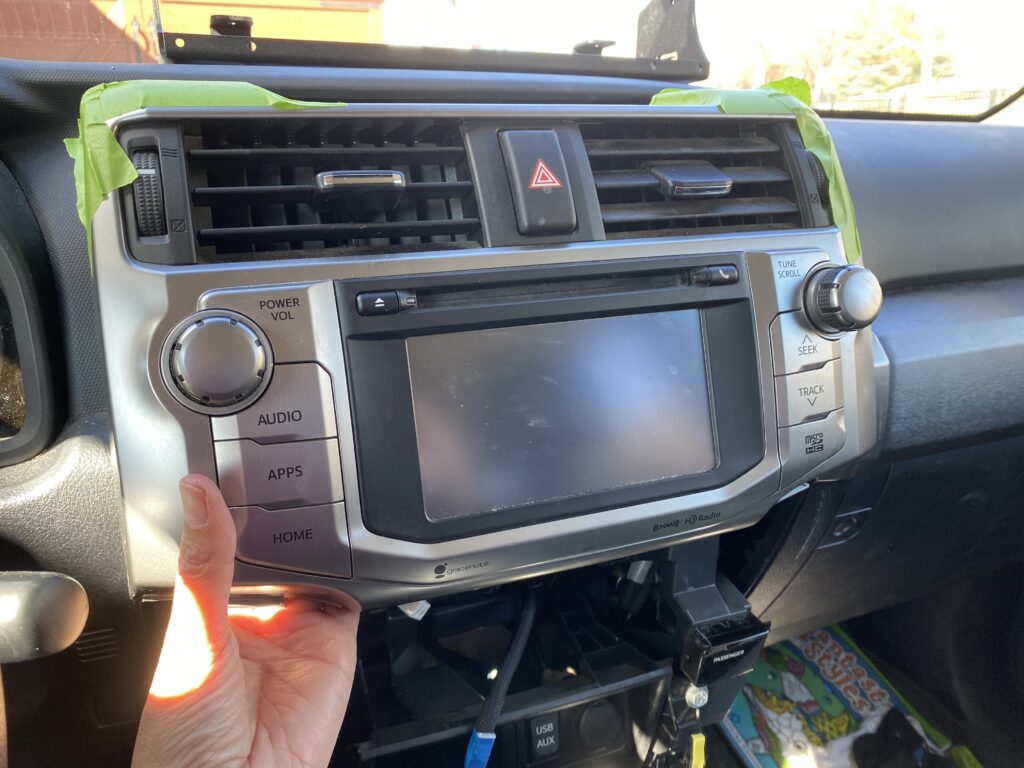
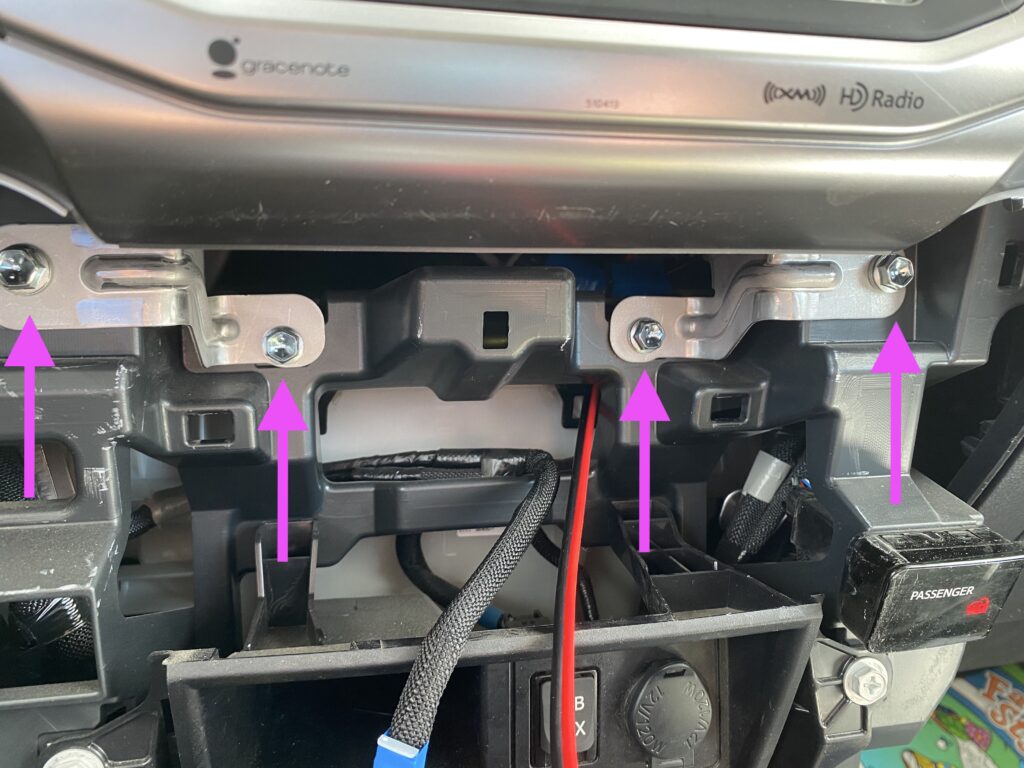
Step 4 – Remove the radio bezel
Using a ratchet and 10mm socket, remove the 4 bolts show below.
Now you can pull out the bezel. Grab the undersides and pull firmly to disengage the retaining clips. The unit will still be attached to its wiring. You will disconnect these in the next step.

Step 5 – Detach the connectors
Next you need to detach all but 6 connectors so that you can pull the bezel all the way out of the dashboard. Here’s what the back will look like before you detach anything:
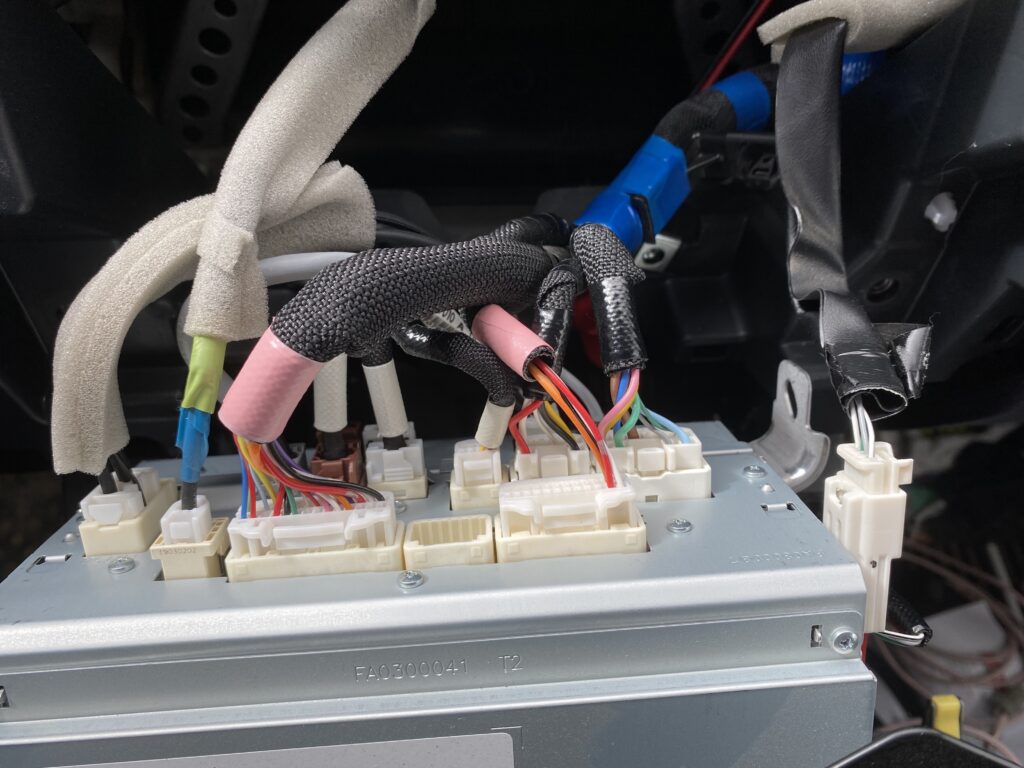
Remove all the connectors except for the six in the pictures below. Basically, disconnect all of them that would prevent you from removing the entire unit. There is also a retaining clip on the right side that you will need to disengage.
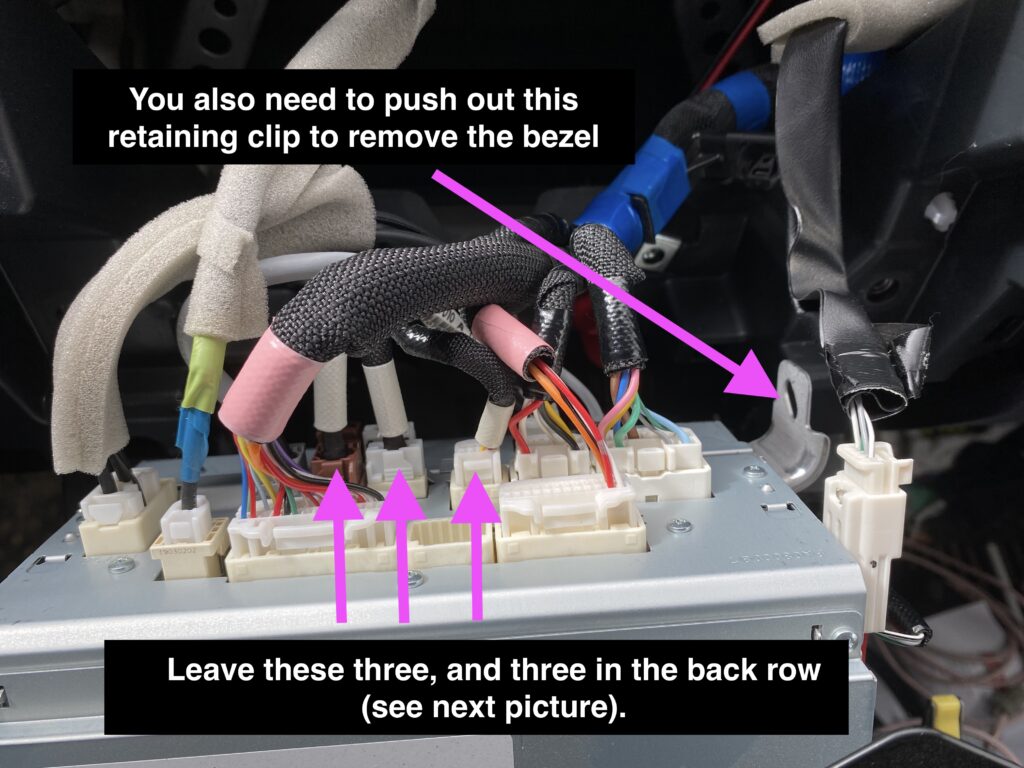

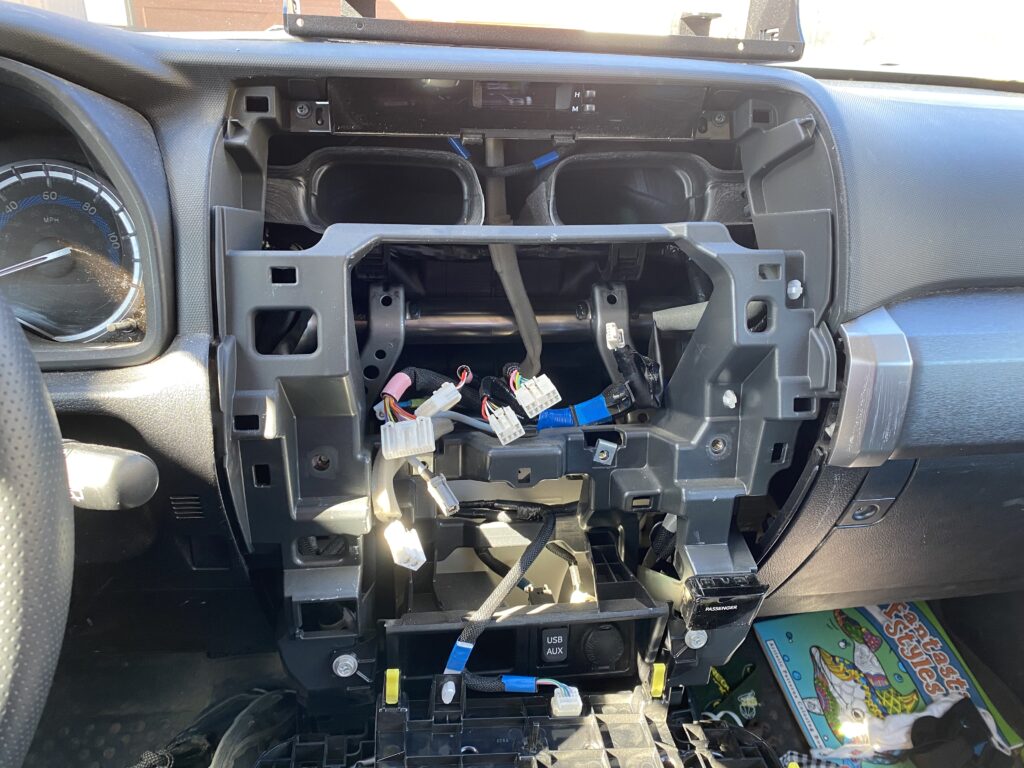
Here’s what it will look like after you have removed all of the attachments from the bezel into the dashboard.
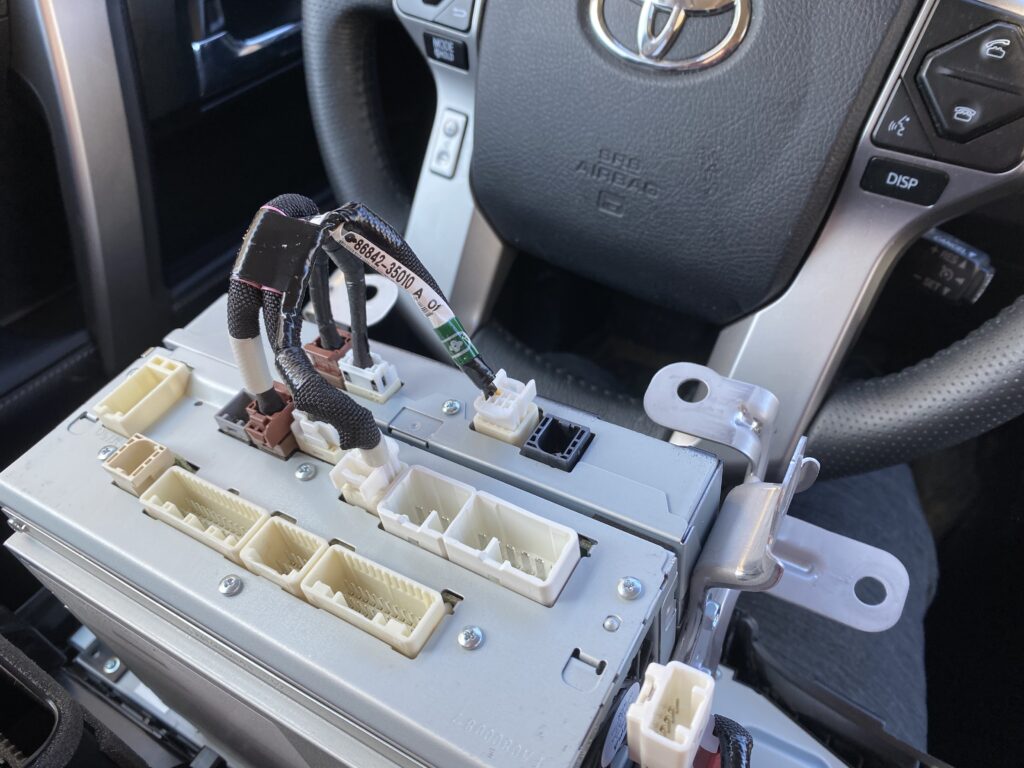
This will be what you’re left with in the dashboard.
Step 6 – Drill holes for dash mount
Now you that have the bezel out, you’re ready to drill your holes using a 9/64″ bit.
Drill gently in the thin plastic.
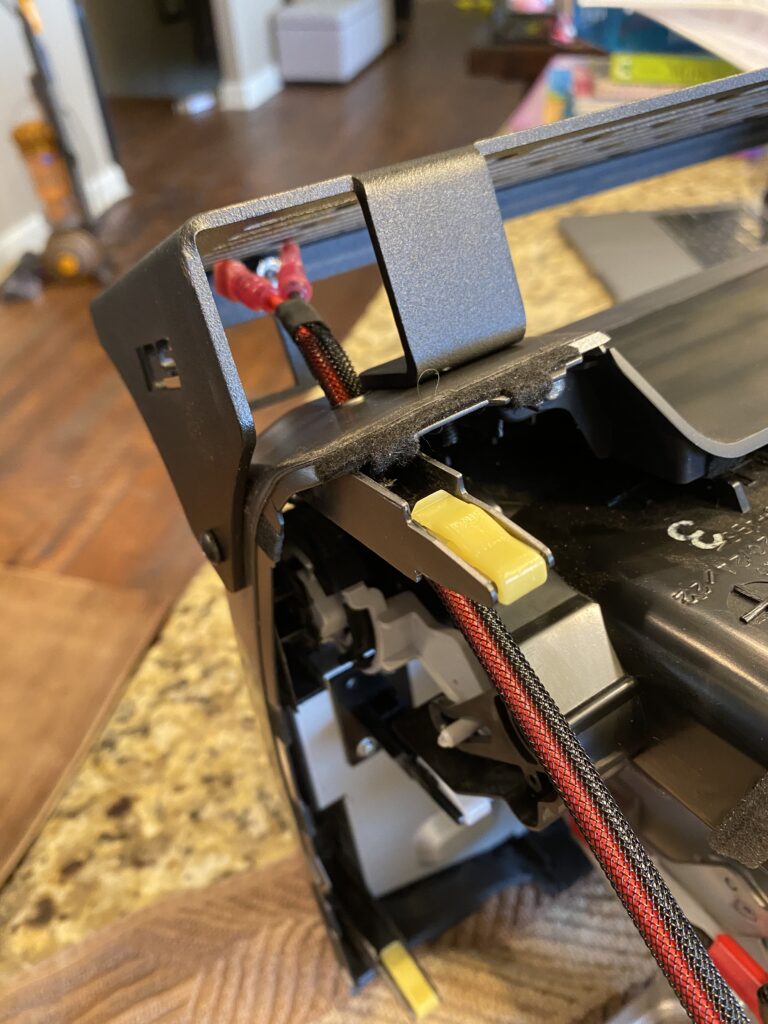
Step 7 – Installing the USB charger
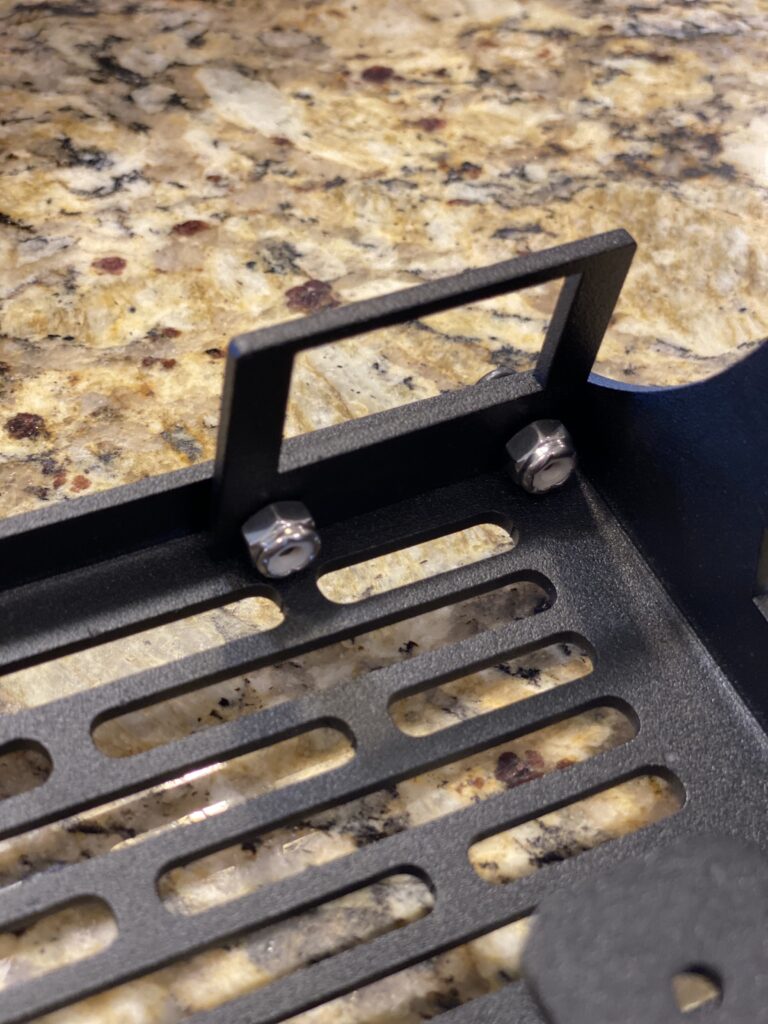
At this point, you need to decide which side you want the USB charger to go on. The dash mount has holes on either the right or the left to install the USB mounting tab (see below). Choose your placement and screw the tab into place using the bolts that came with the kit.
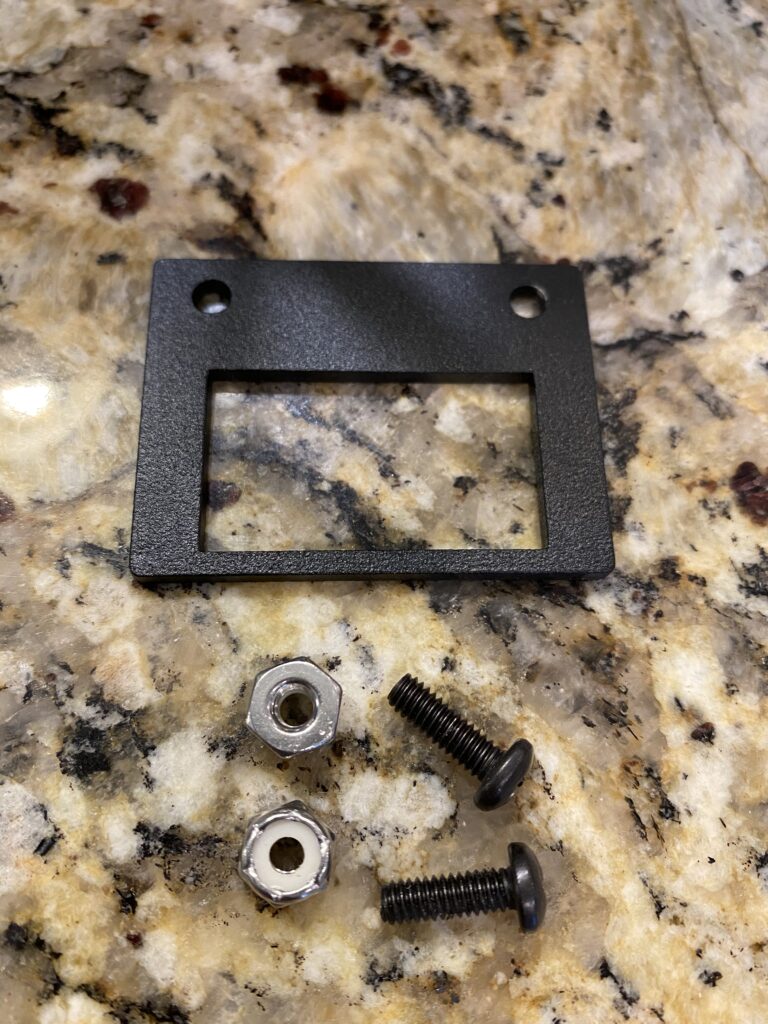
USB mounting tab 
Whichever side you choose, you will need a hole in the bezel for the charger wire to go through. The new hole should be about 3/4″ away from the top hole, toward the outside of the bezel.
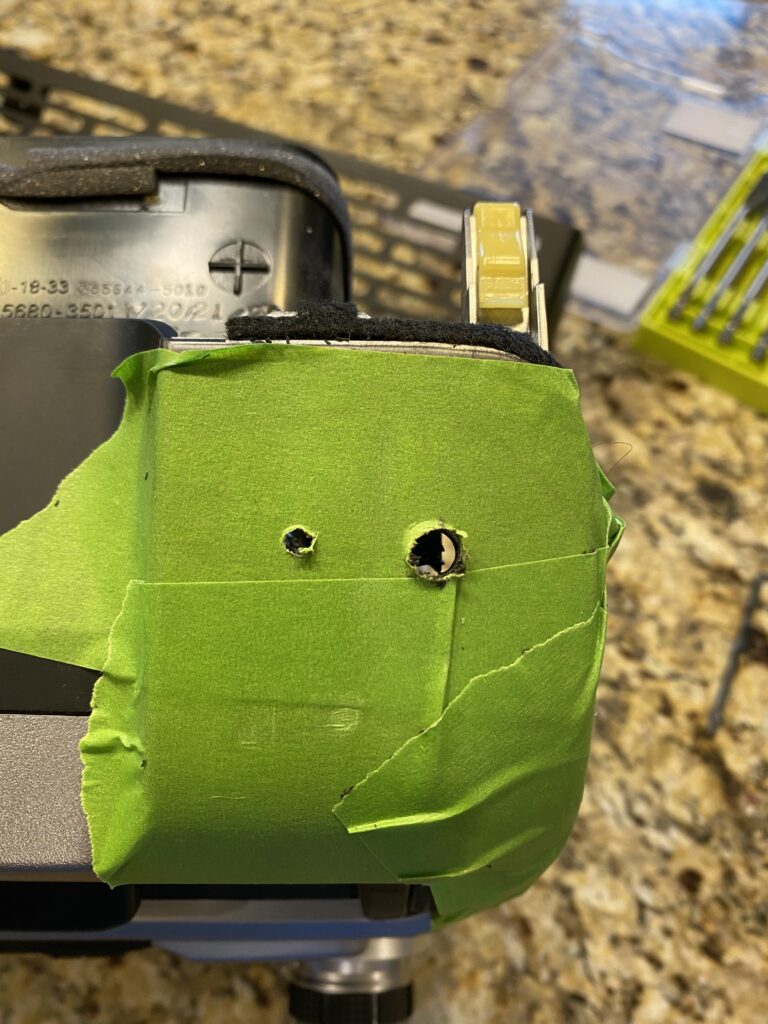

The size of the hole needs to be large enough to fit the grommet and the USB charging harness wires. The video I followed recommended using a 9/64″ to a 1/4″ bit if you’re not using a grommet, and bigger if you are. I ended up using a 5/16″ drill bit and it was really tight with both the grommet and the wires.

This is the grommet 
This is about where it will sit 
9/64″ hole on left for the mount, 5/16″ hole on right for the USB charging harness 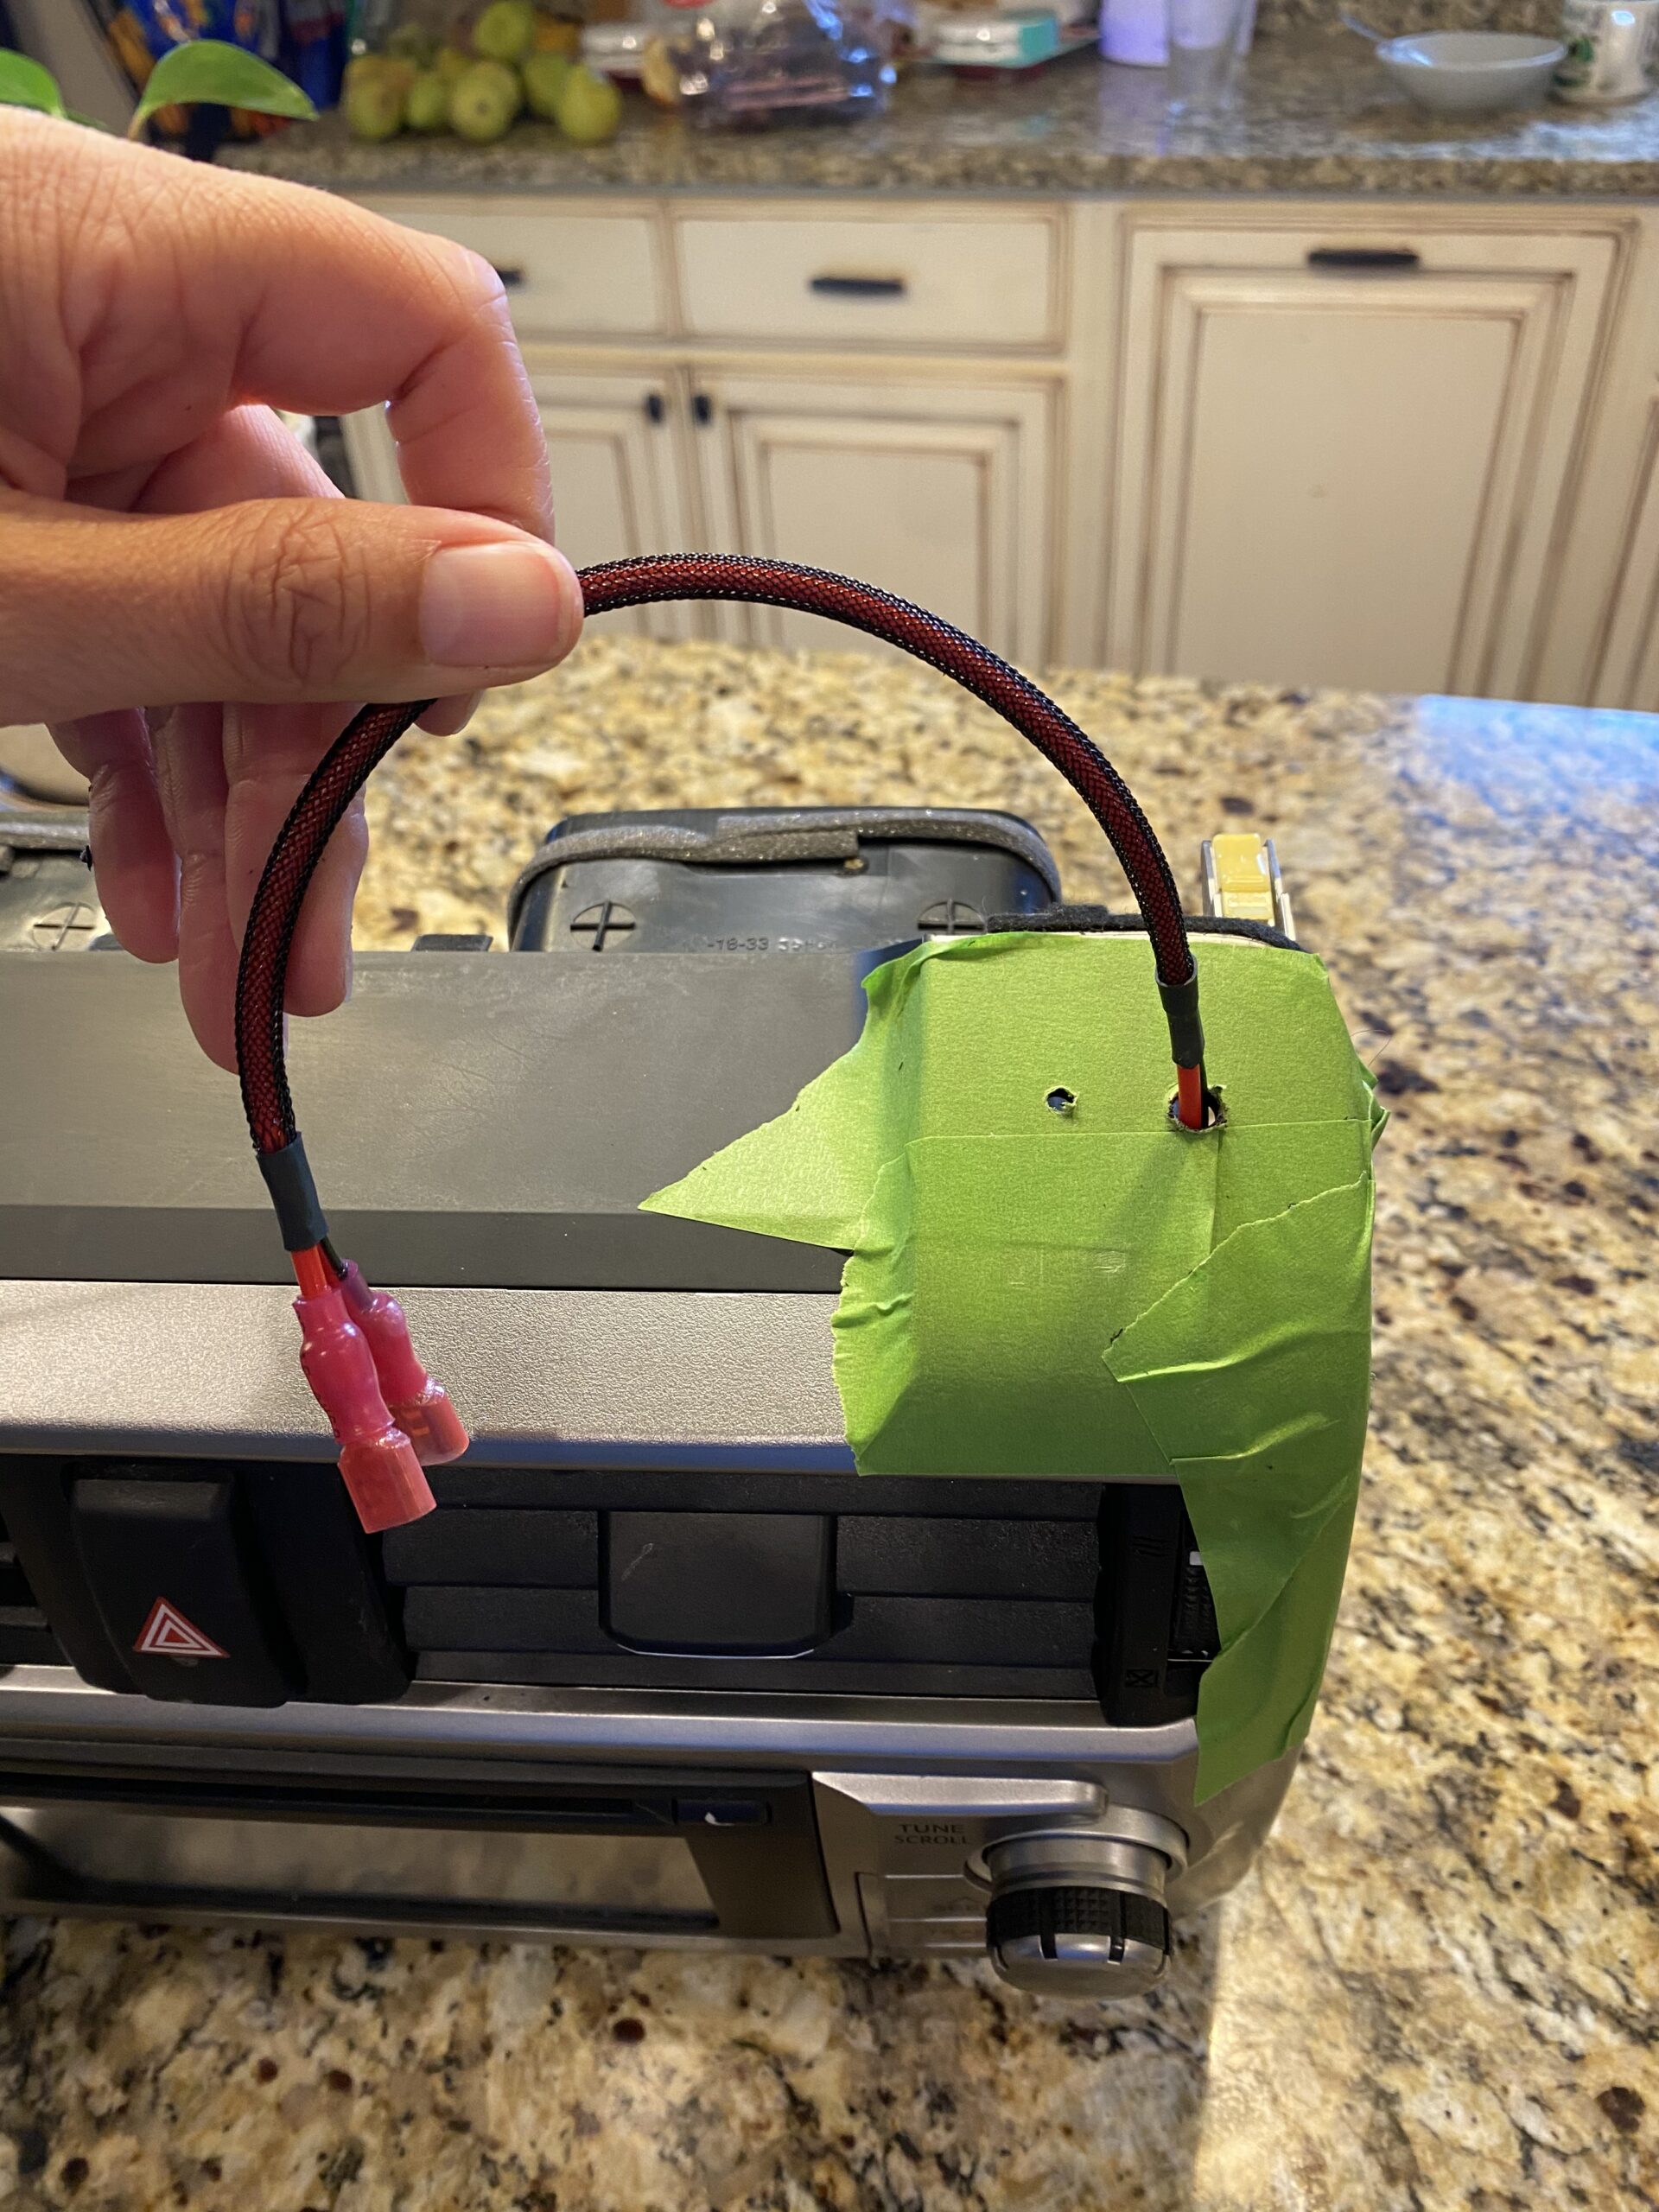
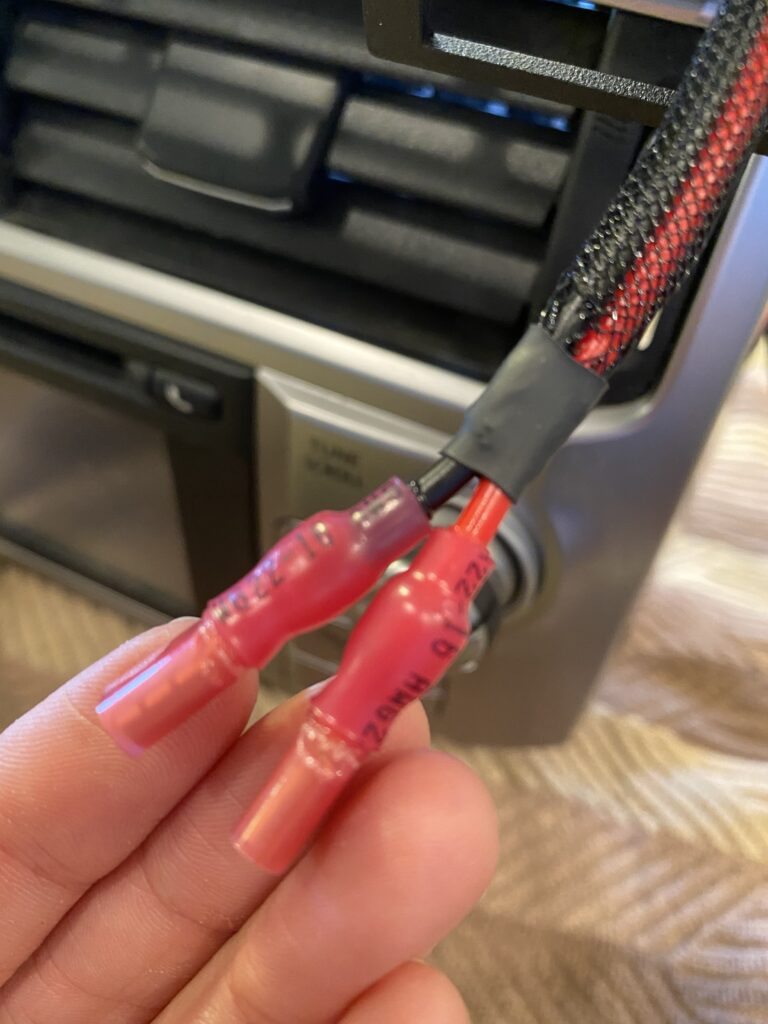
This is the USB charging harness, which will end up going through the hole to connect to your 12V
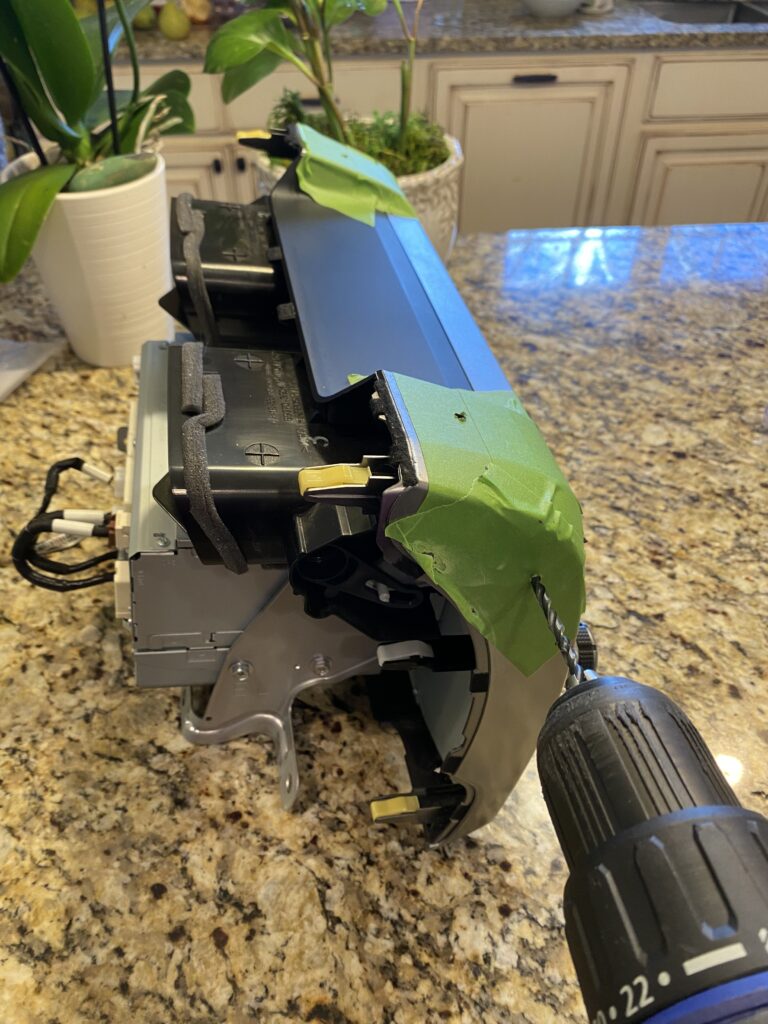
Step 8 – One last thing before you you attach the dash mount
On the passenger side of the unit, there is a piece of plastic that will be in your way when you try to tighten the side bolt. In the pictures below, you can see I put a paperclip through the side hole to show you where it will come out inside. Can you see the vertical line at the end of the arrow in the picture on the right?

Here’s a closer view:
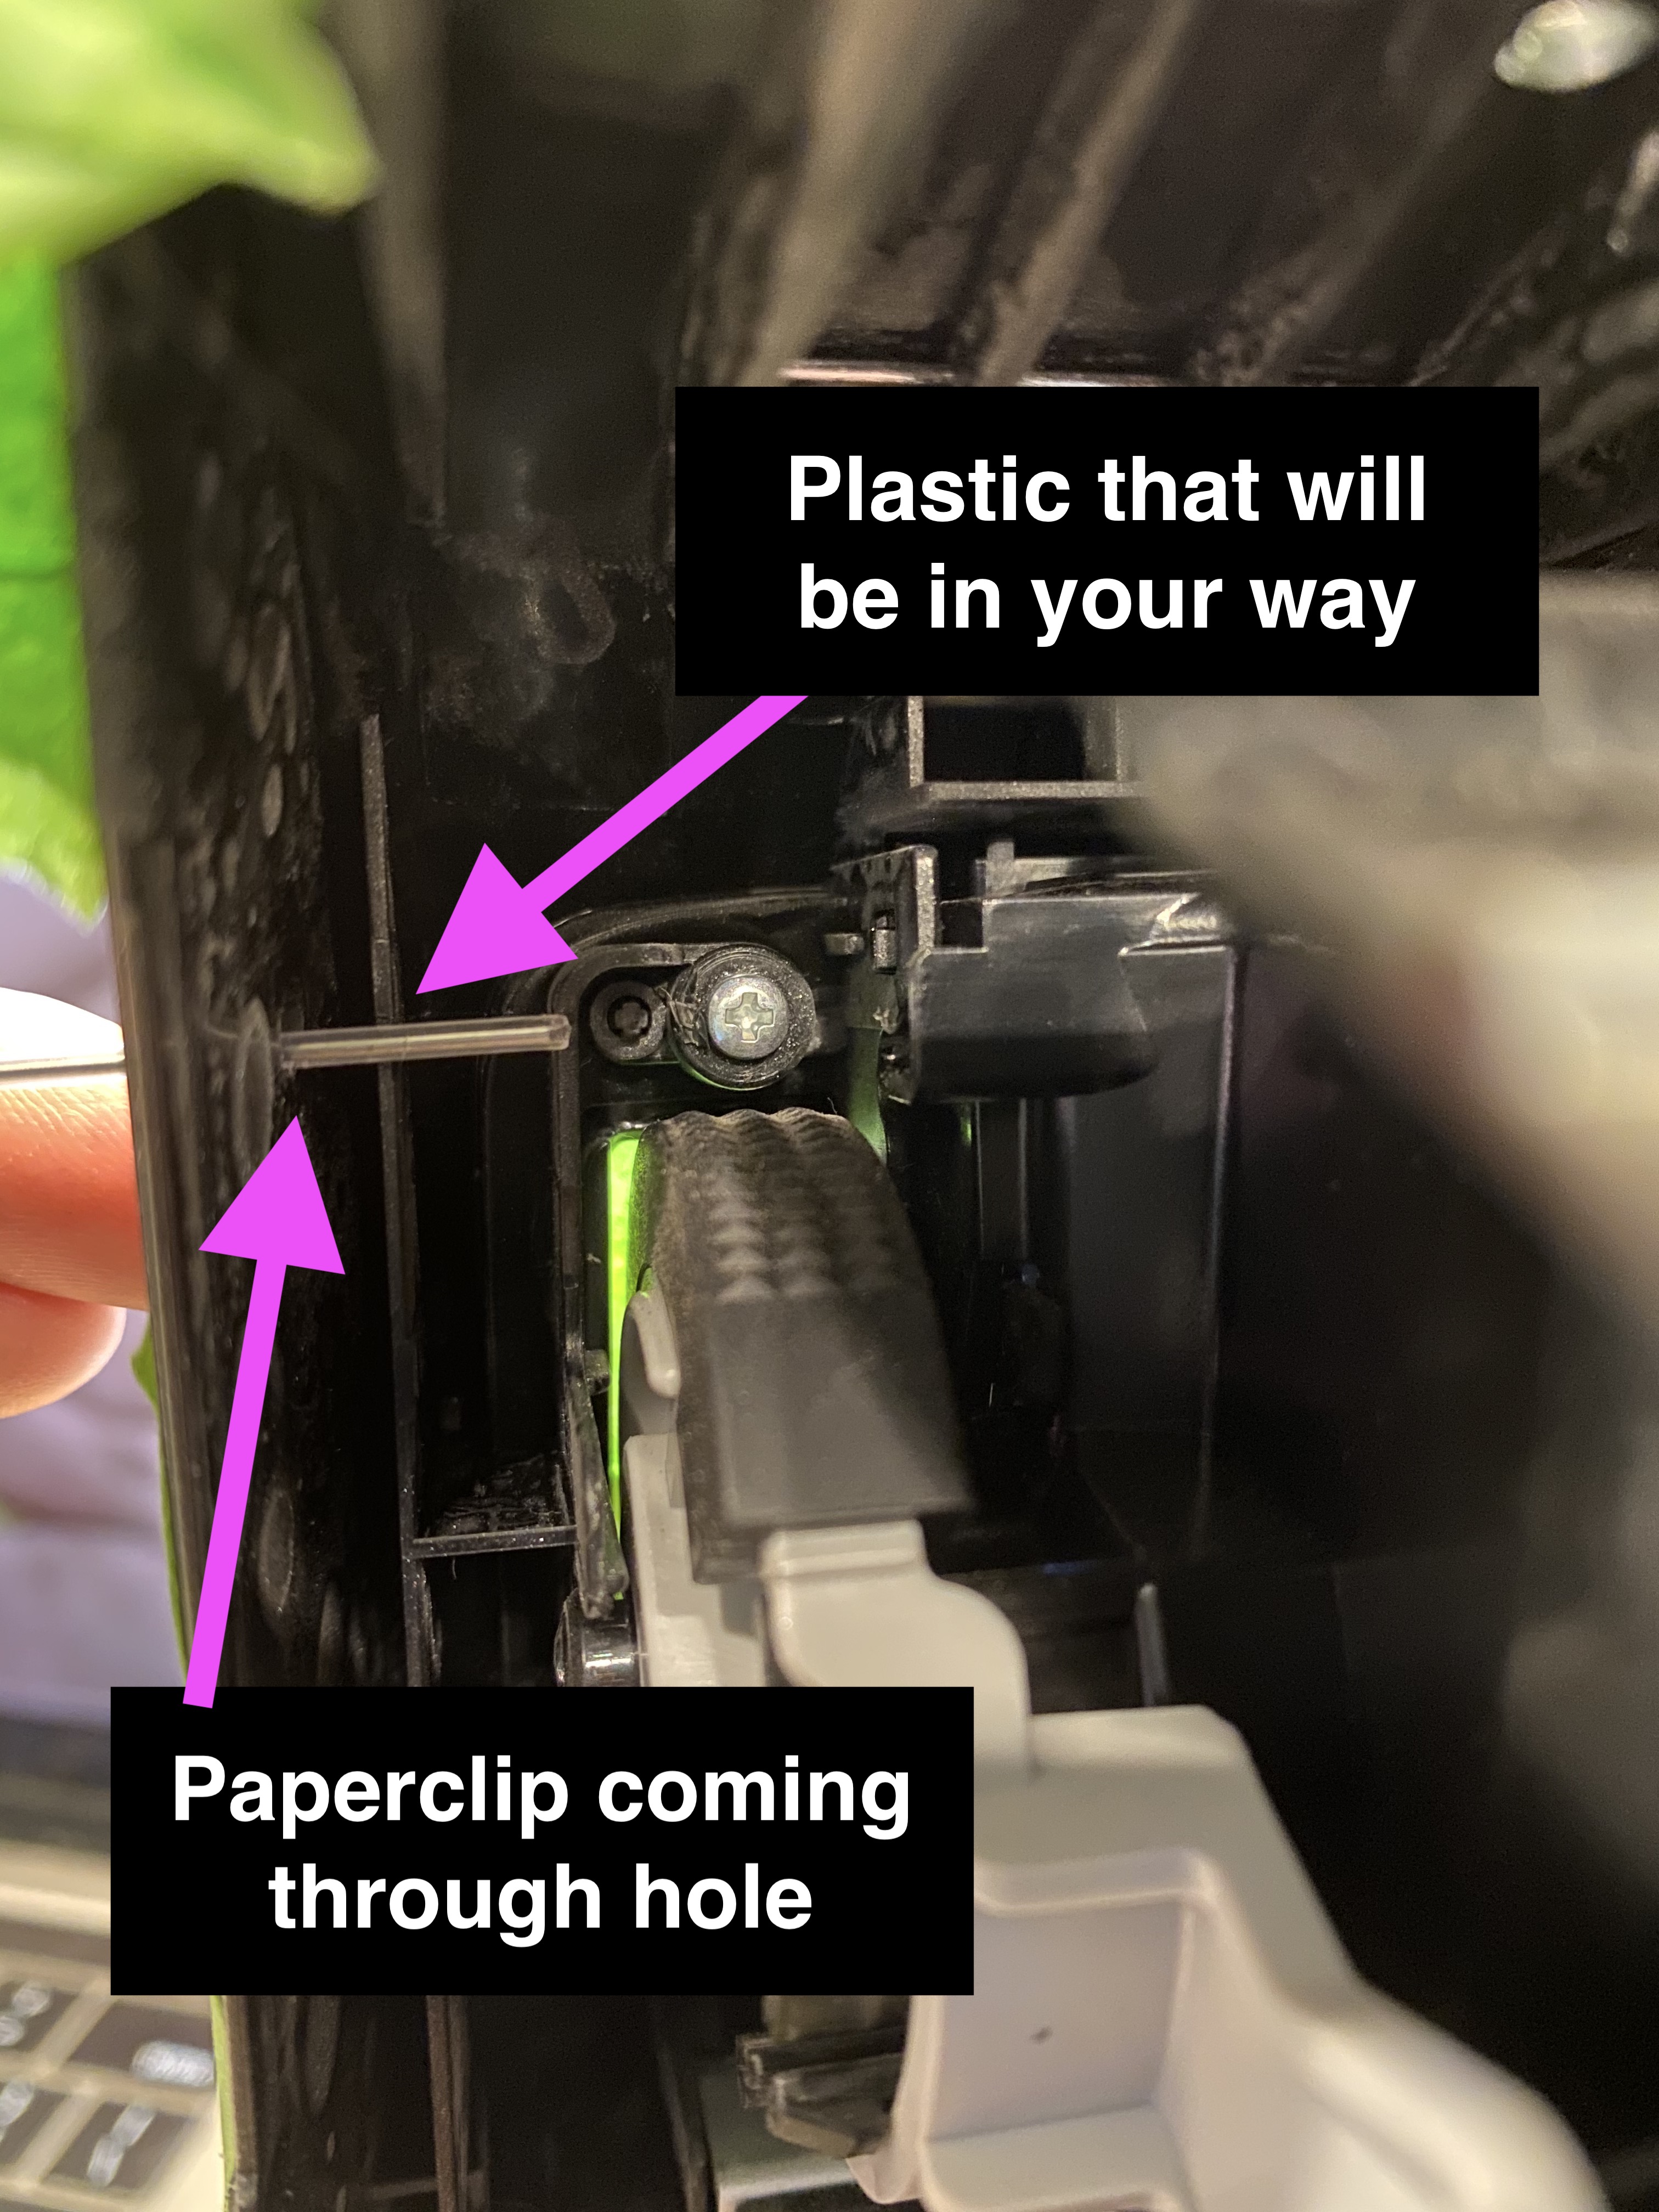
You will need to shave a piece of this plastic to clear the way for the nut. The plastic is thin and easy to cut. You could use the side of your drill, a dremel, a utility knife, or even tear a piece out with pliers. I used a plastic cutter that we have and some needle-nosed pliers. I sliced into the plastic above and below the hole and then used the pliers to rip the piece out. Not very fancy but you can’t see this part on the outside anyway.


Step 9 – Attach the dash mount
Don’t forget to take the tape off before you attach the mount. You also might want to put a towel or other soft surface down for this part so you don’t scratch up your screen.
The bolts to attach your mount to the bezel are the ones that come in the plastic bag. The 1/2″ bolts go in the sides and the 3/4″ bolts go in the top.


Get all the bolts started and make sure the holes all line up before you tighten anything. At first I thought I was going to have to shave some plastic for the tops bolts like I did on the passenger side one. But I found that if you get the bolt in far enough to engage the nut, it will tighten down just fine.
3/4″ bolt 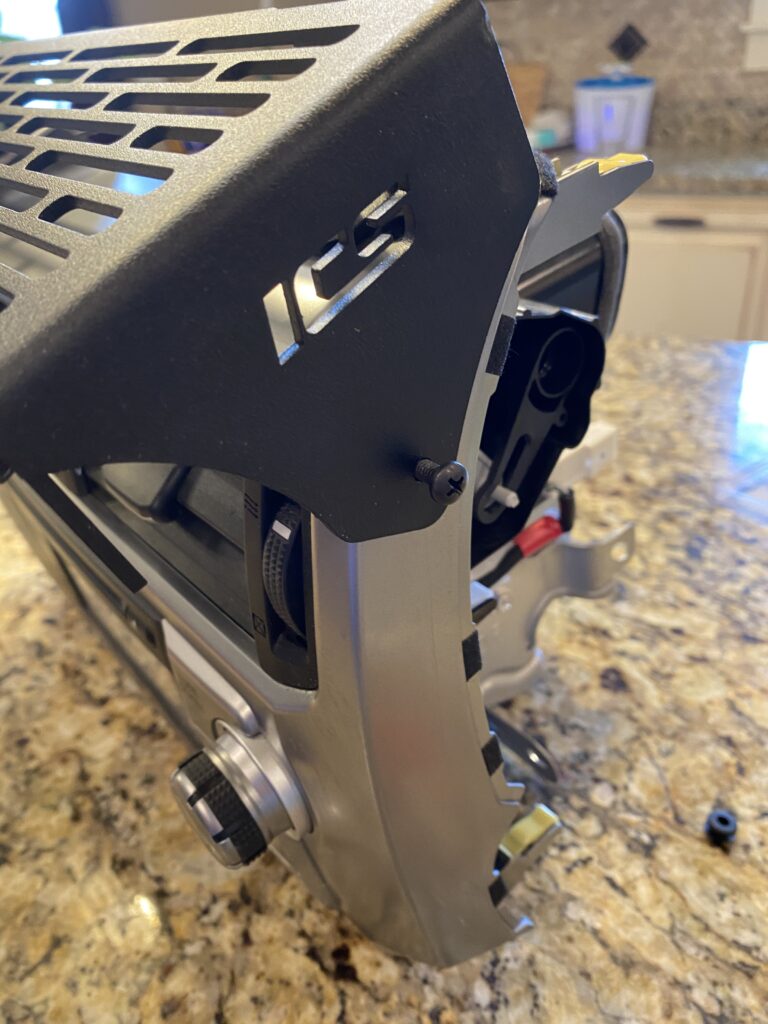
1/2″ bolt
Here’s a great tip from the video I watched: place tape over one side of the end of a closed wrench to help hold the nuts to install in the tight space behind the bezel


Tighten but do not over tighten. The plastic will bend a little.


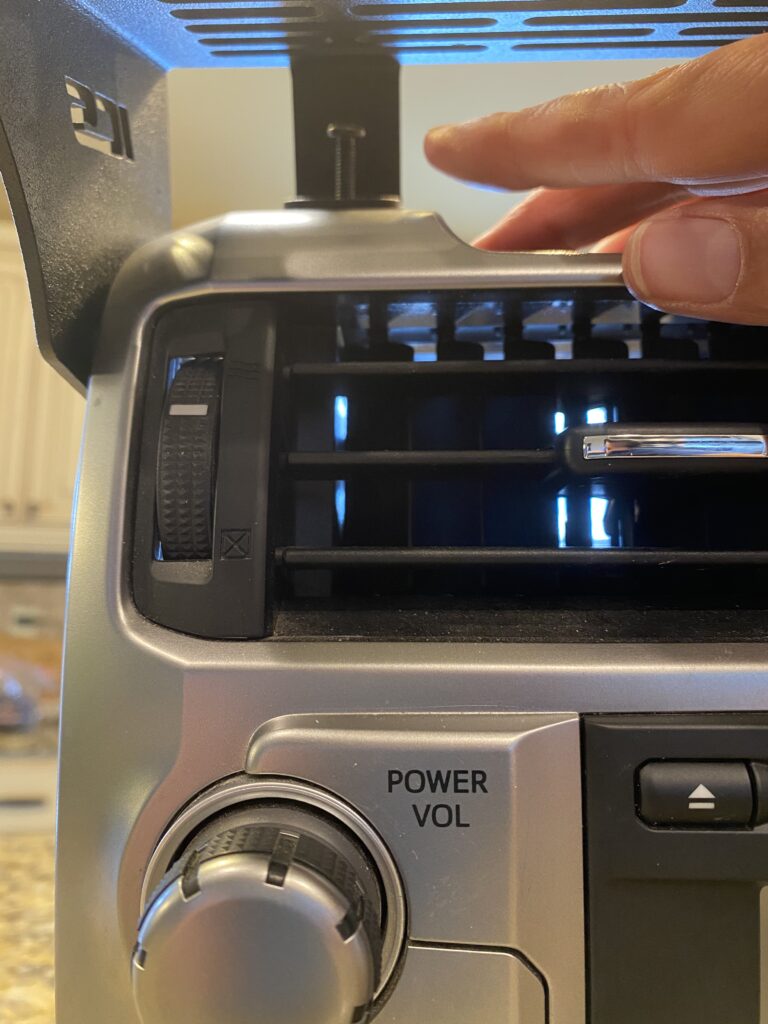
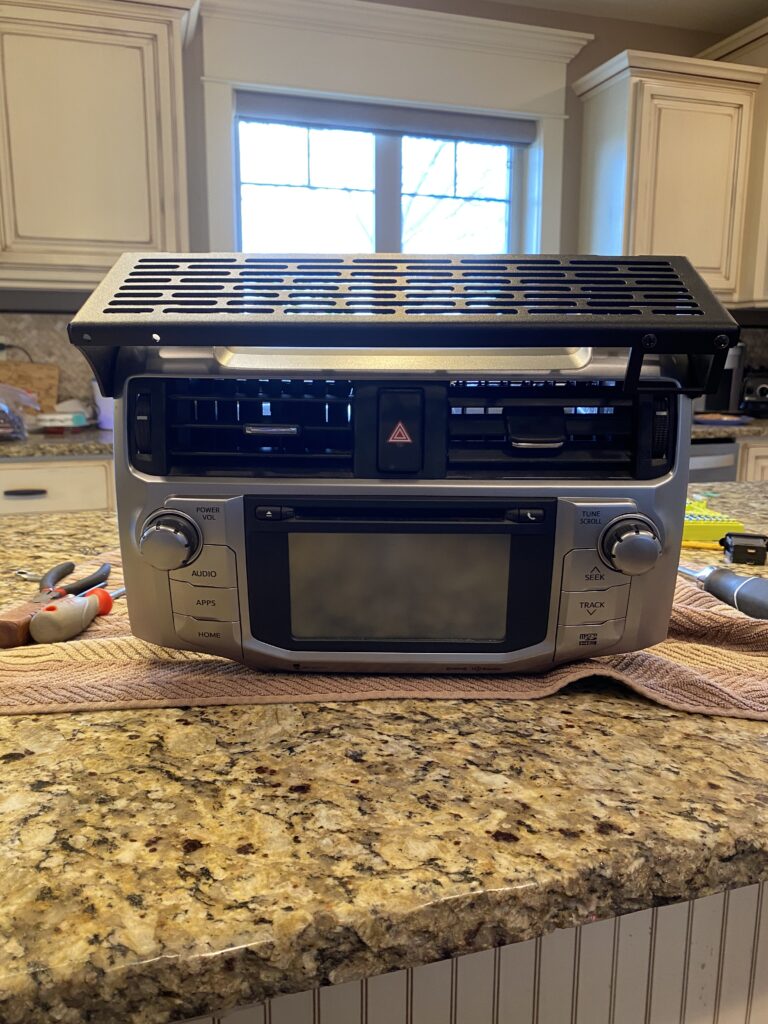
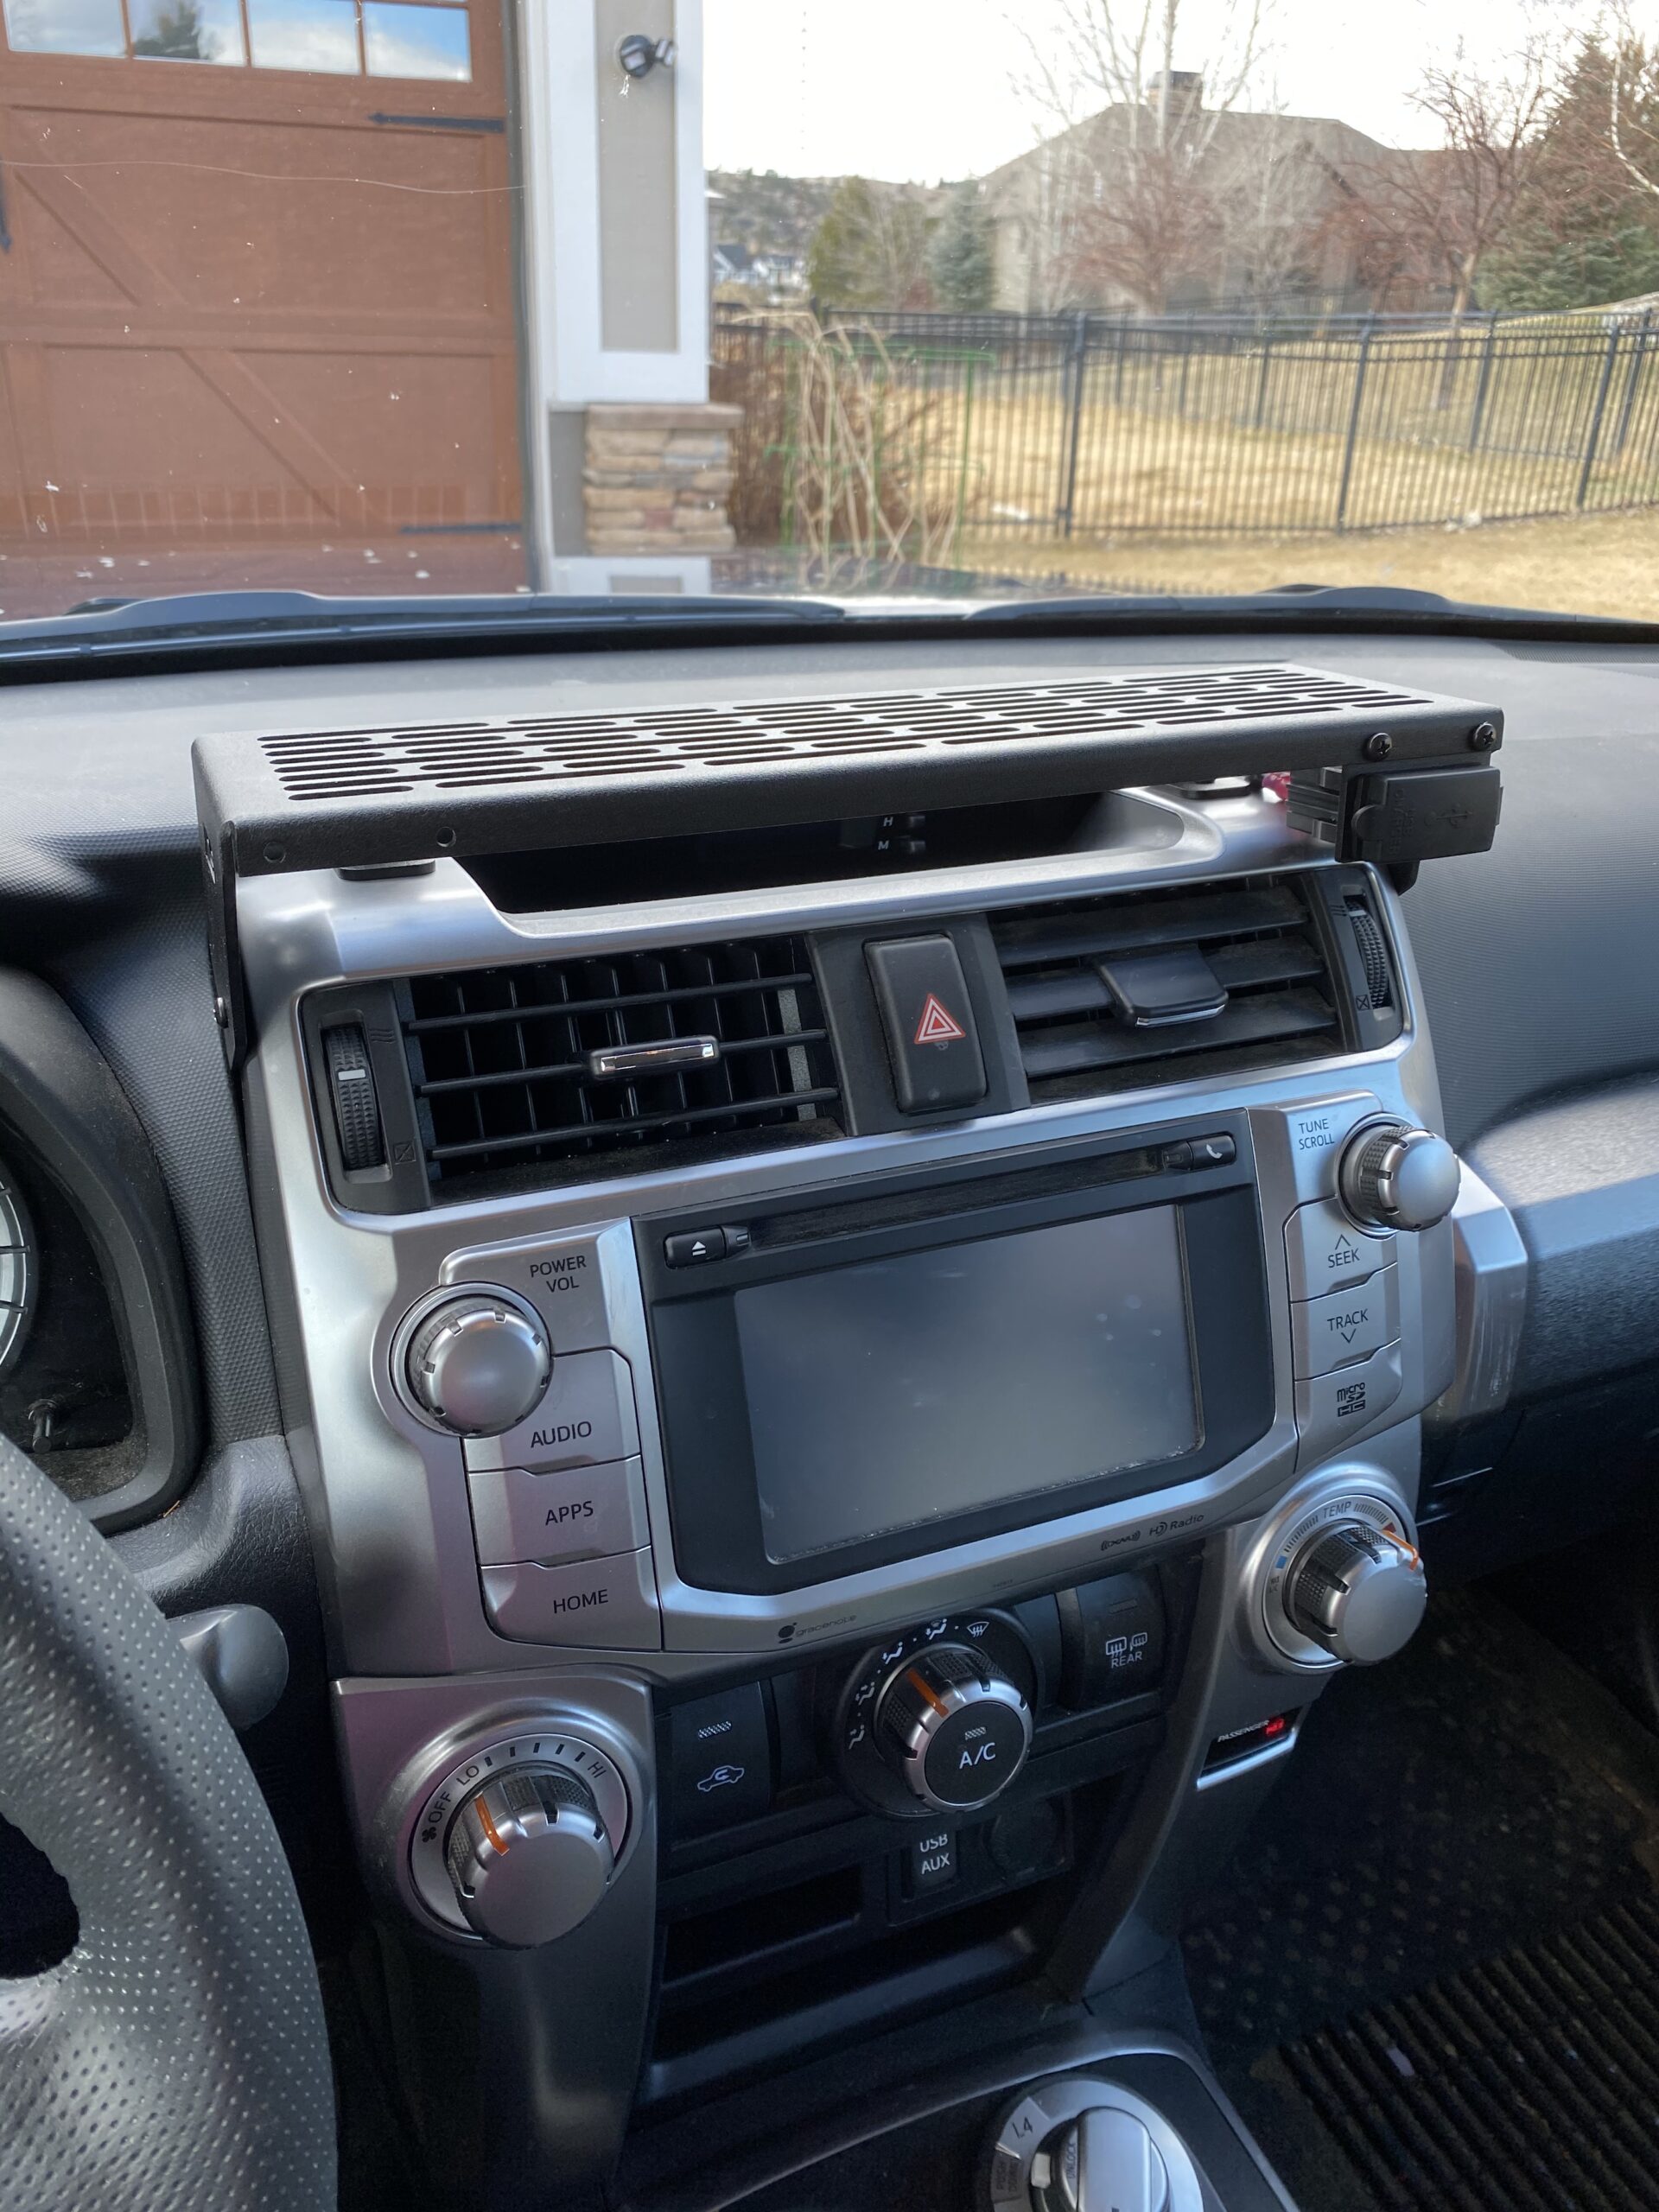
It looks no nice!
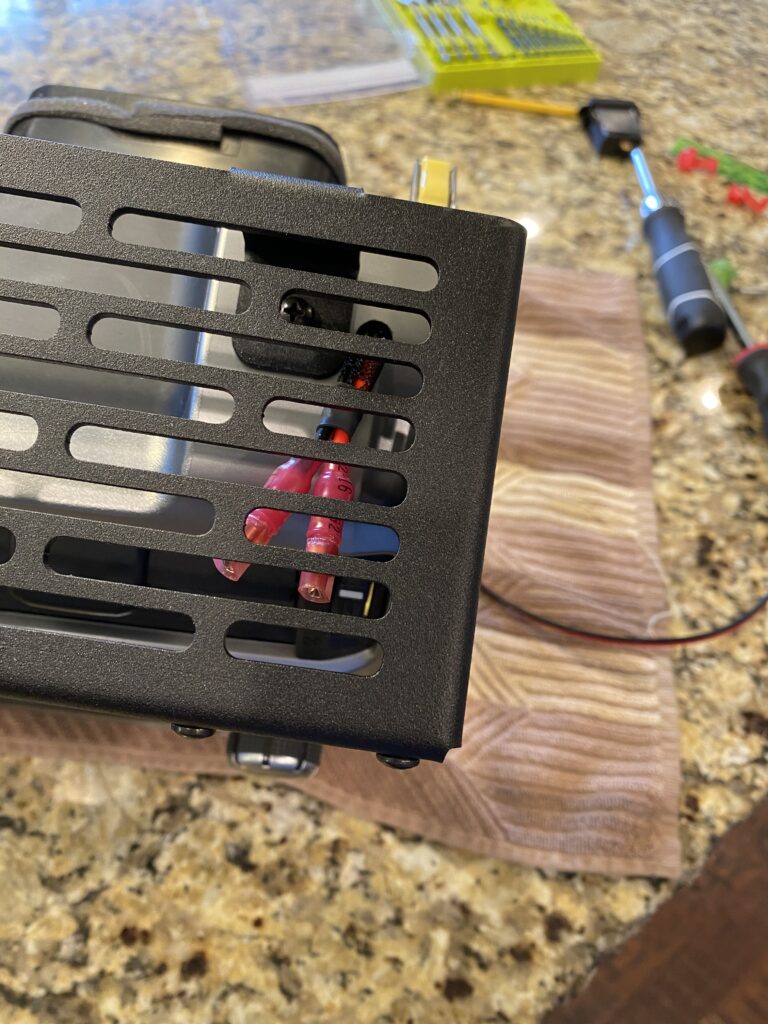
Step 10 – Install the USB charging hub
Route the charging harness through the hole you drilled for it in the top of the radio bezel.
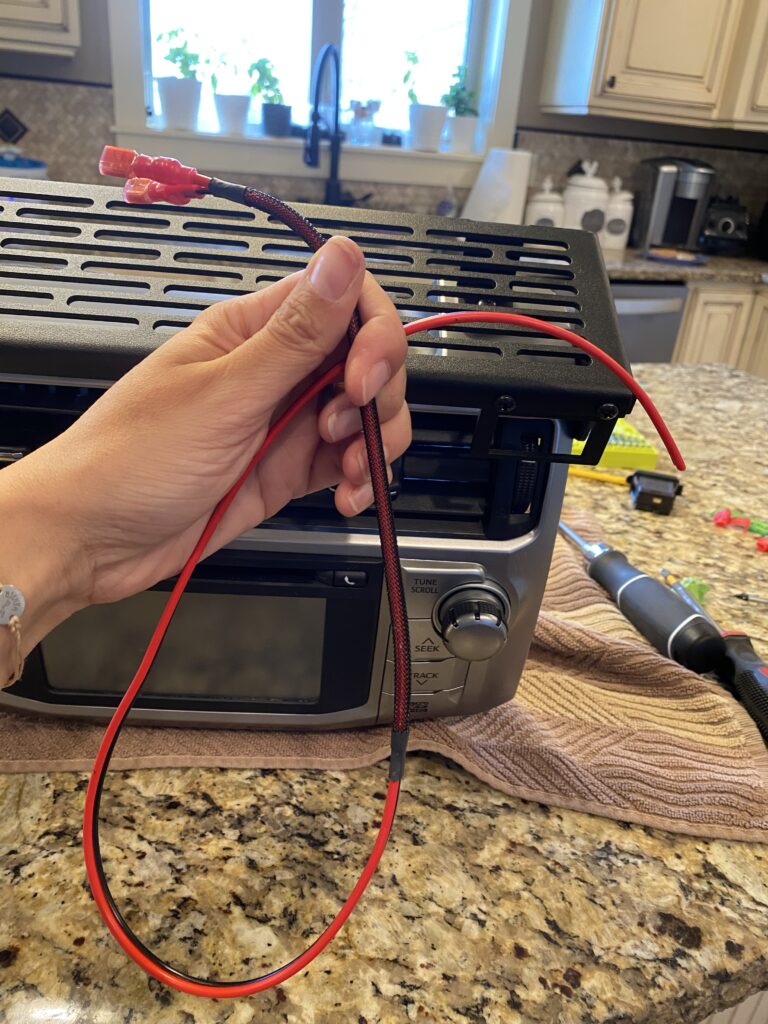


Add the grommet, if desired, and feed the wires through.

Plug in the USB charger wires. Red is positive and black is negative.

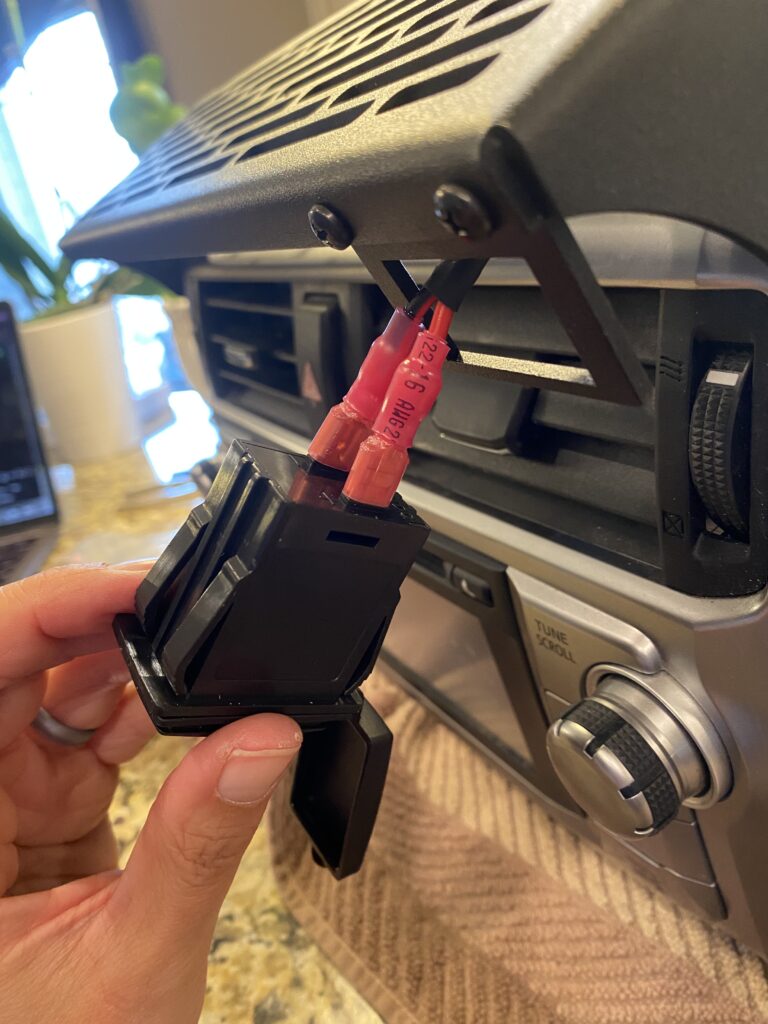
Slide the charging unit into the hub and press firmly until it clicks into place.
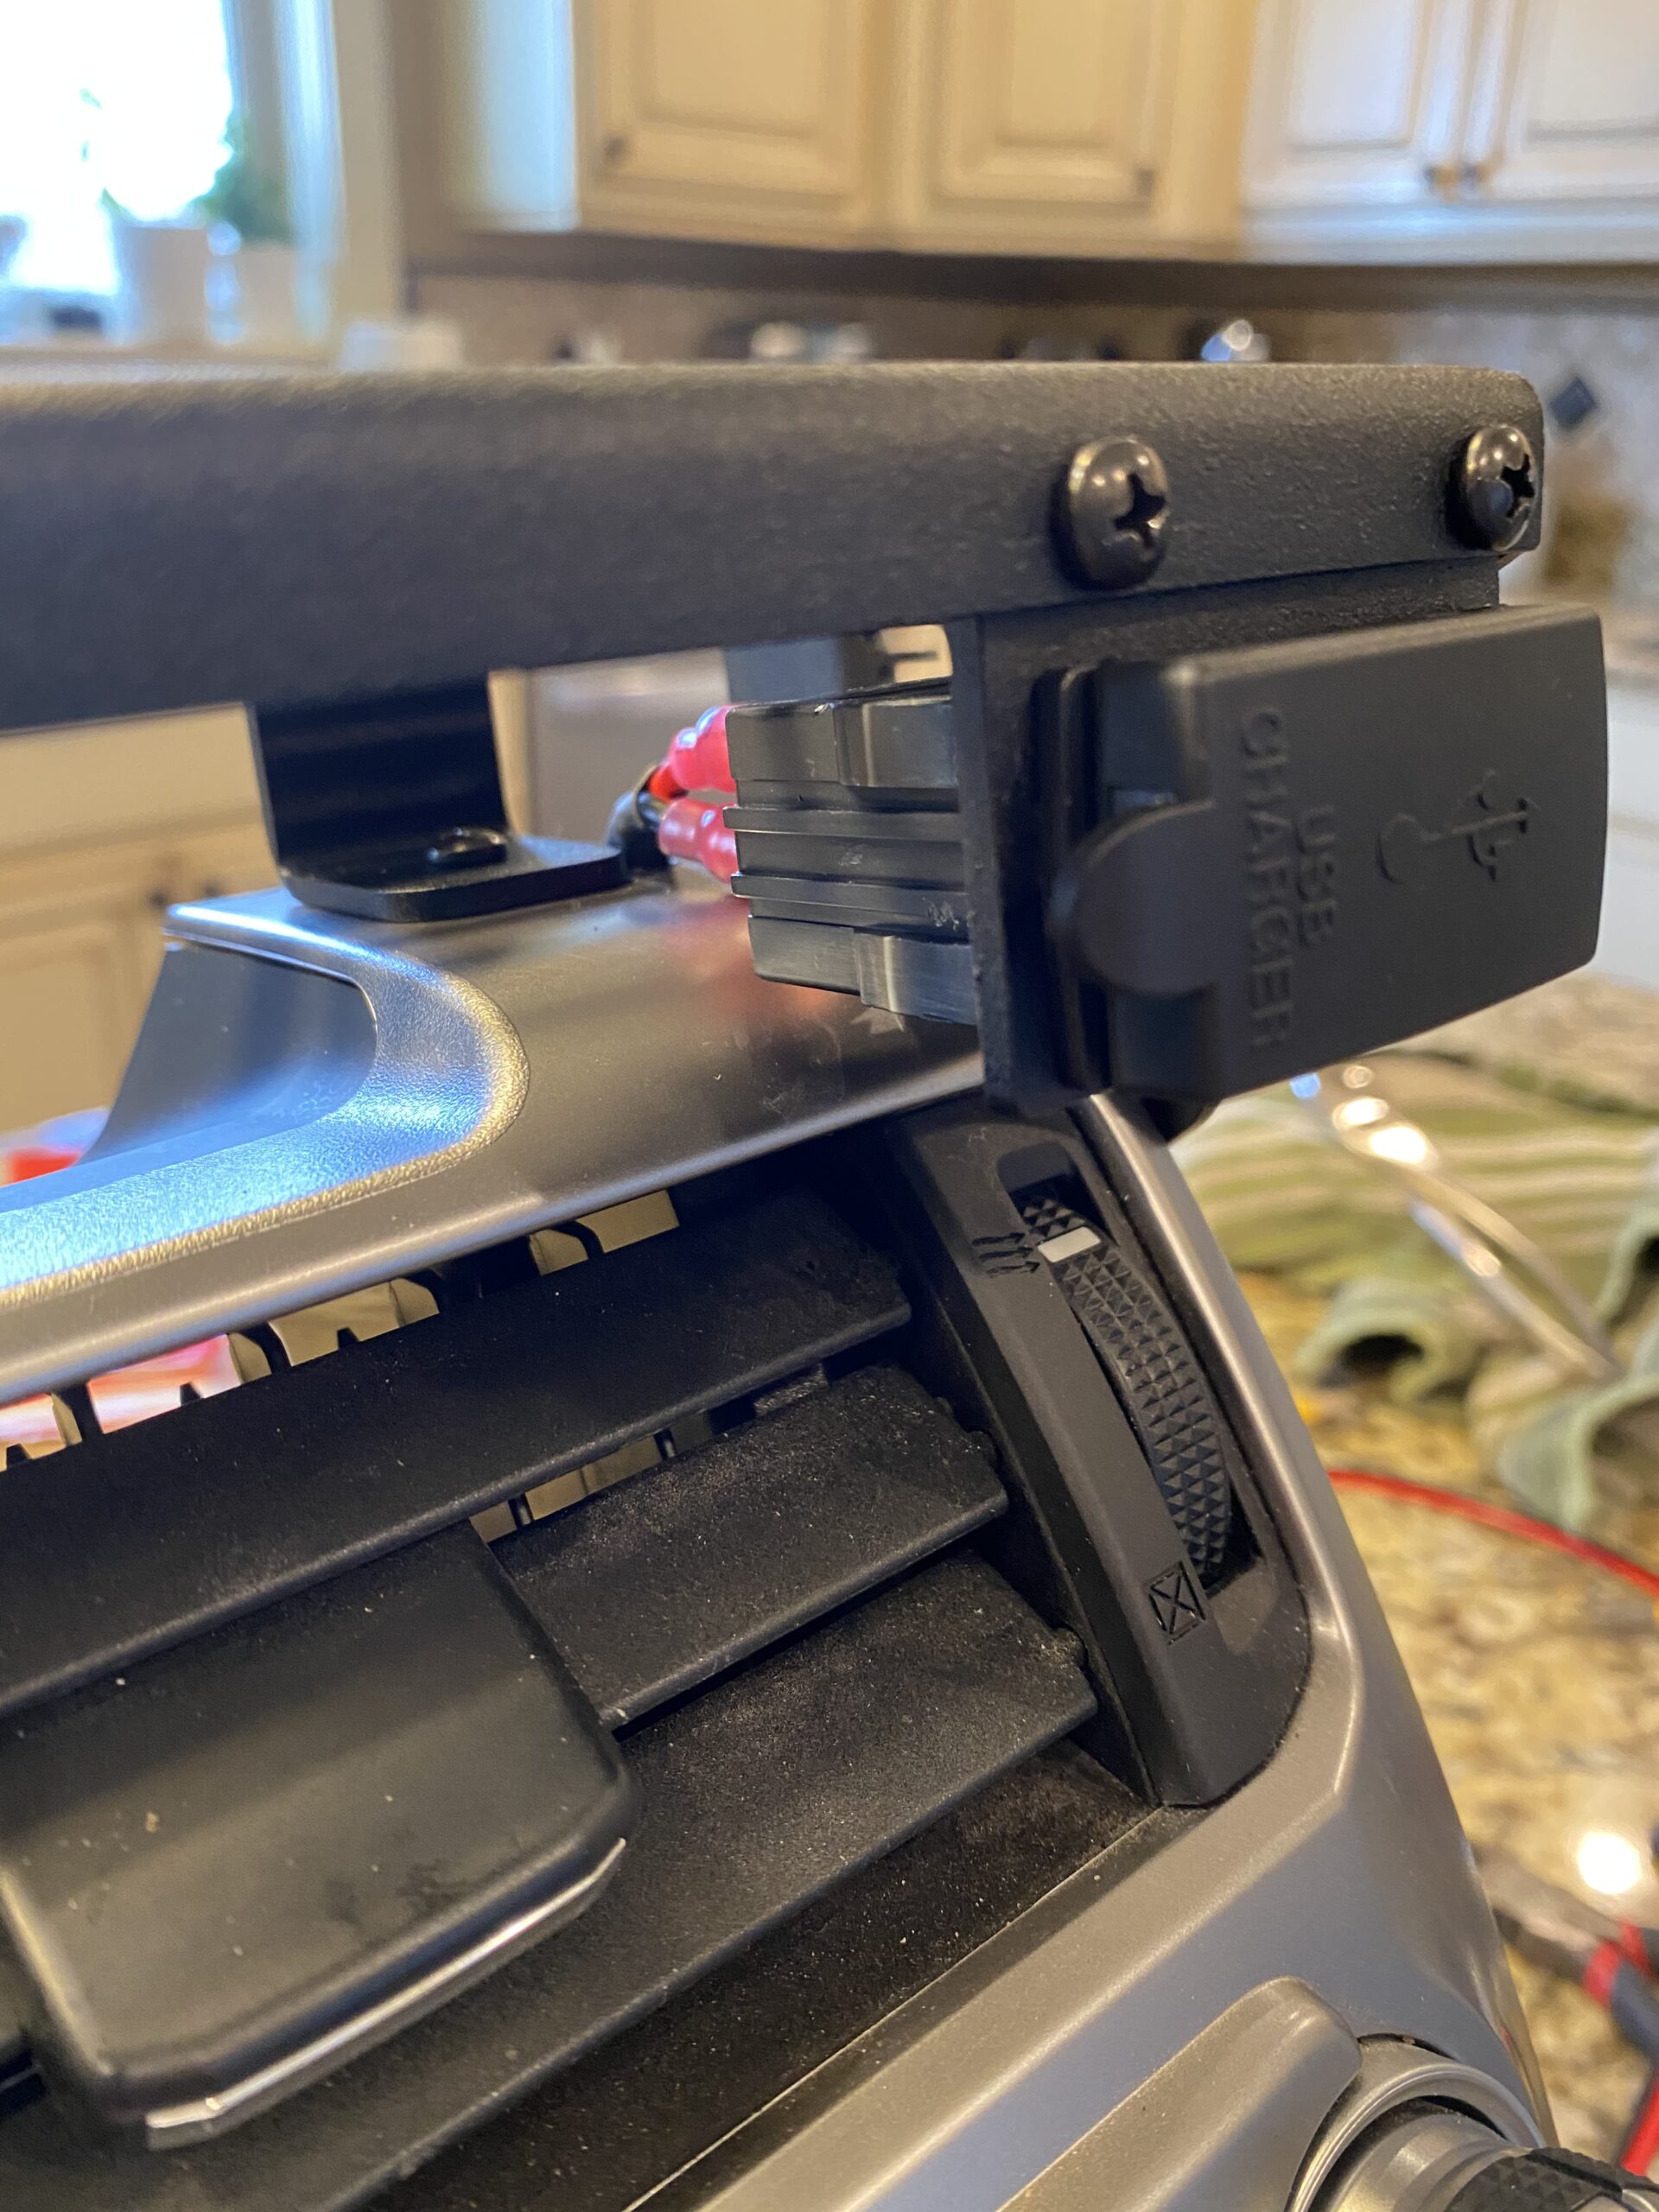

Now you’re ready to put the whole thing back in your vehicle.
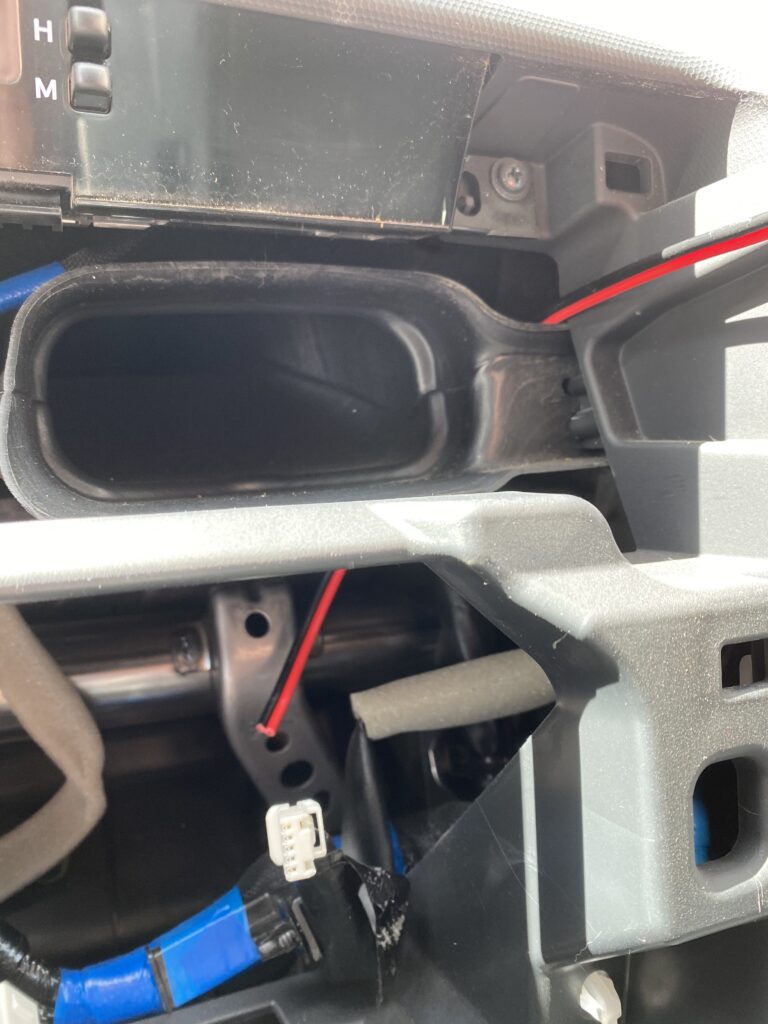
Step 11 – Route USB charging wires and connect connectors
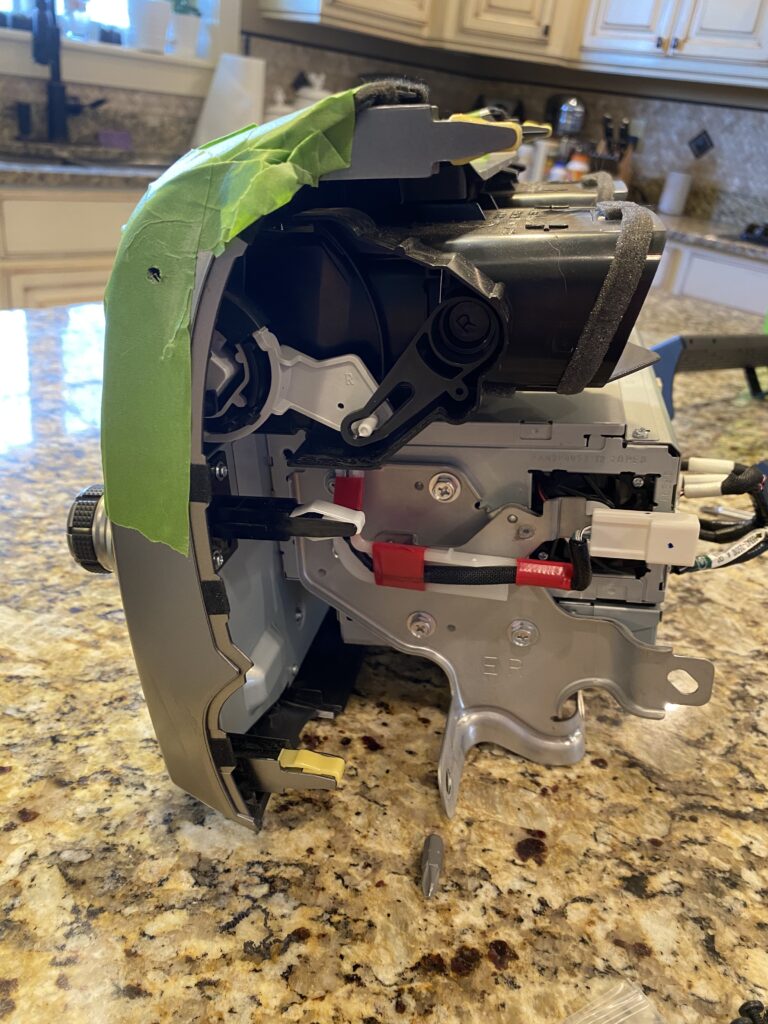
Route the USB harness wires up and over the back of the AC vent and down toward the 12V socket (your cigarette lighter).


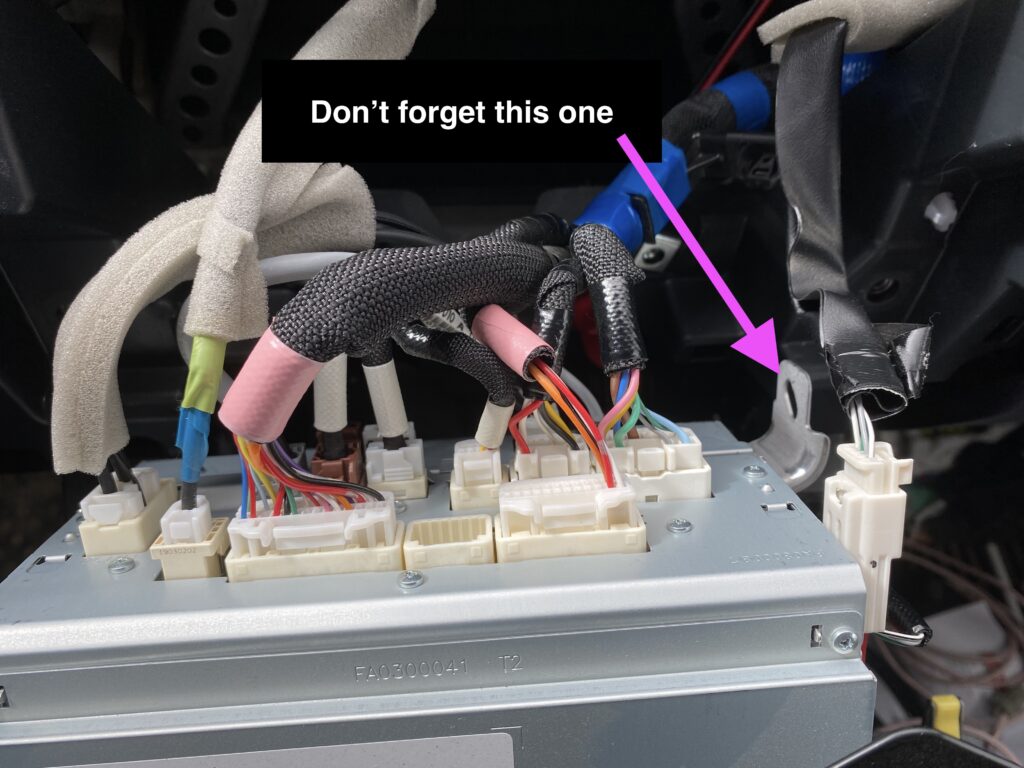
Reattach all of the connectors as well as the retaining clip on the right. If you need help remembering where each one goes, check out the net picture. Most of the connectors will only fit into one socket.
Step 12 – Re-install radio bezel
Loosely place the radio bezel back into position, lining up the retaining clips. You can see the end of the USB charging harness wires attached to the red clip in the picture below on the right.

The sides of the unit will need a little help fitting back into place. Gently press the sides of the bezel inward with a straight trim tool or a with a plastic spackling knife. Be careful here not to scratch the sides of your dash. You will hear a click when the retaining clips engage. The image below shows a screwdriver pointing to where you will need to add pressure.
Replace the 4 bolts you removed earlier to take the bezel out.
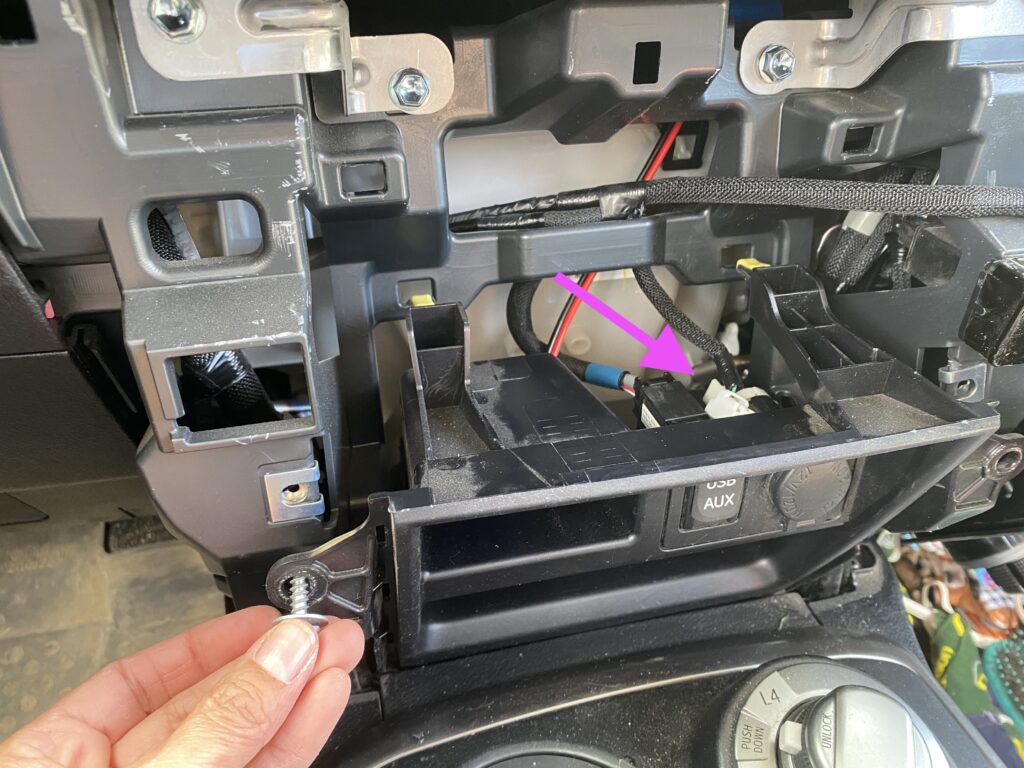
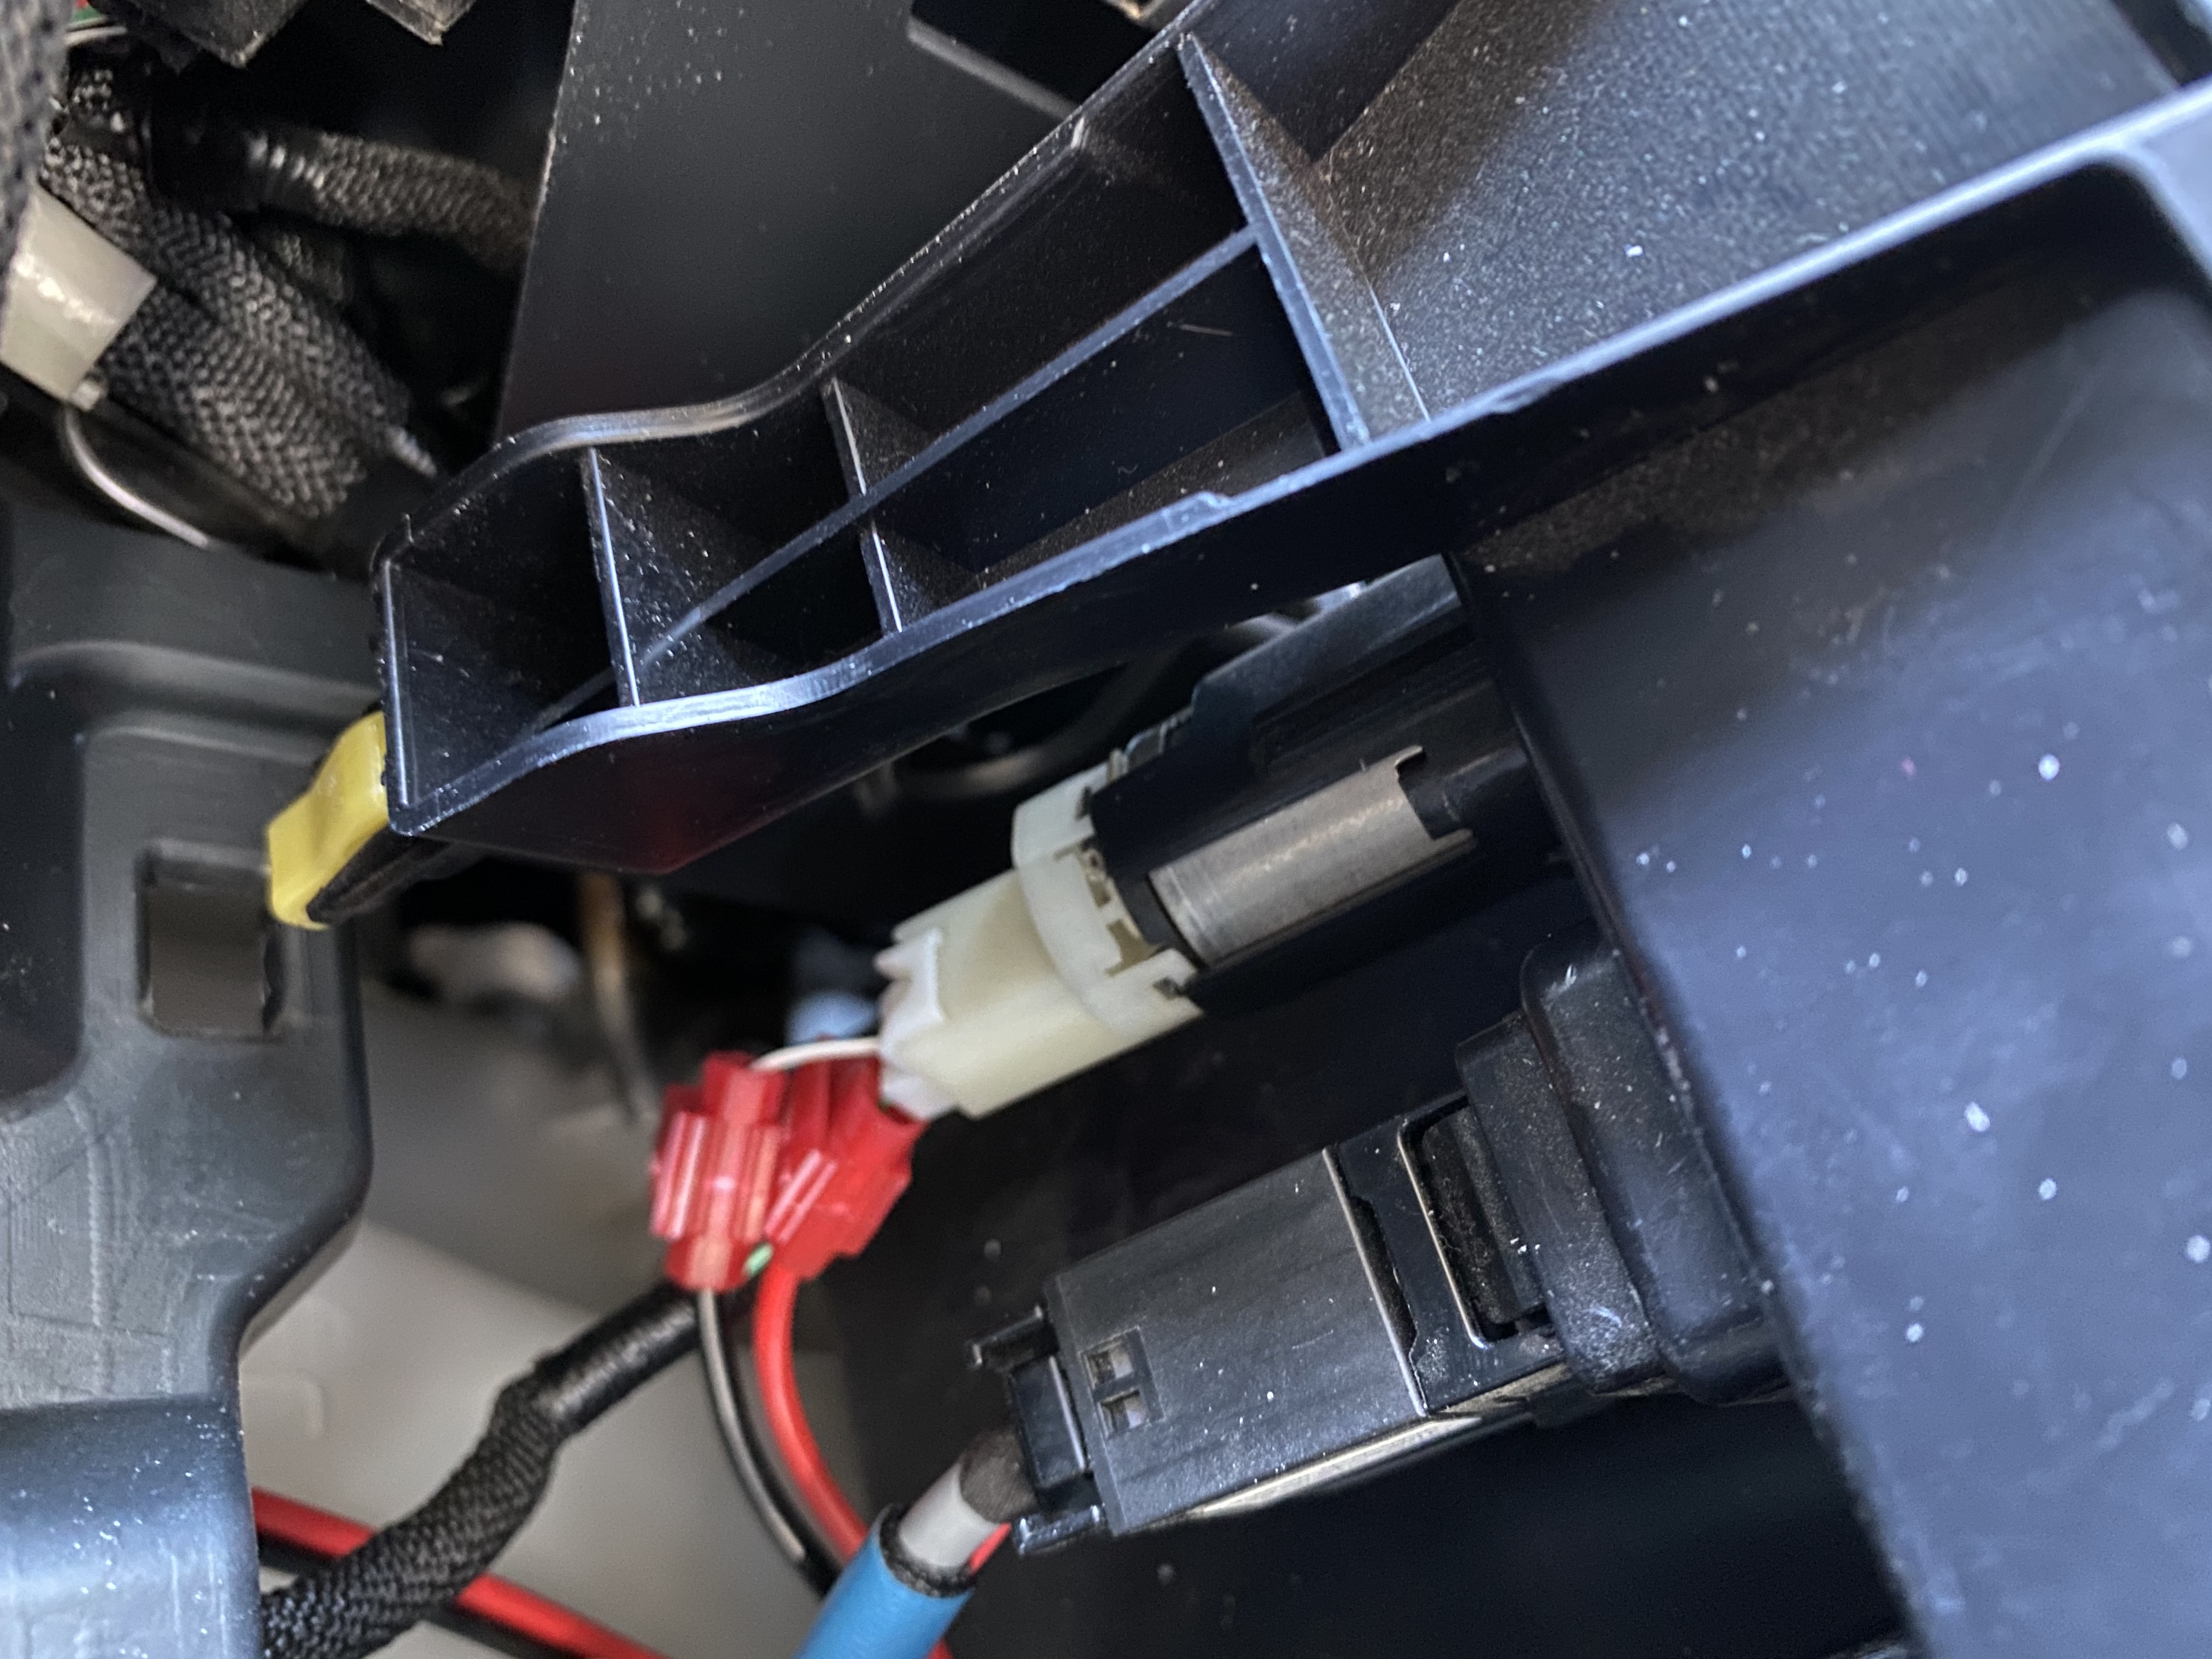
Step 13 – Connect the USB charging harness to the 12V socket
First, you need to remove the 12V socket connector (cigarette lighter), shown by the arrow below.
This was a tight fit and I had difficulty getting to it. If you need more space, you can remove two screws like you see me doing in the lower left of the image. Then the panel will angle out toward you. It’s one more step but then you have easier access.
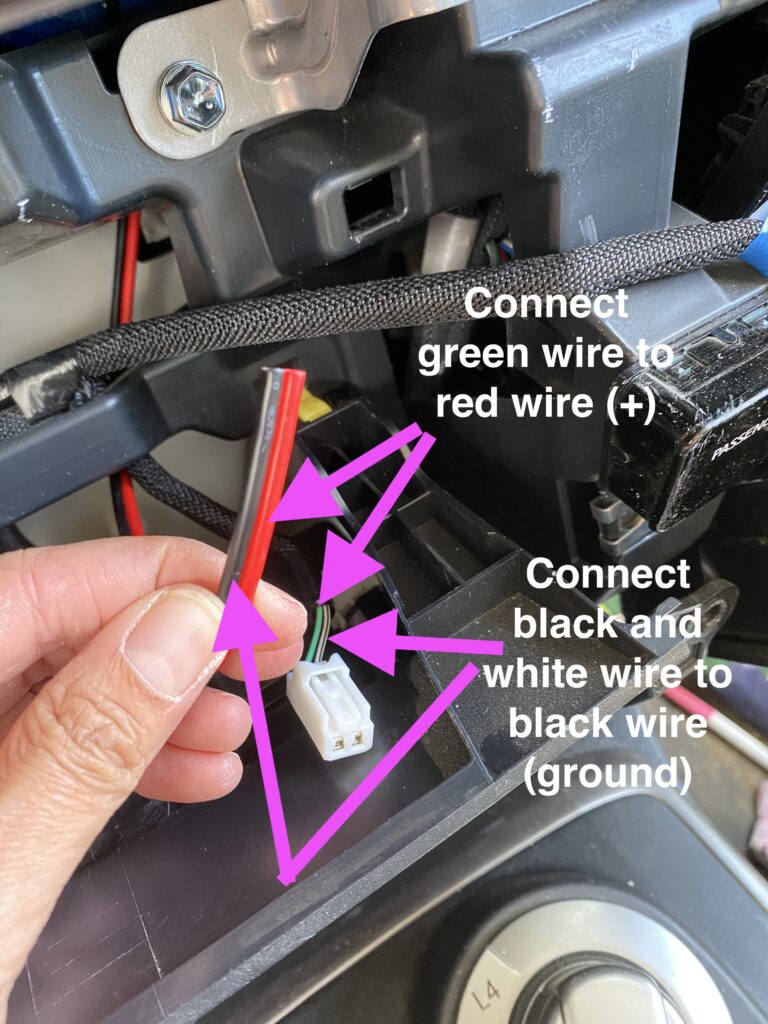
Now you can connect the USB charging wires you routed through the back of the dash to the 12V socket wires.
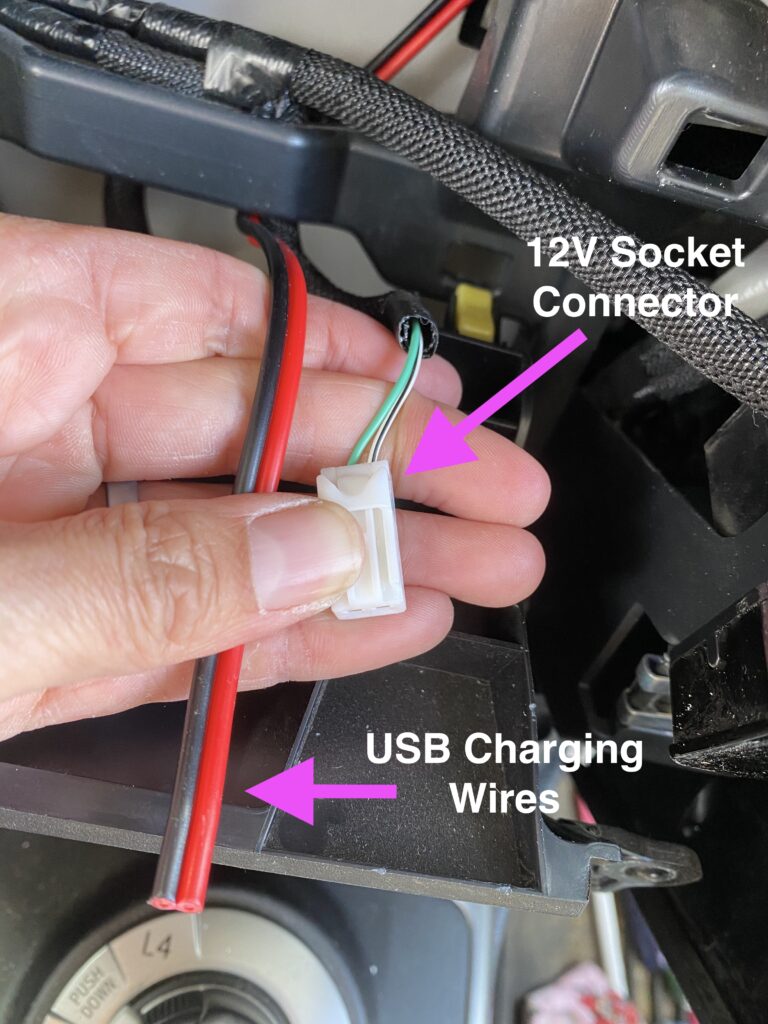
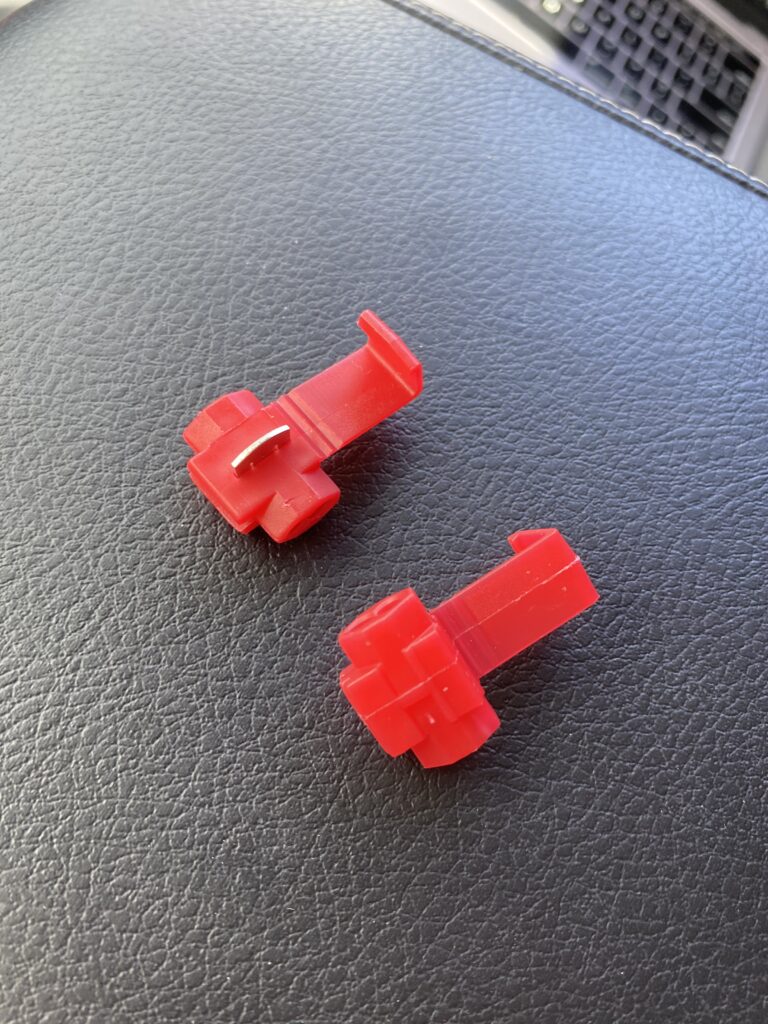
The kit includes wire taps, or quick splicers, to connect these wires without soldering. This is really easy to do and helpful to learn if you haven’t done it before. The picture below shows the splicers.
You’re going to connect the red wire of the USB to the green wire of the 12V, and the black wire of the USB to the black and white wire of the 12V. I’ll show you how to do this using the splicers next.
| USB Charging wires: | 12V socket wires: |
| Red wire | Green wire |
| Black wire | Black and white wire |
First, separate the ends of the USB wires.
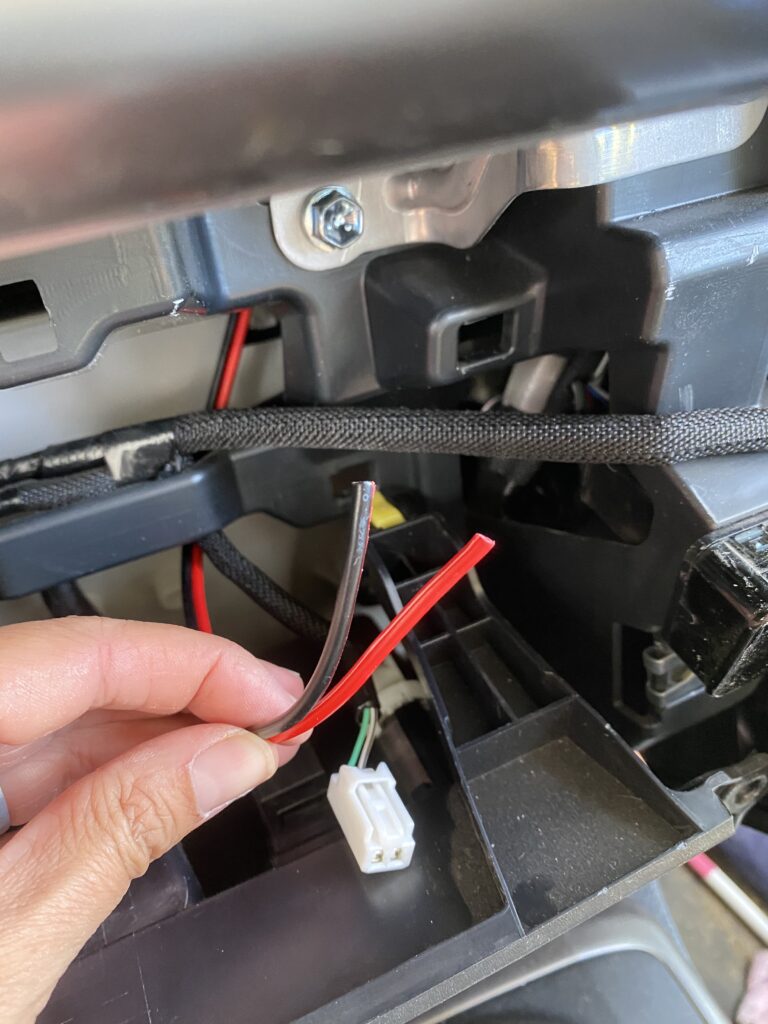
The splicers have two chambers, one for each of the two wires you want to connect. Place each wire into its separate chamber, along the length of the splicer. The clean-cut end of the USB charging wires will go into the side that doesn’t allow them to go all the way through. If you look inside the splicers, you will see what looks like something is blocking one chamber. The 12V wire will go in the other chamber.
Then close the splicer and gently clamp it with pliers, so the metal tab is pushed inside. This will cut through the two wires and clamp them together to make the connection. Once the connection is made, gently tug on both wires to be sure they are securely attached.
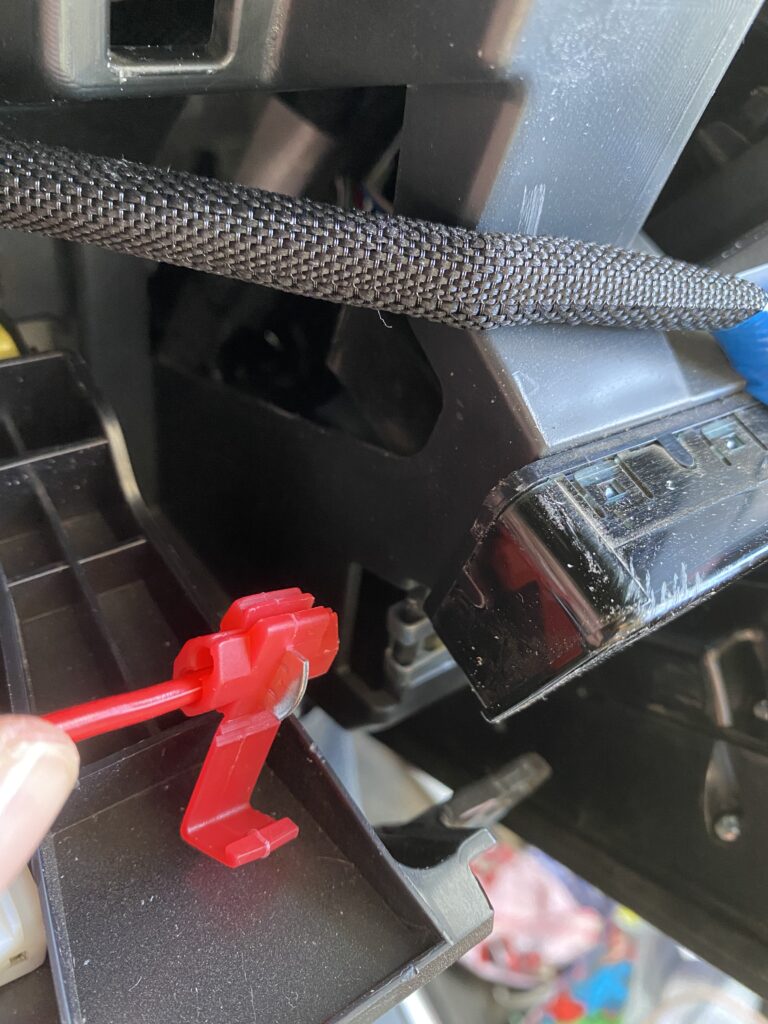
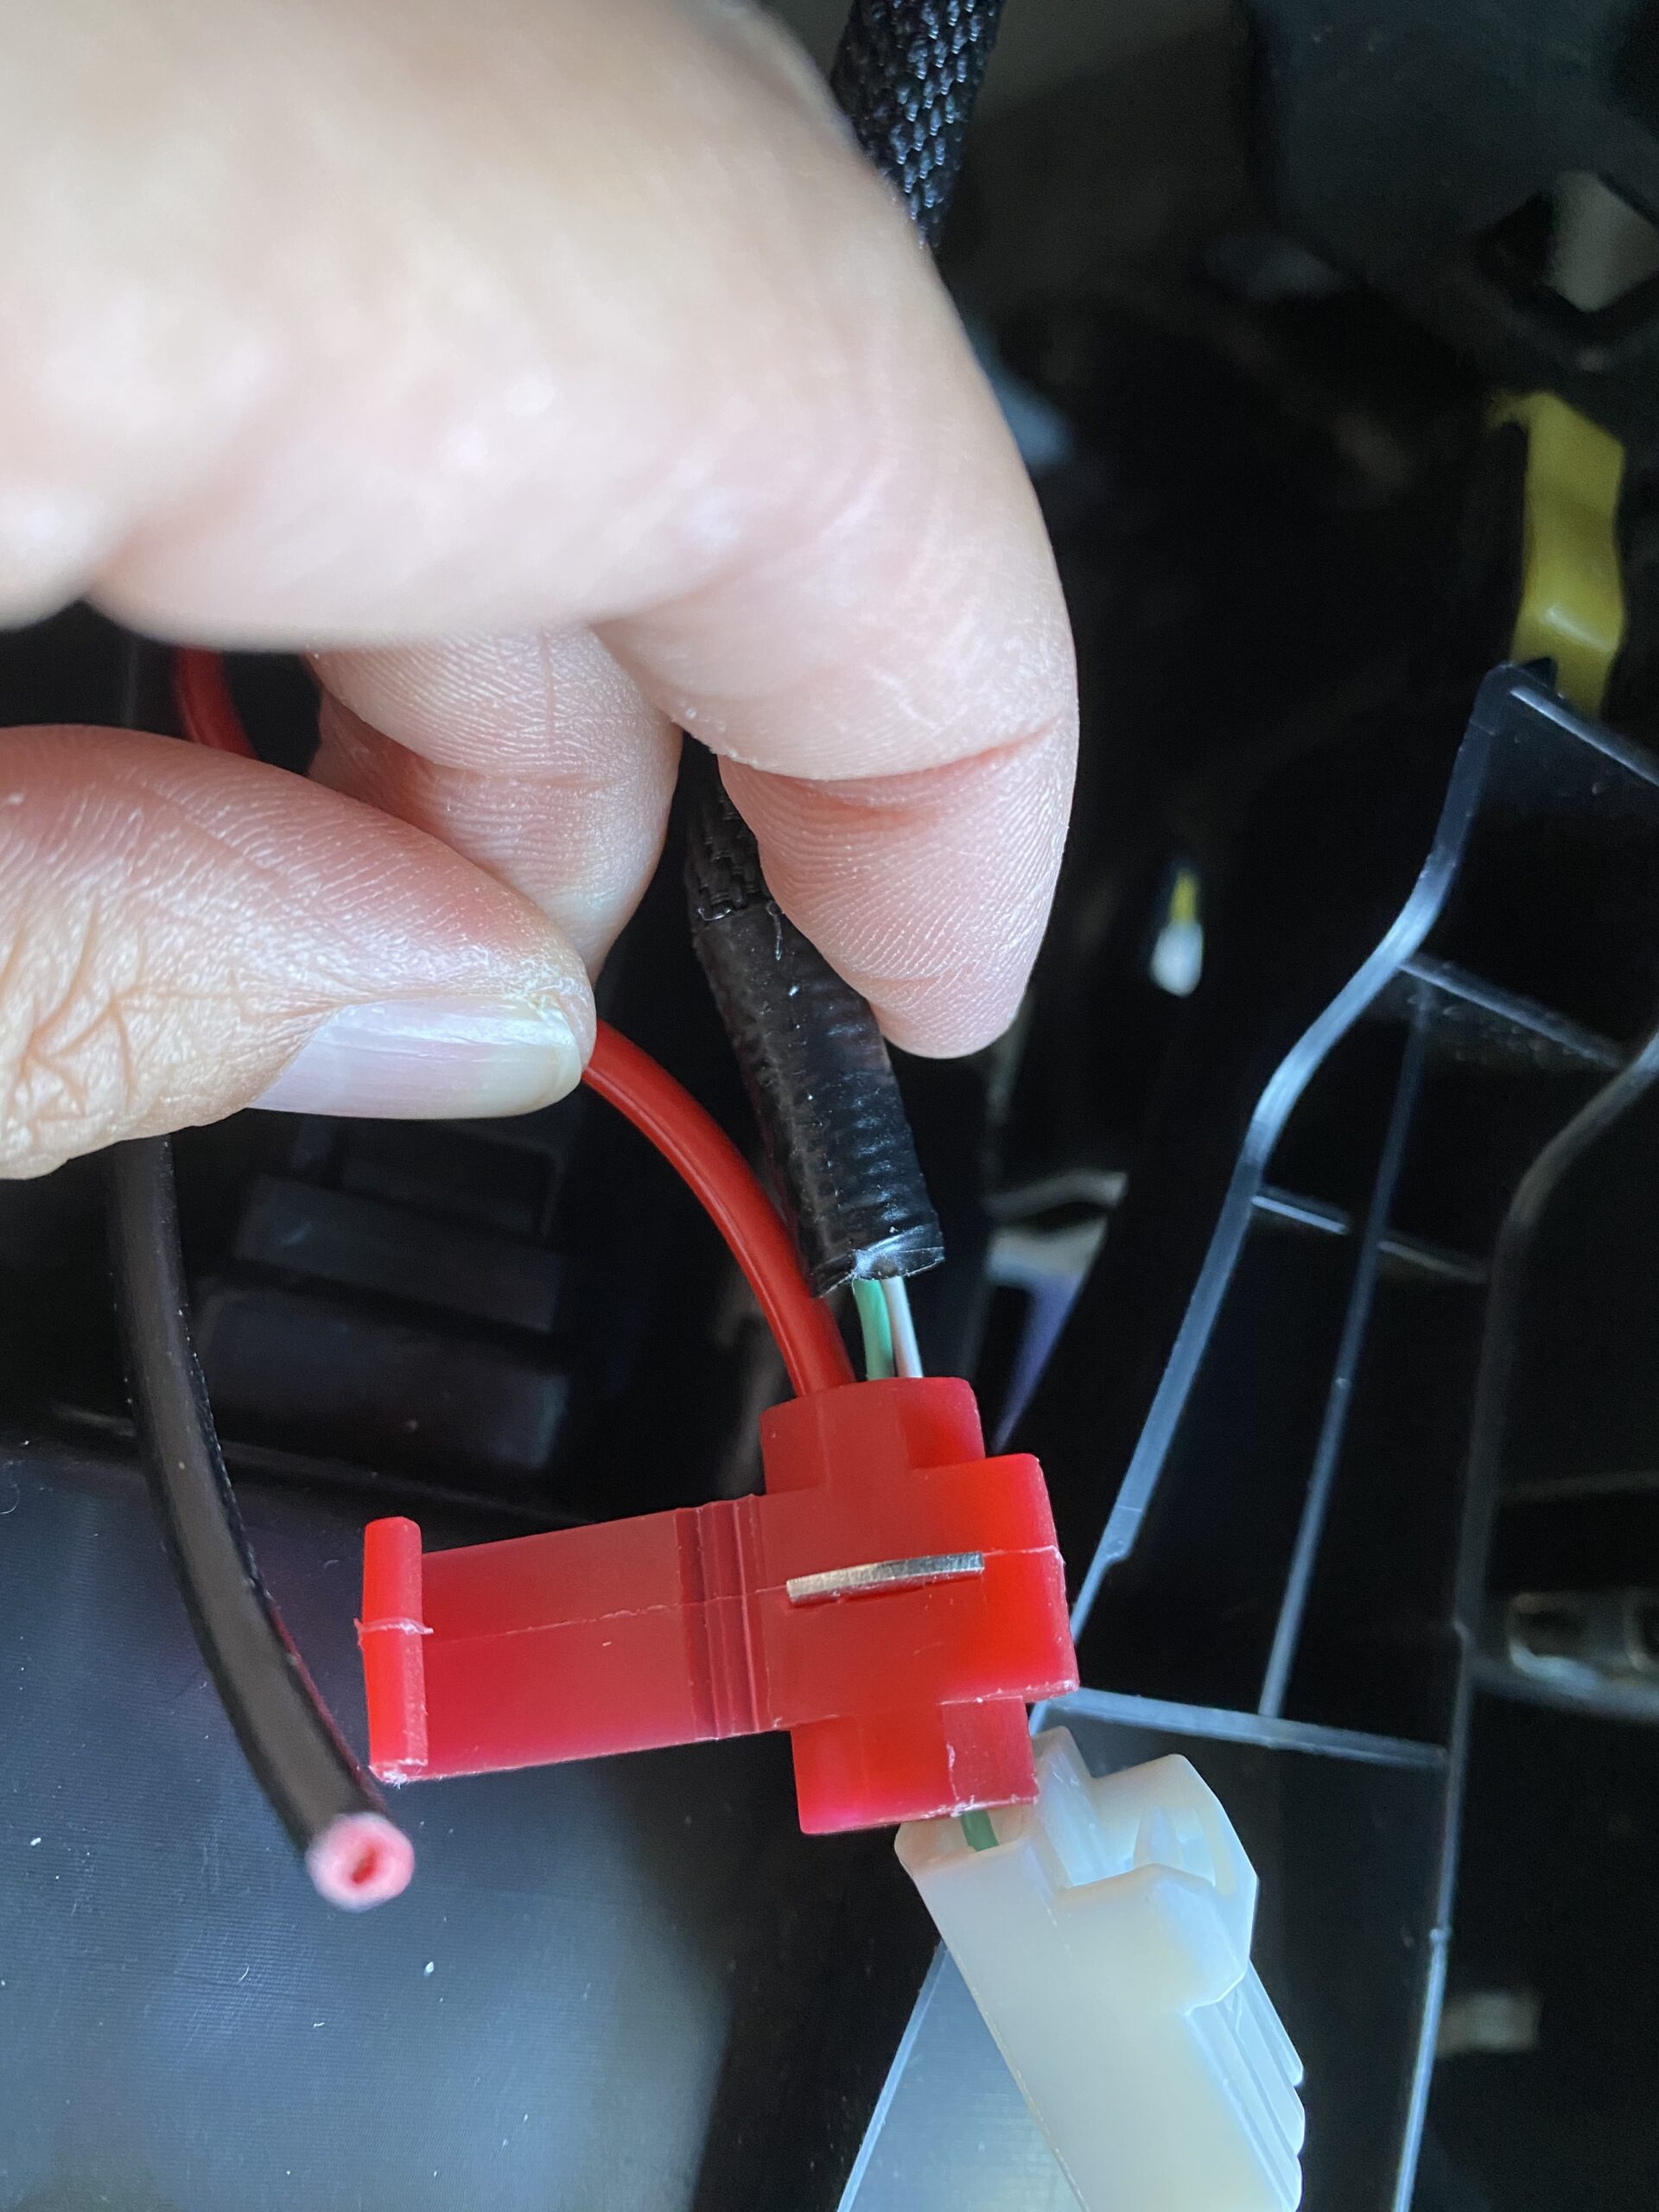

Repeat this process for both the red and green connection and the black and black/white connection. Then plug the 12V connector with the newly attached wires back into the 12V socket. (Replace the bottom panel and screws if you took them out to make room).

Test the power before moving on. You’re almost there!
Step 14 – Replace the AC knobs and trim panels
They click back into place if you guide them in and push.


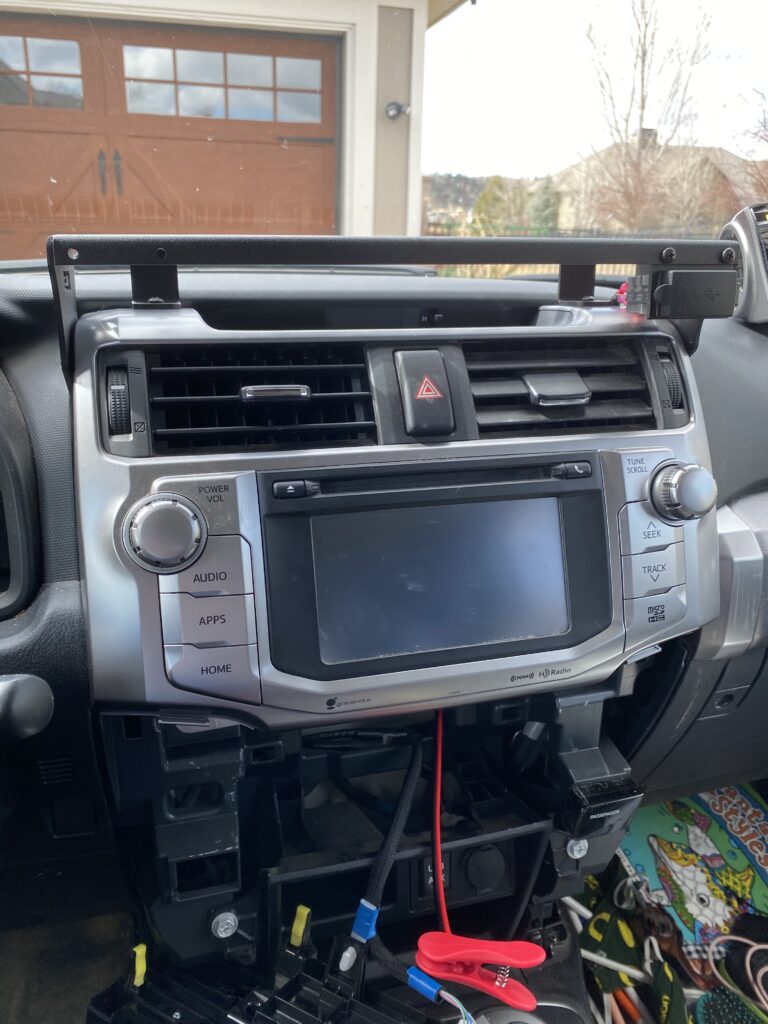
And you’re done!
Well, except for adding your accessories, of course.
Step 15 – Add your gear
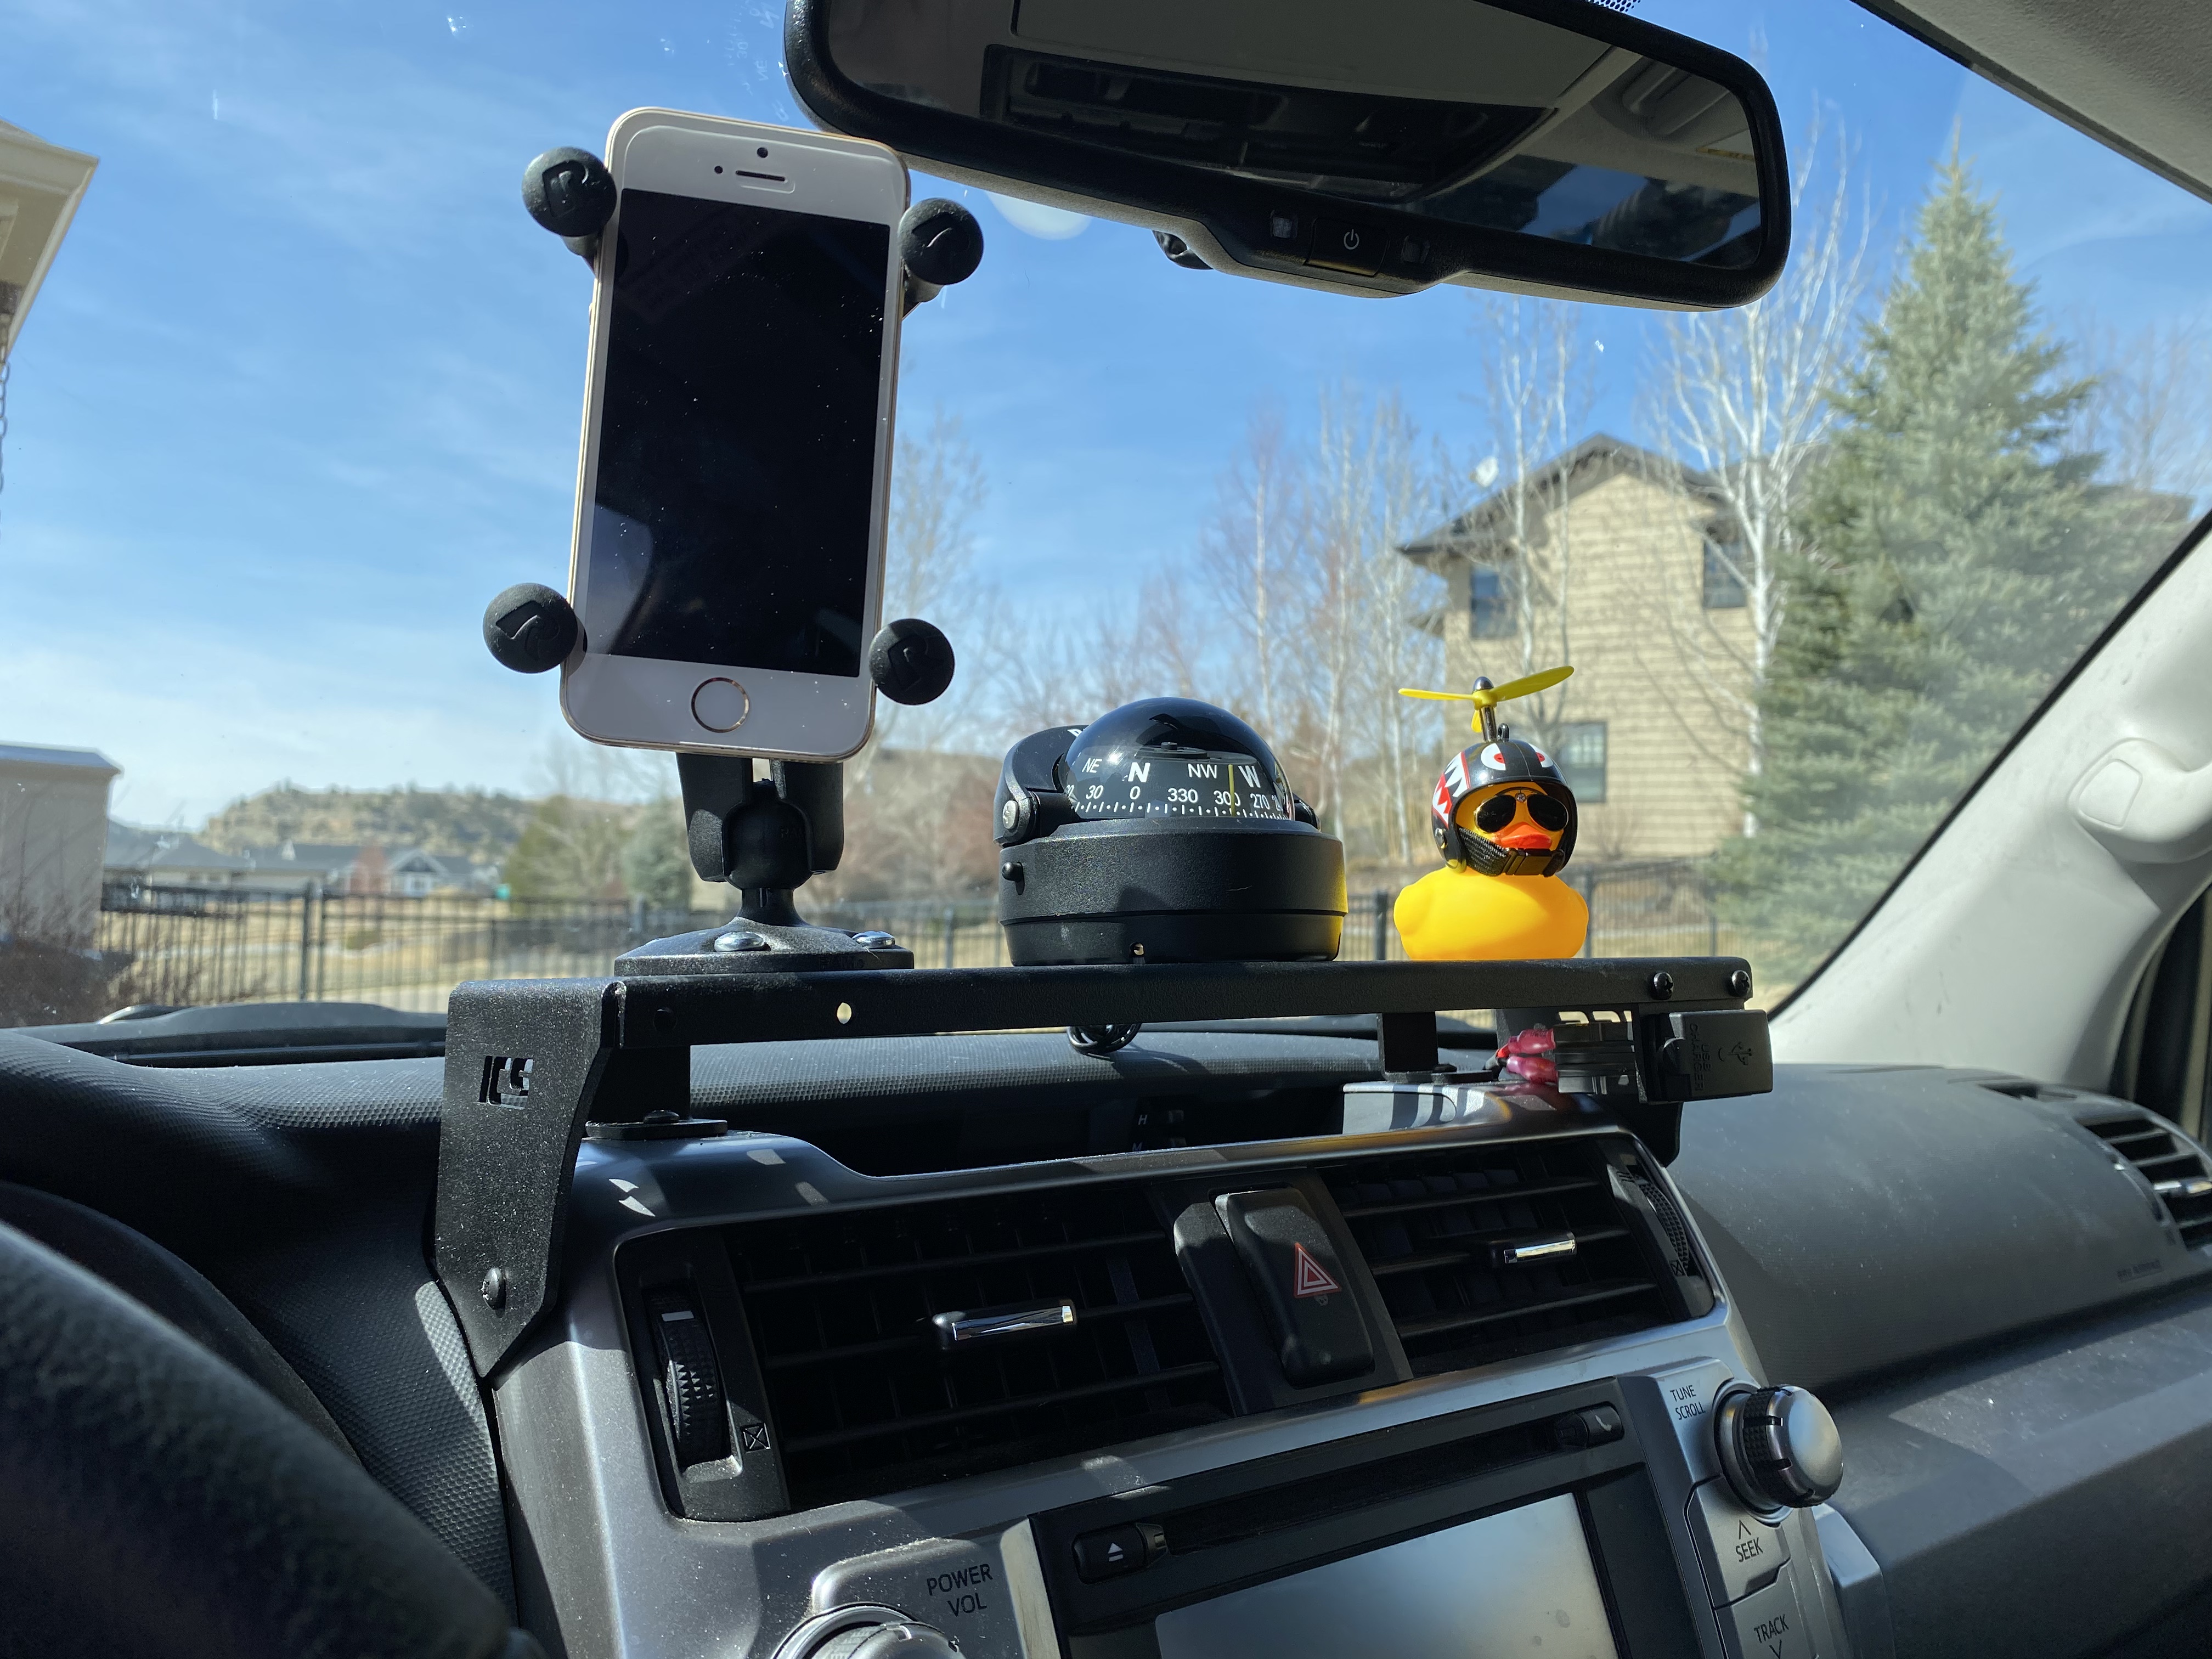
You can clamp anything you’d like to the dash mount. Phones, ipads for larger maps, GoPros, Harold (the cool duck below, named by our 10-year-old son). I drive over some pretty rough roads and this thing is solid!
This is the video I followed from ICS Fab to install:
I hope this helps if anyone else is working on their own dash mount install. The video is great but sometimes seeing the pictures and reading an explanation can help too.
This is one of many projects I’ll be doing with the 4Runner. I have a lot planned for both the inside and outside. Stay tuned for future updates.


You May Also Like

Mudroom Makeover: Part 2
How to Set Up Your Raspberry Pi 4