

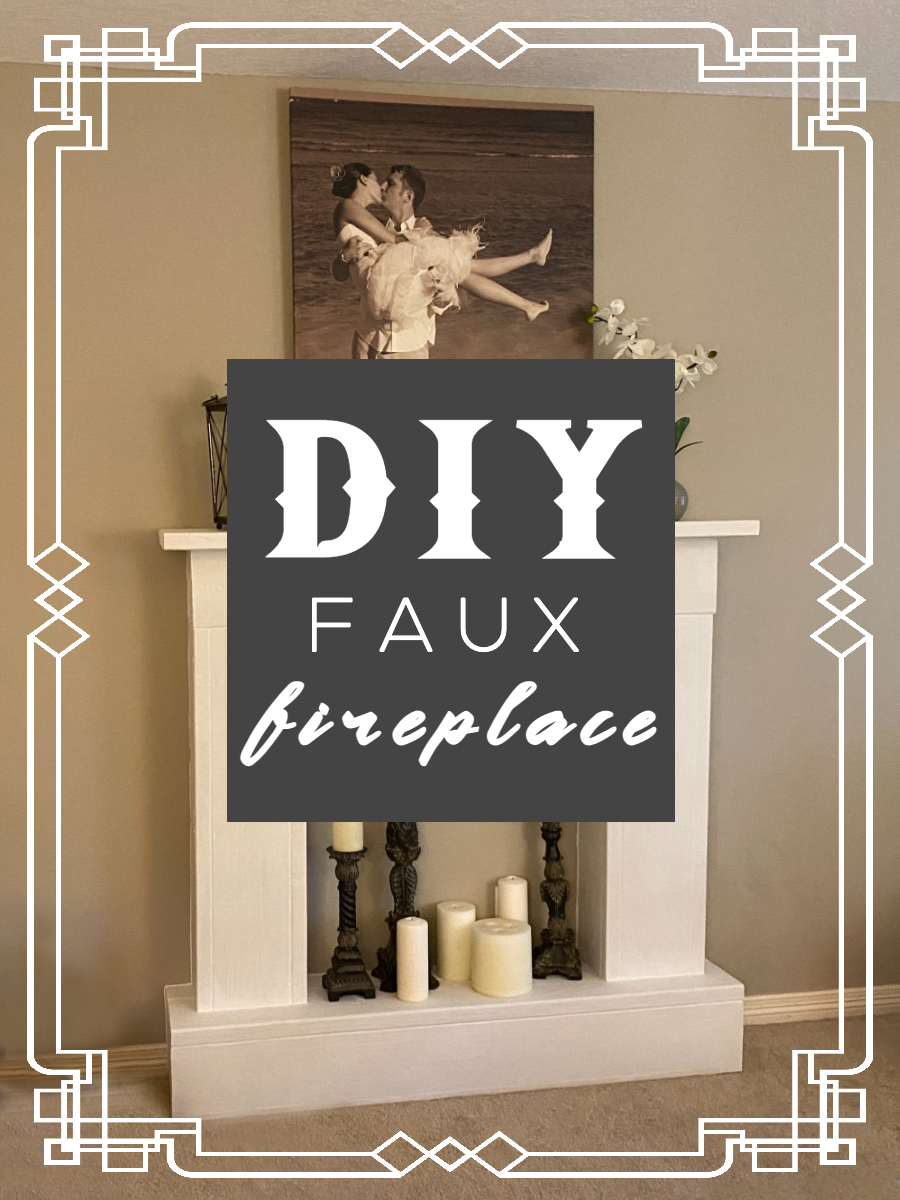
Make Your Own Rustic Faux Fireplace
One day, while scrolling through Pinterest, I came upon an idea.
Any time a sentence starts with scrolling through Pinterest, you know there’s a project coming. I have to be careful with that site- it can be dangerous! Whenever I think of Pinterest, I remember this quote from comedian, Adam Norwest, that never fails to make me laugh:

So what idea did I find?
A faux fireplace!
We have always liked when we’ve stayed in hotels with fireplaces in the room. I love cozying up under the covers with a good book and a fire crackling beside me. We’ve discussed many times how nice it would be to have one in our own room at home. However, our older home and uneven heating meant that our room was already warmer than we would have chosen. Adding a fire to that would only make matter worse. It’s not quite the same cozying up to a fire when you’re already steaming.
I had never considered a faux fireplace before. What a great idea! We could have the fireplace without the heat. It could be decorated with candles in, or even have an electric insert for effect. In our room, there was a long, empty wall in front of our bed that was just calling out for a centerpiece and I knew I had found it.
Upon researching, I found quite a few tutorials from people who had this same idea. I was having a Golidilocks problem though. Every one I found was either too big, too small, or just not quite what I wanted.
Time to hit the drawing board:
I measured our space and figured out what size would fit best. Next, I looked at the scrap wood we had in our garage to see if we already had materials that would work for this project. Then I began designing.
Here’s the plan I came up with, but one of the nice things about DIY is that you can make yours to your own specifications.

This turned out to be an easy project overall. More time was spent planning dimensions than on the actual build. I did end up using scrap wood and supplies we had in our garage. Often, I try to use what we already have rather than buying more supplies. If you are ever reading my DIY posts and wonder why I used something that seems a bit ‘funny’, it’s probably because I was trying to make do with what we had rather than heading to the store.
Supplies:
- Lumber – We used 2×8’s because that’s what we had in our scrap wood pile.
- Screws or nails
- Corner braces for base
- Drill
- Saw – We used a circular saw.
- Sandpaper
- Measuring tape
- Eye protection
- Pencil
- Caulk
- Paint
- You also may need an oscillating mutli-tool, utility knife, large flat-head screwdriver, and/or a small crowbar for removing existing molding.
What I wish I would have had for this project:
- Kreg Jig – I’m planning on doing a separate post about this. I can’t believe I just discovered this tool! It makes pocket holes to join wood, which makes for both stronger joints and hidden screws.
The 2×8’s I used made for a sturdy fireplace but they were unnecessarily big and heavy. I only used them because we had them on hand. If you’re buying lumber specifically for this project, I would recommend thinner wood. You can use any size boards you want and change the dimensions accordingly. In fact, if you need help figuring this out, feel free to write me. The planning process is one of my favorite parts!
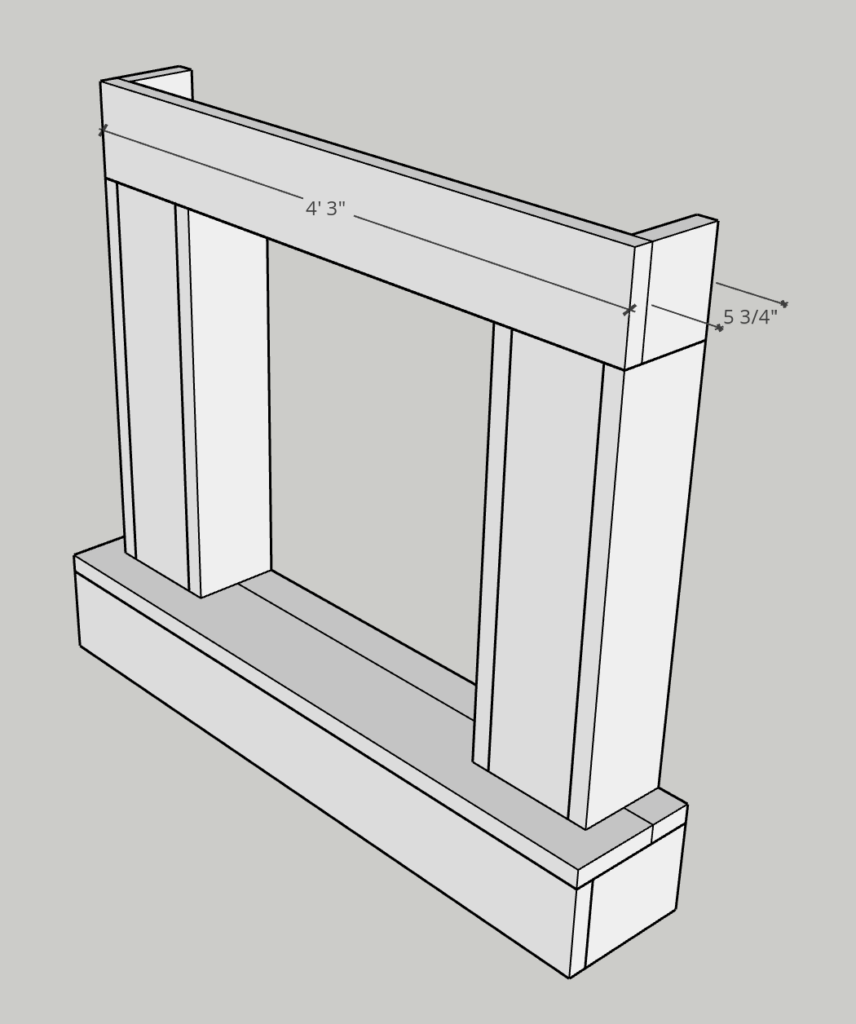
Step 1 – The Base
Before I began planning, I decided that I wanted the finished fireplace to be about 4 feet tall and between 4-5 feet wide. This is what I thought would fit best in the space we had. All of the dimensions stemmed from this and the fact that I was using all 2 x 8’s and a couple of 2 x 4’s. Your fireplace can be any size you would like.
I wanted the base to be wider and longer than the center portion with the opening and columns. I decided on 4’8″ long and 10-3/4″ for the depth (simply because I was going to use a 2 x 4 and a 2 x 8 side-by-side for the top of the base. You’ll see this part next).
I cut the boards and attached them using corner braces. This project was done before I learned about the Kreg Jig. I was going for a rustic look and didn’t need to worry much about sturdiness since the fireplace would also be supported by a wall. Overall, my screw method worked just fine. Even so, now that I know how easy it is to make joints with the Kreg, I definitely would have gone that way!
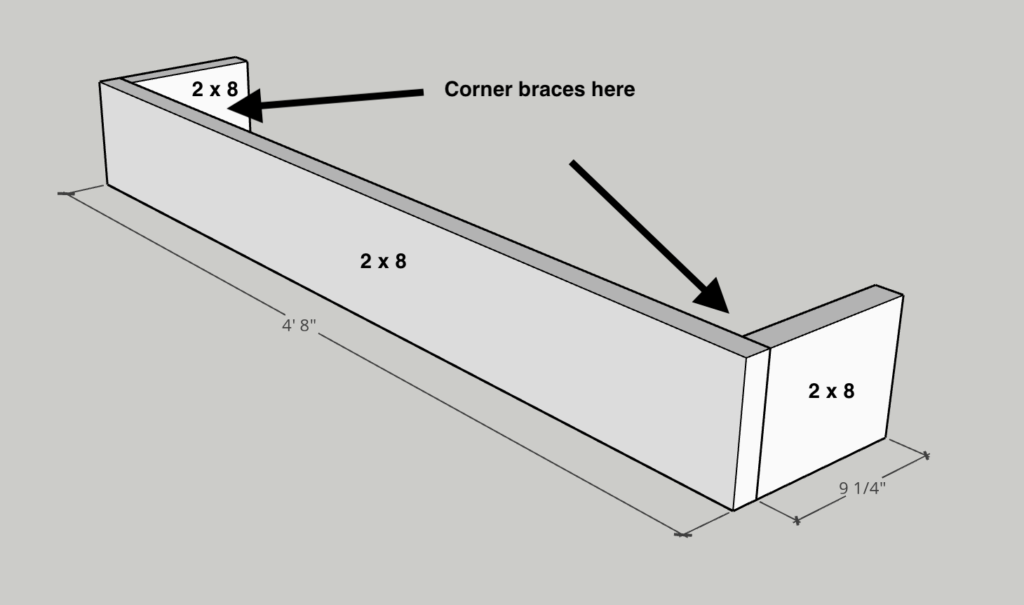
Don’t forget that the actual lumber size is different than what is called the nominal size. A 2 x 8 is actually 1-1/2″ x 7-1/4″ and a 2 x 4 is really 1-1/2″ x 3-1/2″. If you’re following my plan, that’s already been taken into account. If you’re designing your own, remember to figure this into your planning.
Next, I added a 2 x 4 and 2 x 8 for the top of the base. This dimension is why I chose 10-3/4″ for the overall base depth, as I was telling you about earlier.


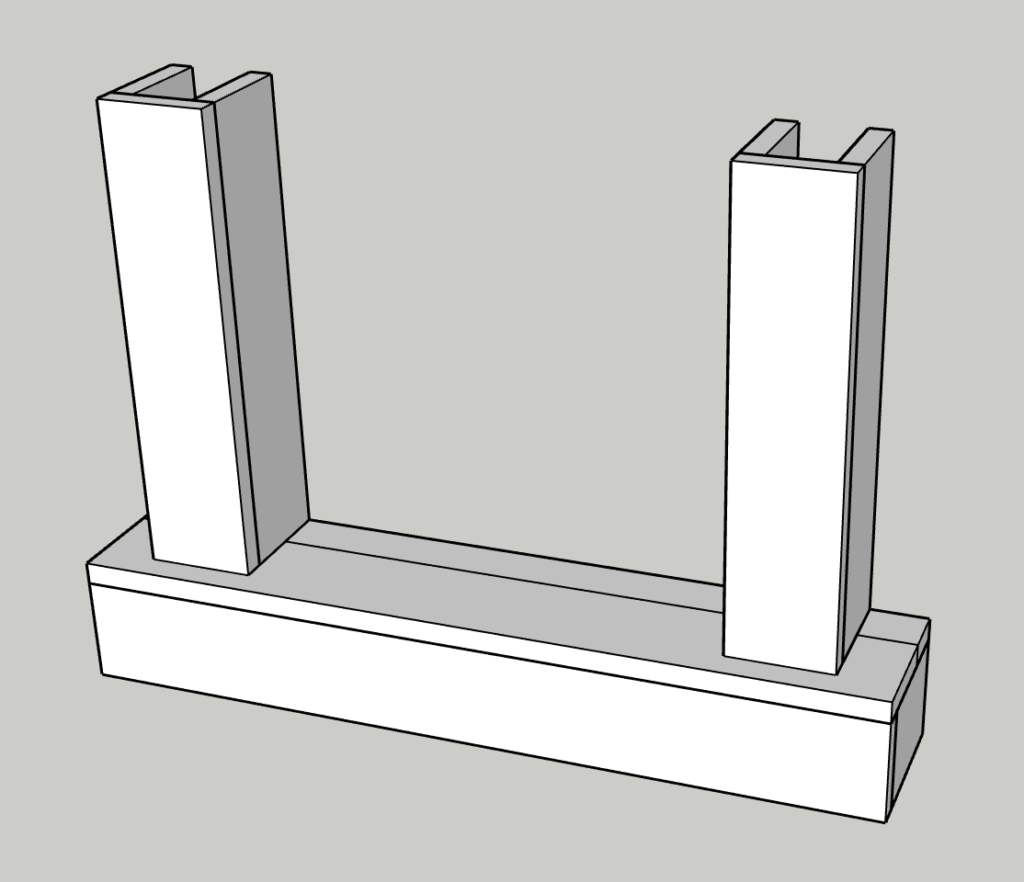
Step 2 – The Columns
For the columns, I cut 6- 2 x 8’s to 2’8″ with our circular saw and then screwed them together. I opted for 2’8″ tall for this part but here’s another place where you could easily modify your design if you want more or less height.
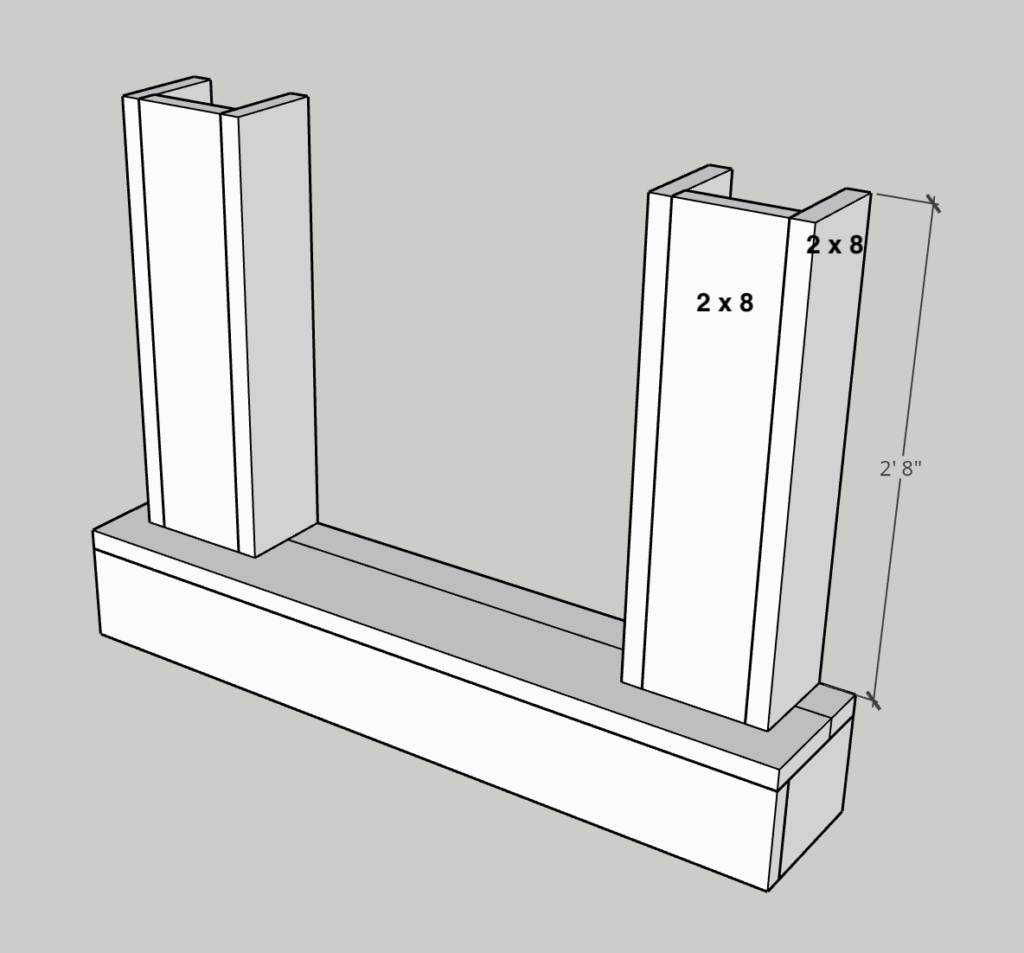
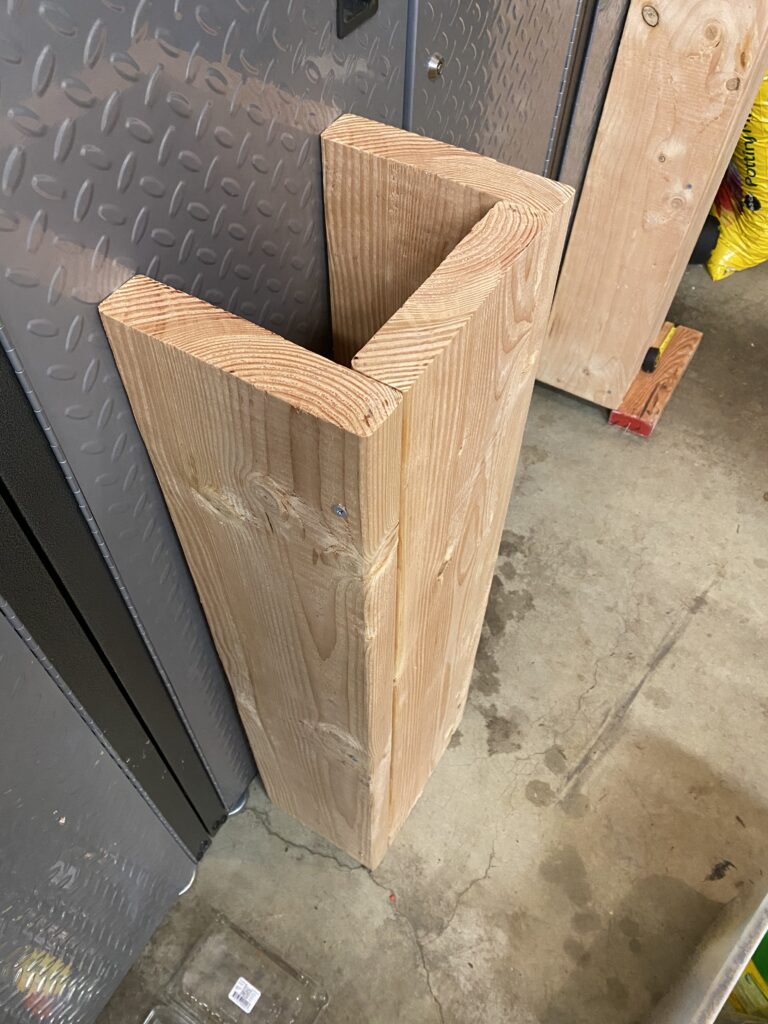

I decided to attach the column boards the way you see in the image above because I liked the look but you could easily make a narrower column as you see below. You could also make the opening narrower/shorter/taller/etc. That’s one of the best parts about do-it-yourself projects!
Step 3 – The Top Box
This is also made of 2 x 8’s. As I mentioned earlier, the entire project is 2 x 8’s and a couple of 2 x 4’s. You don’t need a top on this because you’re going to attach the mantle in the next step.
I left the underside open. I thought this might be a good place to hide lighting in the future. Can you imagine the glow of strip lights illuminating the space?
Step 4 – The Mantle
For the mantle, I used a 2×8 and a 2×4 side by side in the same way as I did on the base. It’s also the same length as the base at 4’8″.


Initially, I had planned on adding decorative molding to finish the fireplace. In the end however, I liked the rustic look that resulted and decided to leave it alone.
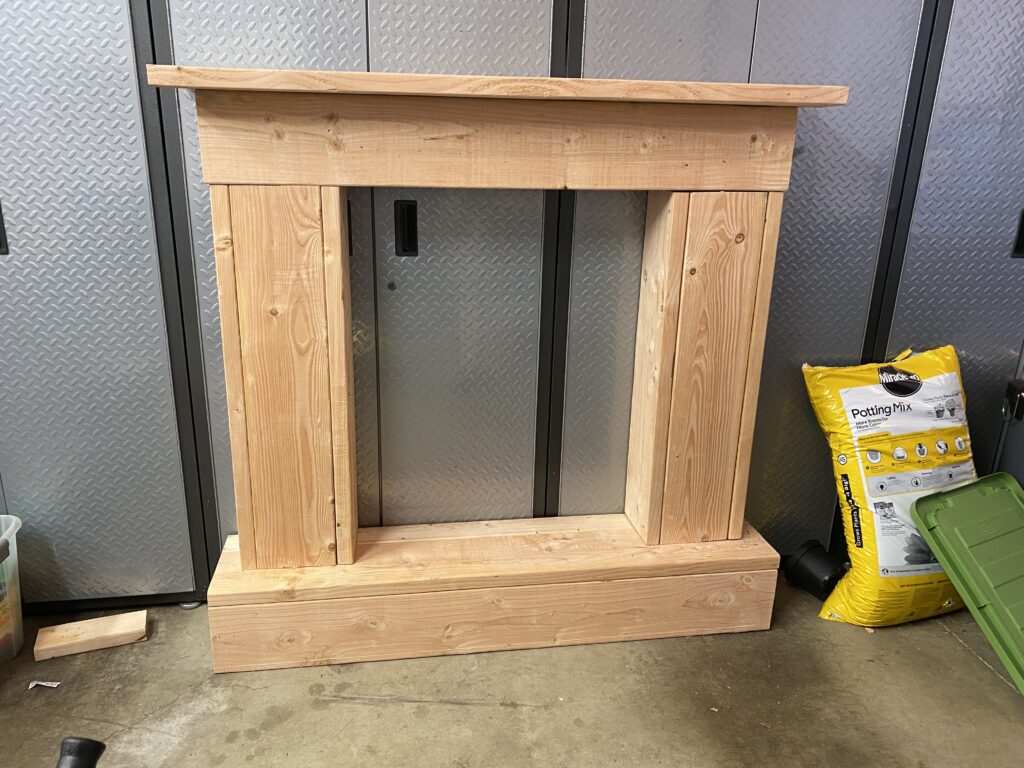
Step 5 – Putting it all together
Since the 2×8’s made this project quite heavy, I made the fireplace in parts and then brought it upstairs. The base, columns, top box, and mantle are all separate pieces. My plan was to attach them upstairs, but I decided not to so it would be easier to move in the future. This worked because with the 2×8’s, this thing was SOLID. If you end up using thinner boards, you might want to attach them together. (Note: I did secure the entire fireplace to the wall, so it couldn’t tip over). As you may have noticed from previous posts, we have climbers in the house.
Here are the pieces set together before finishing. Since I knew it would need more than one coat of paint, I applied one before taking it upstairs.

Step 6 – Getting it in place
I decided to make the fireplace look more like a built-in by cutting out the molding behind it. I measured where I wanted the fireplace and then used our oscillating multi-tool to cut the molding. Then I cut the caulk along the wall with a utility knife and gently pried off the molding with a large flat-head screwdriver.
After I had the molding cut out, I placed the fireplace in position. You could also add molding around the sides and front of your fireplace if you want it to look even more like a built-in.
I caulked all the seams of the fireplace and the places where it met the wall. Then I painted it white. It probably could have used another coat of paint but I was happy with having a more rustic result.
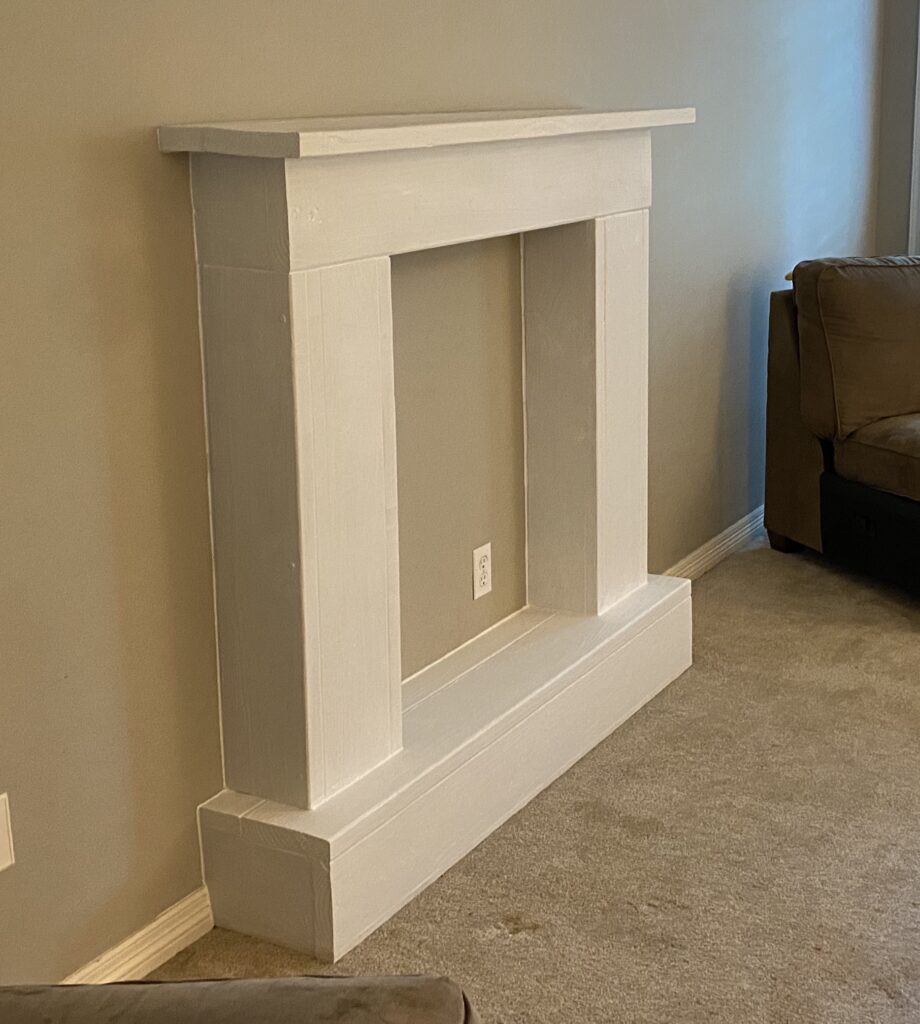
As I mentioned earlier, I left the underside of the top box open. See that plug in the picture? That’s where our strip lights will plug in to give our fireplace a cozy glow.

Step 7 – Decor
Time to play! You can decorate your new fireplace in innumerable ways. The options are endless and can be changed out with the seasons. In the image below you can see I’m trying out candles. I’m also thinking of adding a mirror to the back wall.

Another idea might be a different sort of backing like brick, metal, fake stacked wood, shiplap, or whatever you can imagine. You could even add an electric insert to your build.
Before you begin your own fireplace, I’d recommend looking online for ideas to figure out what styles you like the most. You could always try Pinterest, which is what got me into this project in the first place.
Here’s another idea for styling. See how the same room can look so different?


Thank you for the time you spent reading about my faux fireplace project. I hoped you enjoyed it and will visit me again. Please feel free to ask any questions or offer (hopefully friendly) comments in the area below or by emailing me. I would love to hear from you!


You May Also Like
Indoor Swing

Indoor Monkey Bars
