

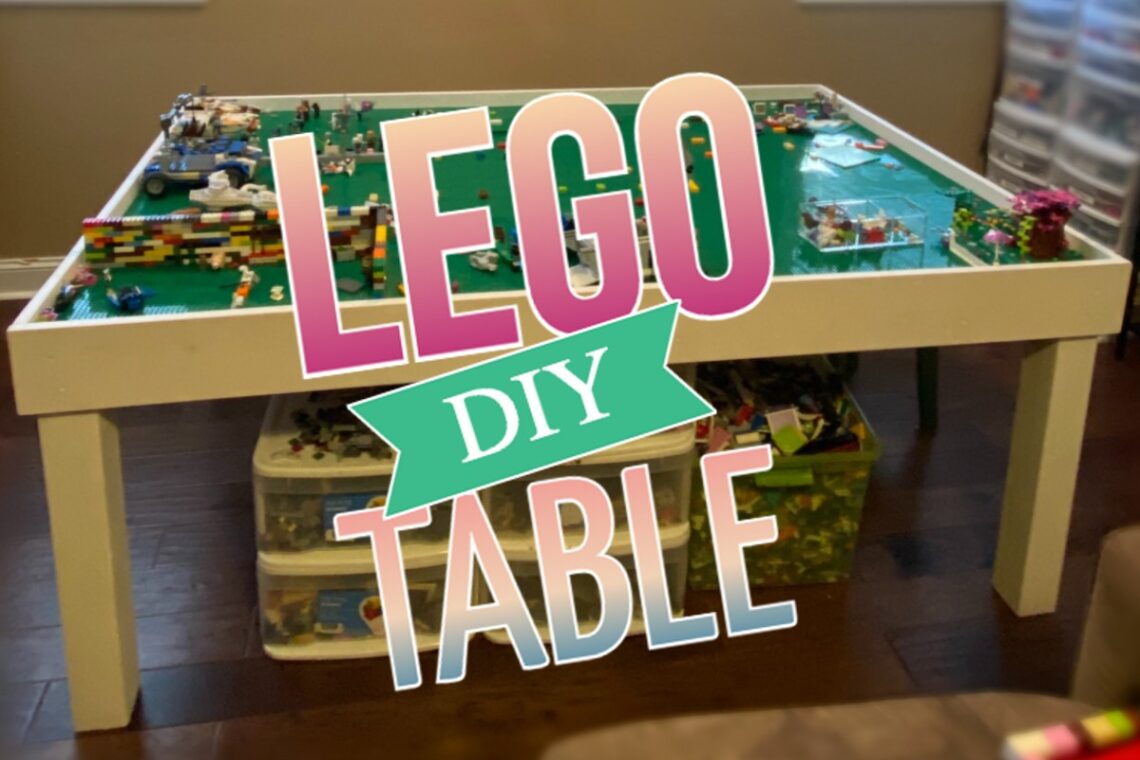
Build Your Own Lego Table
Can you have too many Legos?
No. Not if you have four kids who love them.
What you can have, however, is the problem of figuring out how to manage them all. Without a space to corral them, they can get out of hand fast!
When our youngest was a baby, we encouraged our older kids to use our pool table for their building. They loved having a large space to create and we loved keeping small pieces of plastic out of the baby’s mouth. We left the pool table behind with our move, and ever since, we’ve been doing this:
Once we started unpacking the boxes and boxes (and boxes) of Legos at our new house, we realized it would be a good time to build a new Lego table. The kids and I were off to the drawing board!
The Design
We only had two requirements:
- A large building space
- A lip around the outside to contain unattached Lego pieces
I tried to convince the kids we should build in drawers or some kind of storage but they opted for super simple. They wanted it to be as big as possible and done yesterday. Their first idea was to build the whole table out of Legos. Here is the model:
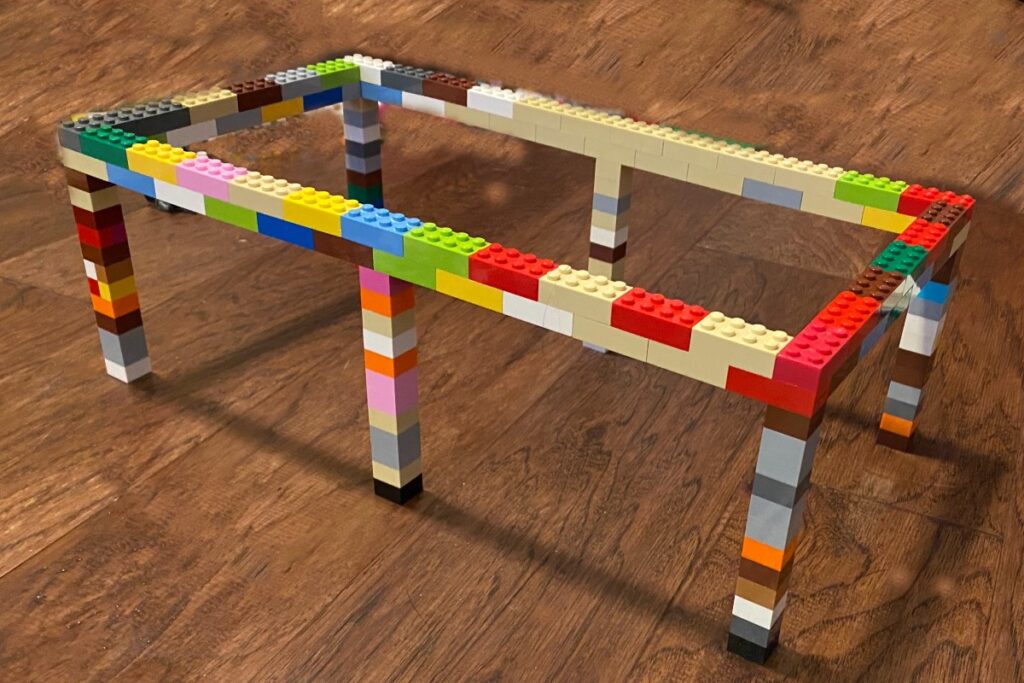
Their logic was two-fold. Not only would a Lego table out of Legos be cool, this would allow them to avoid the hardware store and the prep time required to cut the wood. Unfortunately, while that would be very cool, the budget for that project would be off the charts. We decided to build out of wood.
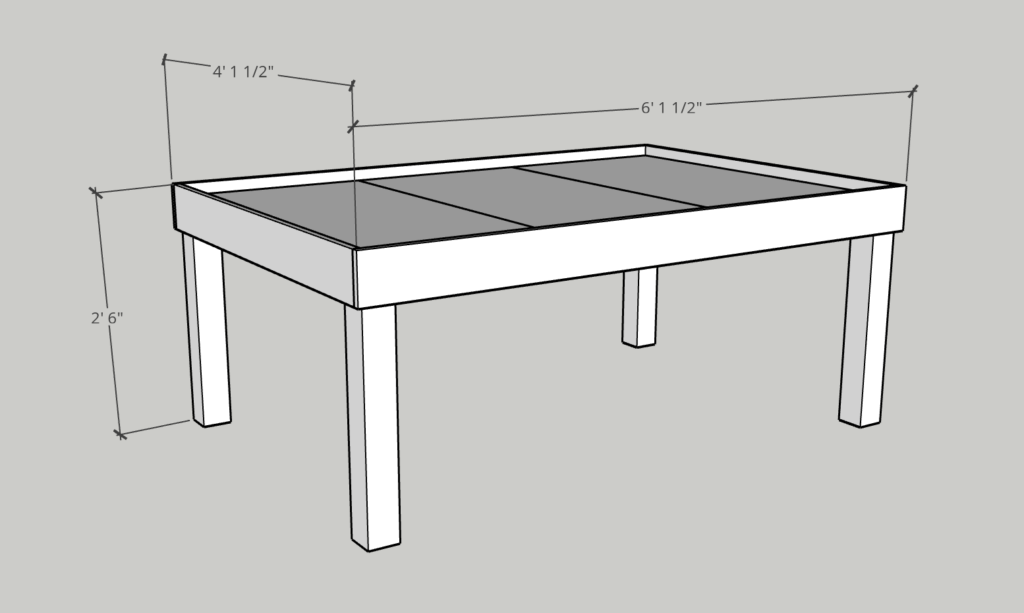
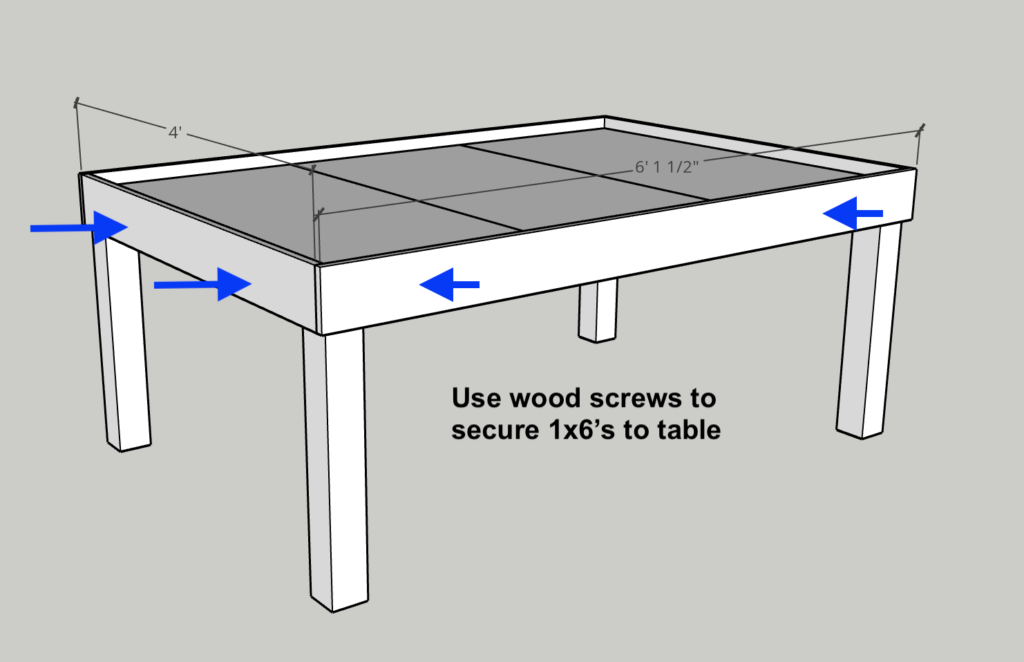
Based on our space and design ideas, here’s what we came up with:
Supplies:
- 1 – 4×4 x 10′
- 4 – 2×4’s
- 3 – 1×6’s
- Plywood – We used 3 – 1/2″ thick pre-cut boards @ 2′ x 4′ each. You could also use a 4’x8′ sheet of plywood and cut it down to size. This would likely be cheaper. We just went with the easier, fits in the back of our car, choice.
- Kreg Jig
- Pocket Hole Screws (2-1/2″)
- Wood screws (1-1/2″)
- Panel nails (1″)
- Sandpaper
- Caulk
- Paint and paint brushes – We used white paint leftover from a previous project
- Baseplates for play surface
Tools you may already have on hand:
- Drill
- Hammer
- Tape measure
- Pencil
- Safety goggles
- Utility Knife (If you need to trim the baseplates to fit your tabletop)
Cut List:
- 4 – 4×4 @ 2′ 4″
- 2 – 2×4 @ 5′ 5″
- 2 – 2×4 @ 3’5″
- 2 – 2×4 @ 3’9″
- 2 – 1×6 @ 6′ 1-1/2″
- 2 – 1×6 @ 4′

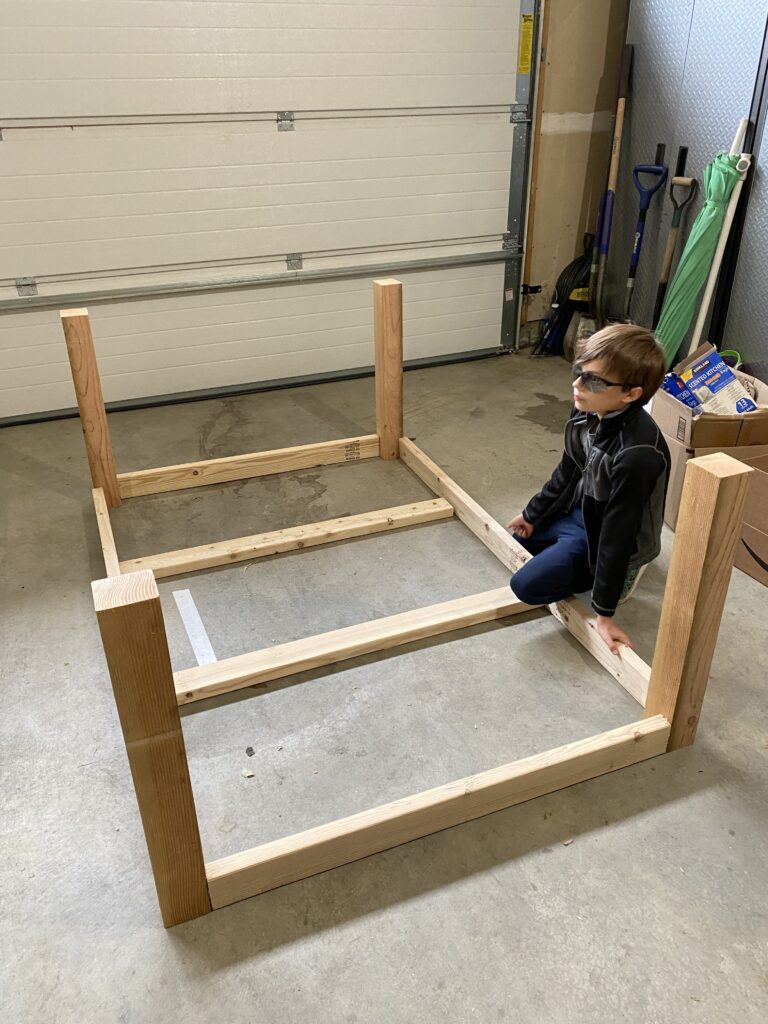
Step 1: Build the Table Base

We cut the boards and lay them out to plan where the pocket holes would go.
Pocket hole planning:

Then, using our Kreg Jig, we drilled the pocket holes.

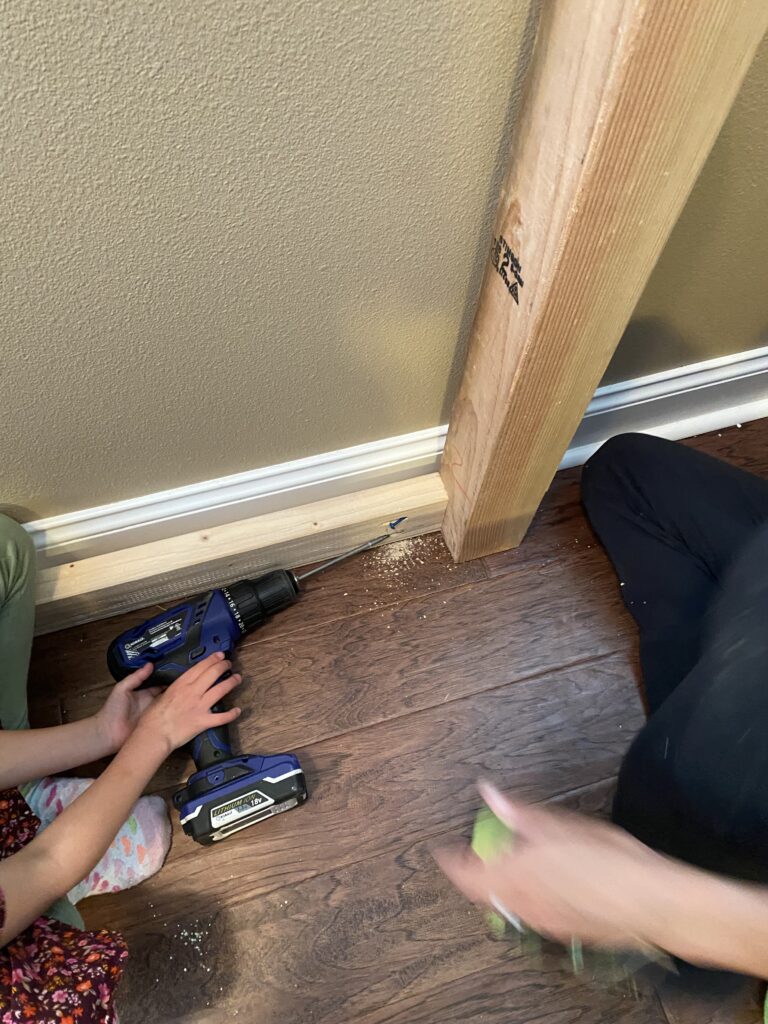
We decided to build the table in place so we wouldn’t have to carry it down the stairs later. We attached the skirt to the legs with 2 1/2″ coarse thread pocket hole screws.


Step 2: Attach the Table Top
We flipped the table base right side up and laid the plywood sheets on top. We secured each piece with 1″ panel nails around the edges.
(You only need to add enough nails to keep the plywood pieces flat because the 1×6’s you will add around the edges in the next step will help hold them in place. Be sure to hammer them all the way in so they don’t get in the way of your baseplates later.)
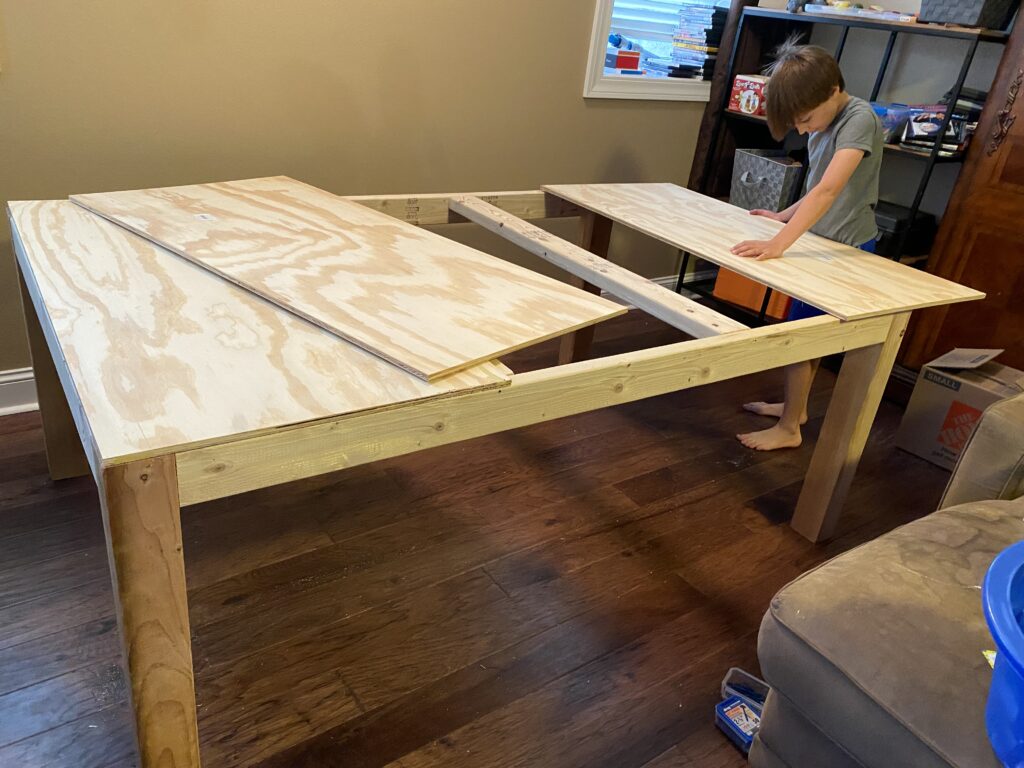

Next we used wood screws to attach 1×6 boards around the table. We extended them above the level of the plywood surface to create a lip around the edge to hold stray Lego pieces in while building.
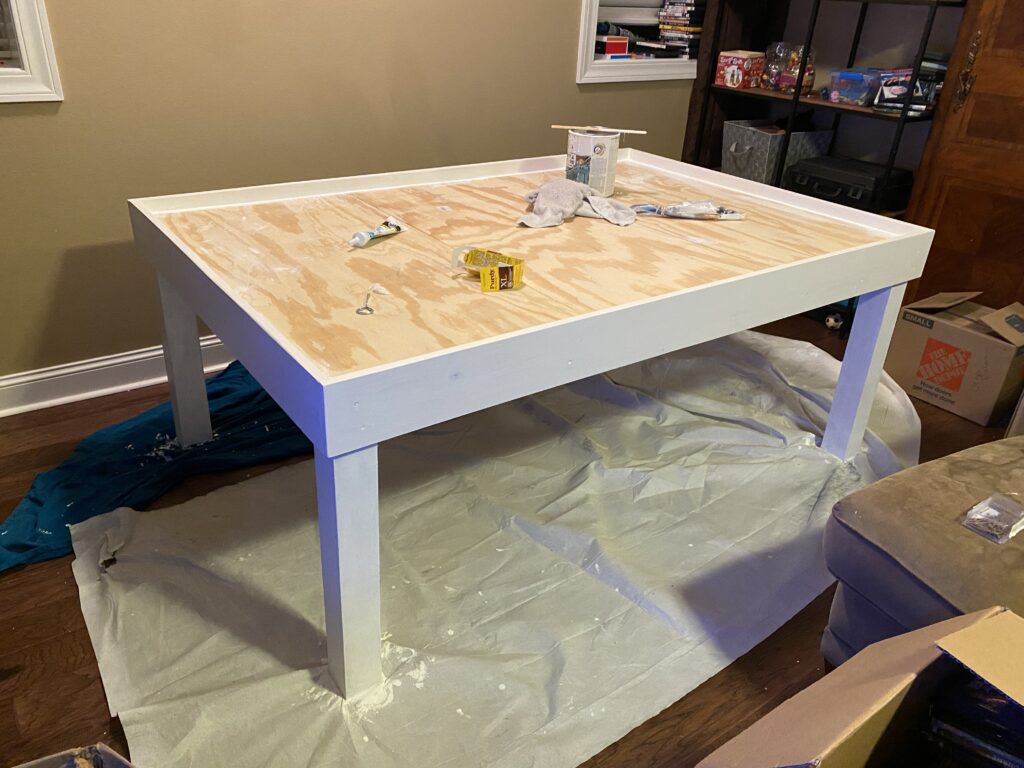
Step 3: Finishing the Table
We didn’t want any splinters or rough edges to interfere with our building so we sanded, and sanded, and sanded some more. The kids thought this was fun. In the future, they will be in charge of sanding for every project because this is one of my least favorite parts!

After vacuuming up the sawdust, we caulked over the screw holes on the outside of the table. We also touched up some small spaces in between the plywood and the 1×6’s.
Then I let the kids have at it with some white paint we had on hand from a previous project. There was some argument about painting the table different colors but after I explained that one color would be done faster, they agreed to white.

Step 5: Add the Baseplates
The final part in the process was to add the baseplates. We found these Lekebaby baseplates on Amazon and I’m happy to report that they have been indistinguishable from the official Lego ones. This is especially nice since they are a LOT cheaper and we had a LOT of table to cover.
Cutting the Baseplates:
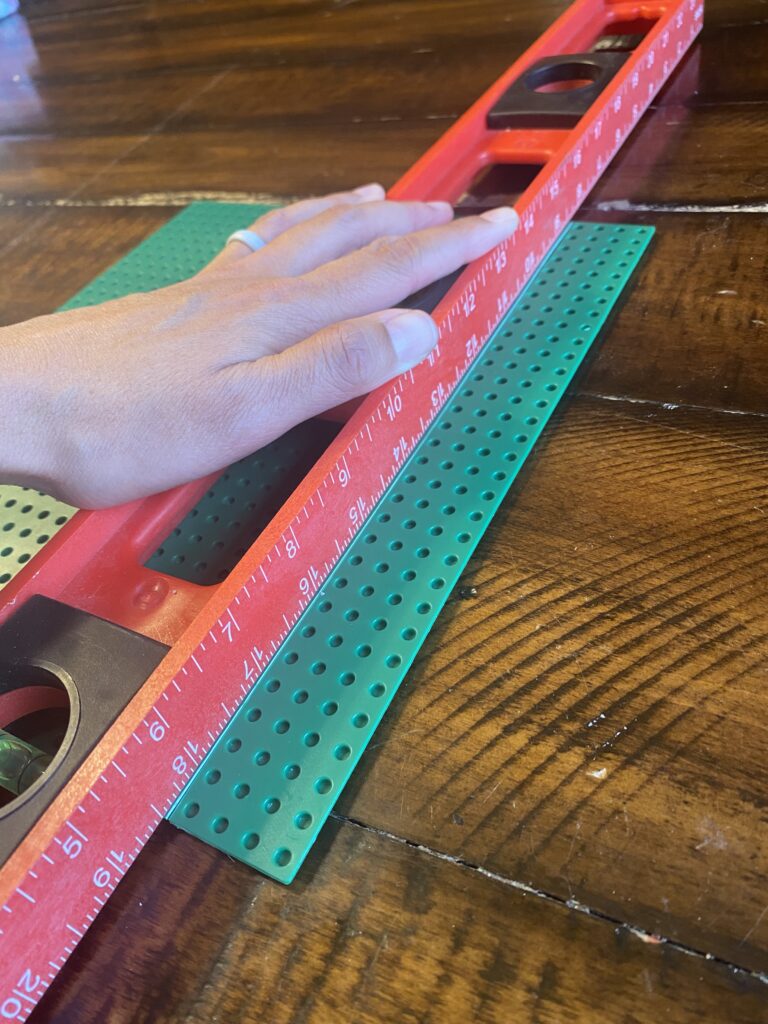
The baseplates weren’t the exact measurements of our table so I had to cut them down to size. I was nervous about this part but it was easy to do!
Measure where you want to cut the baseplate. Then, using a straight surface as a guide, score the back of the plate with a utility knife a few times.
(Be sure to put something under the plate while you cut to protect your table. I forgot to take pictures during this process so these are recreations after the fact.)

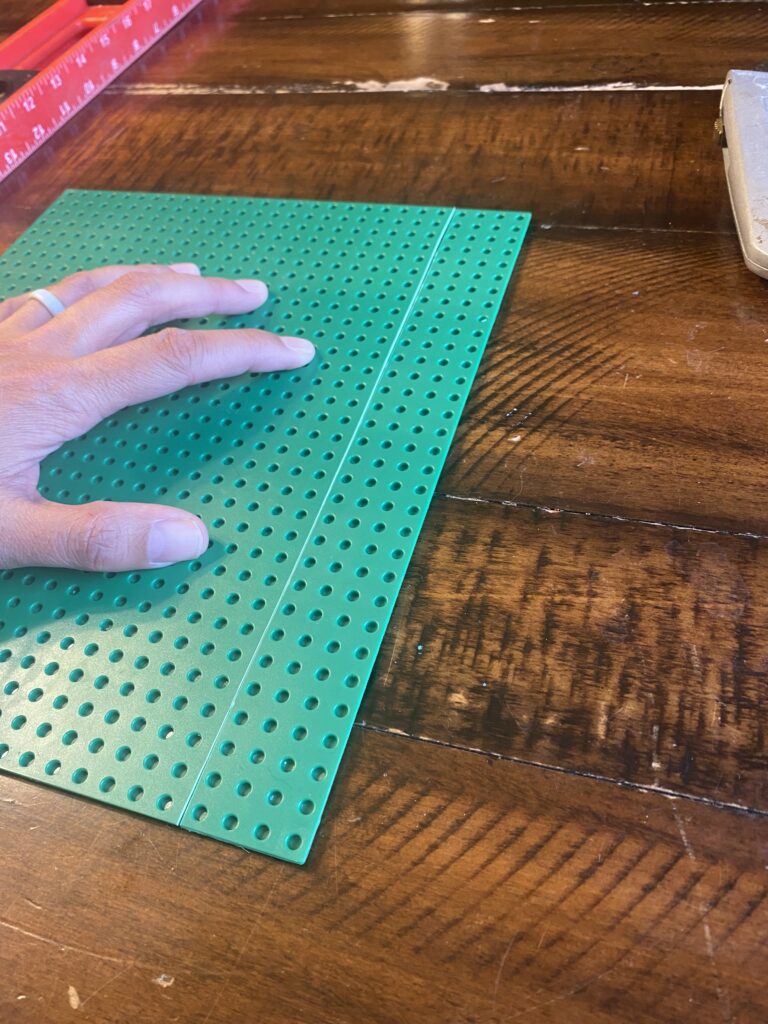
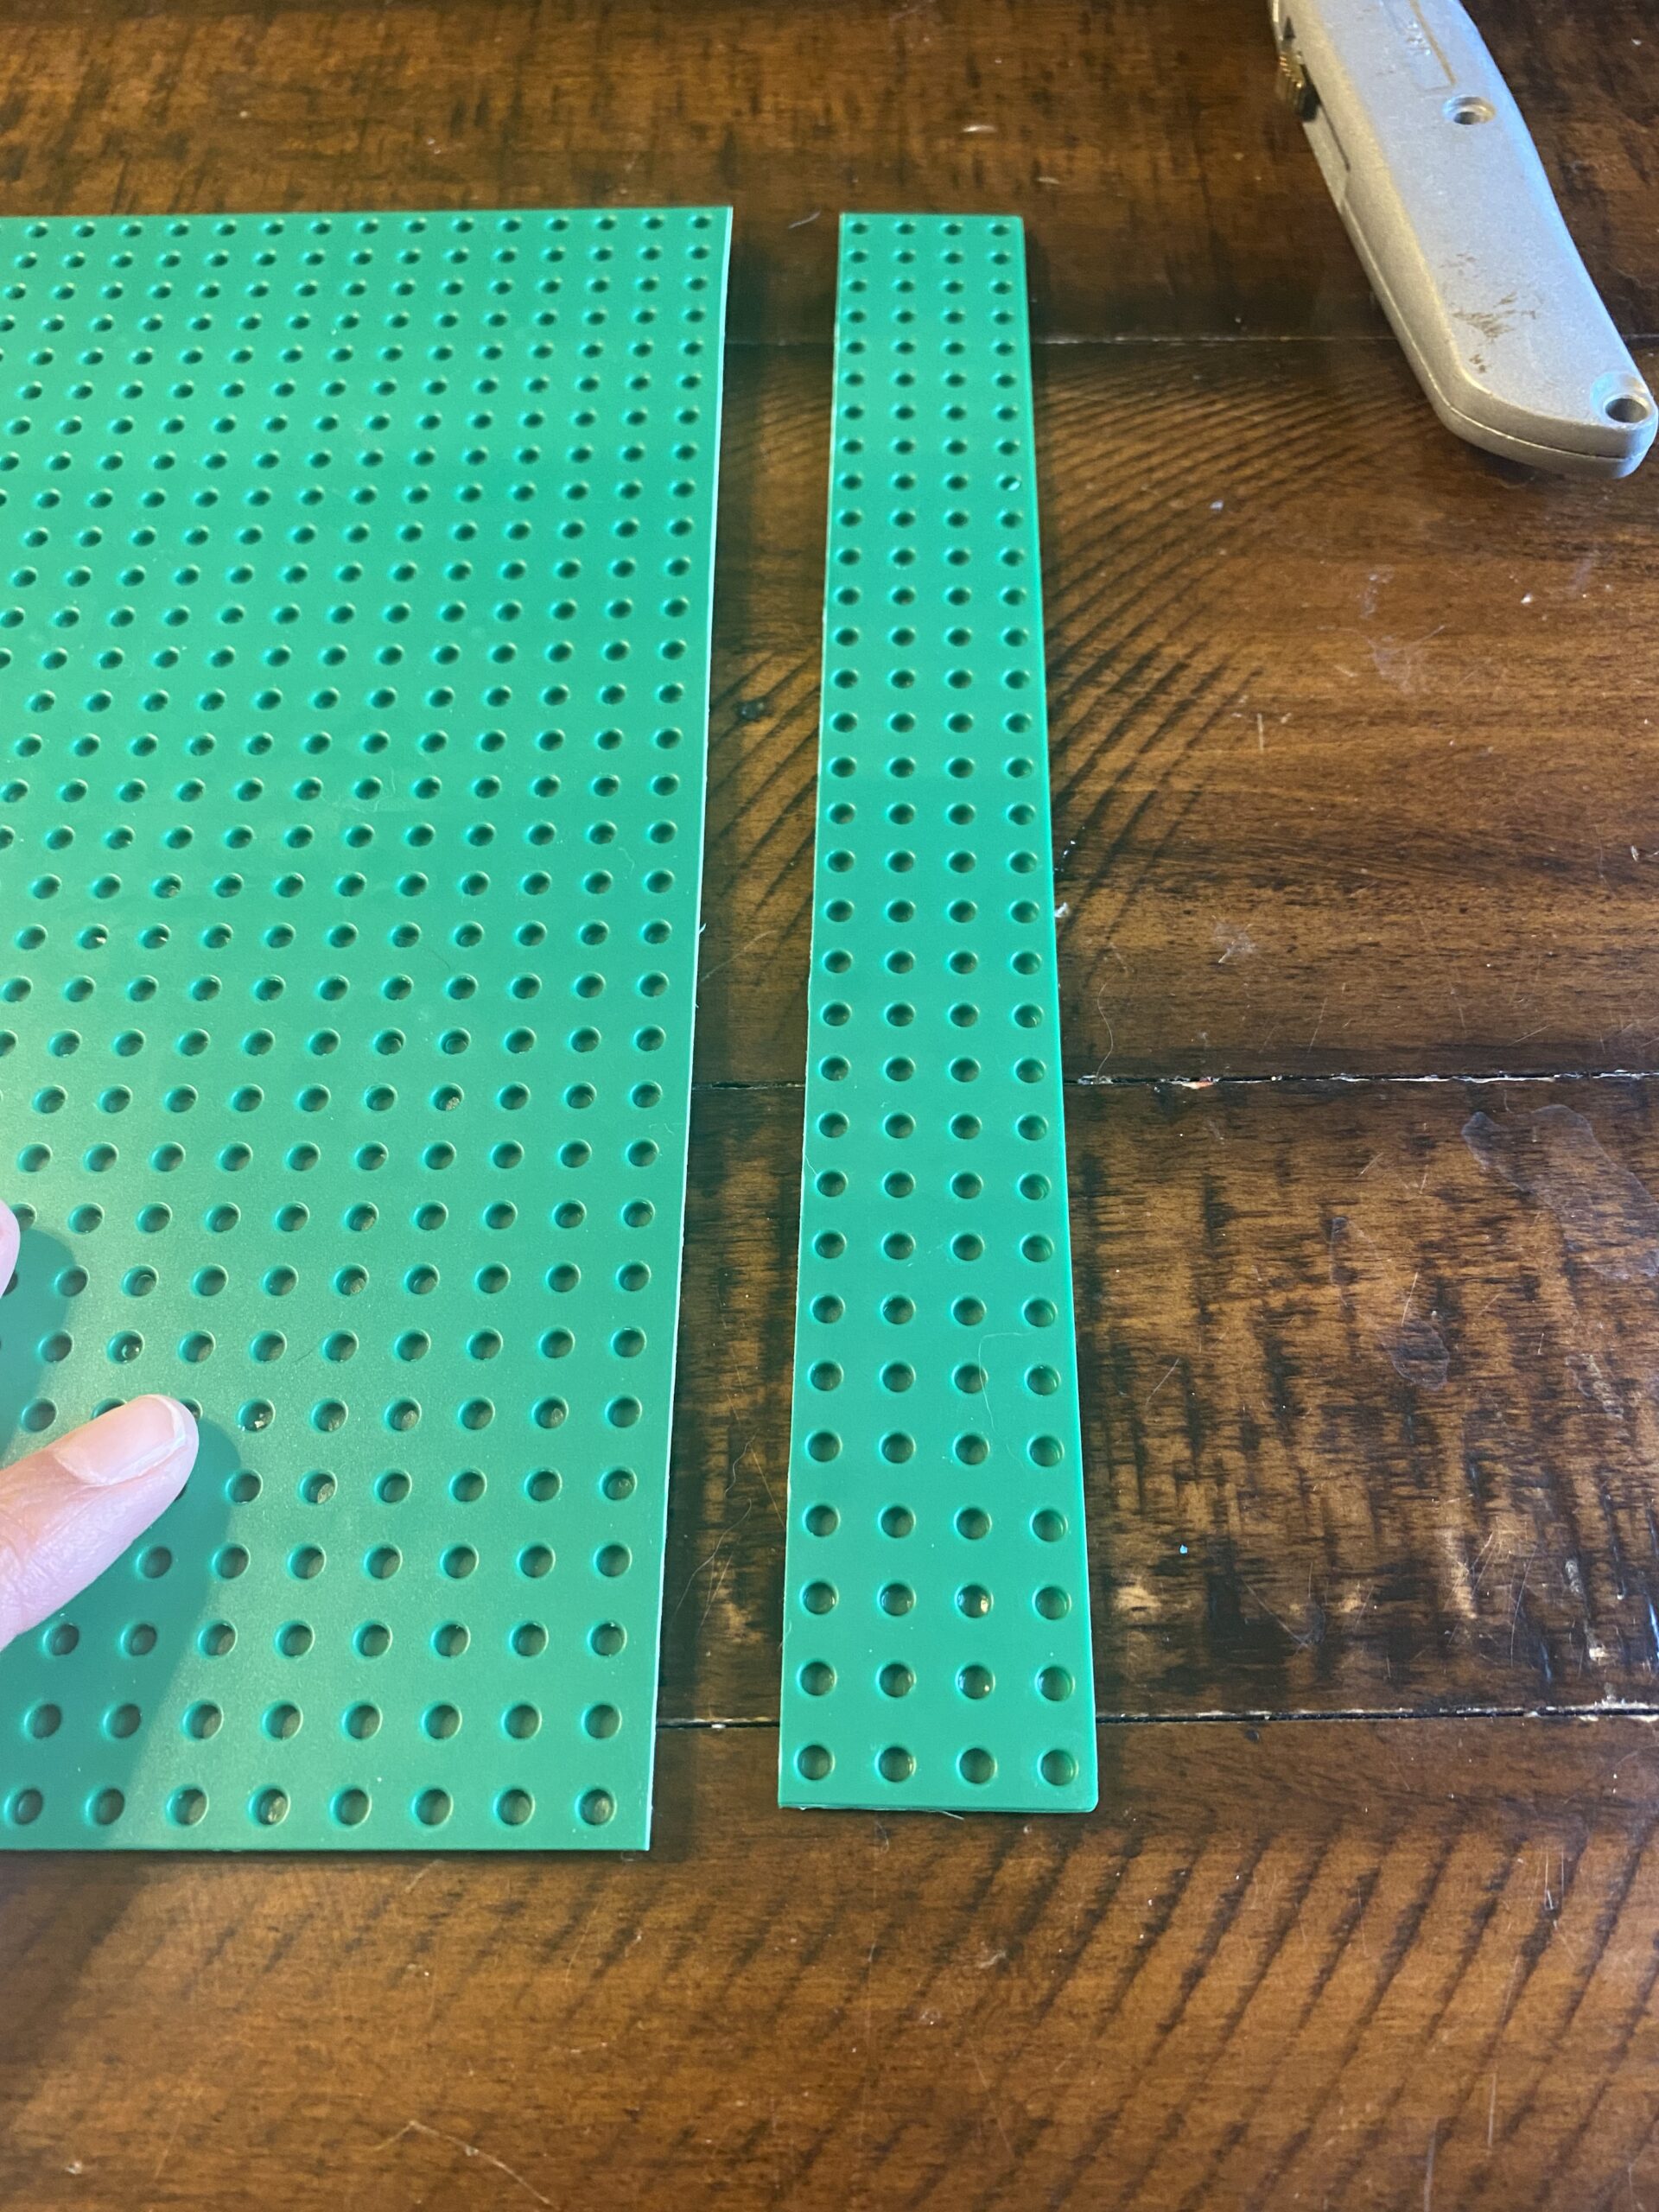
Once you have scored the plate, it will easily snap along the line you cut when folded.

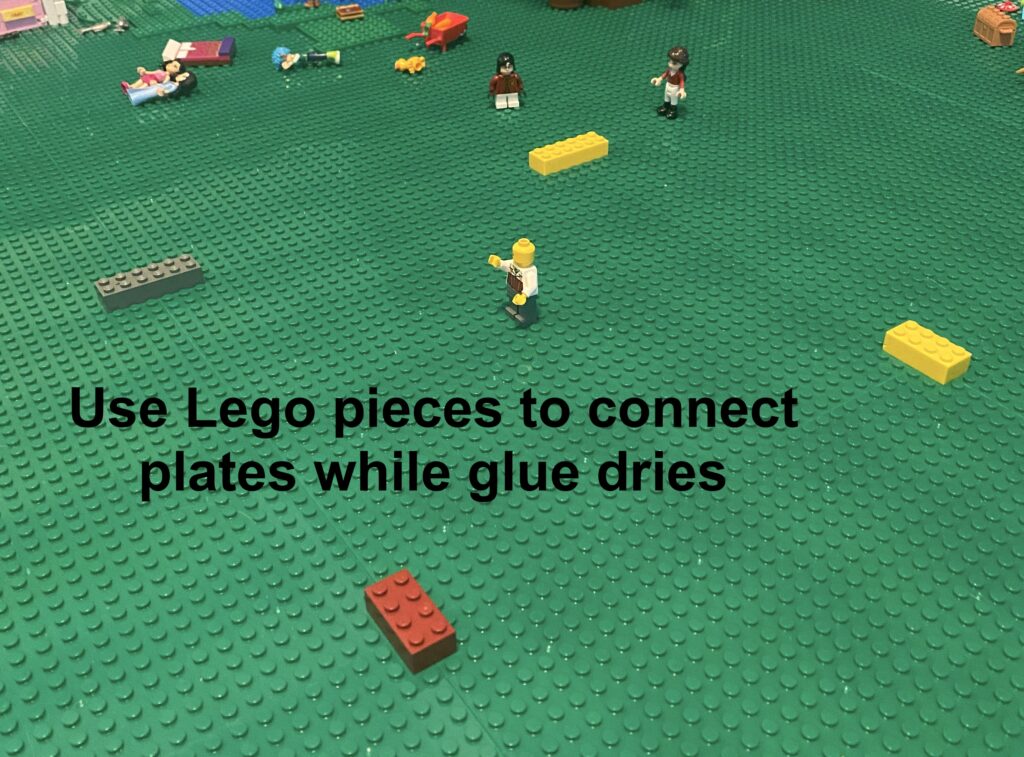
We elected not to glue the baseplates to the plywood. The kids wanted to have the option of switching them out in the future if they feel like adding water or roads to their town. If you decide to glue yours, add glue to the back of the plates and set them into place. A helpful tip is to connect the corners of the plates while your glue dries. This way you will be sure that they are lined up when you’re done.
The kids didn’t even wait until all the baseplates were in place before starting to build. I guess that means our table is a success!

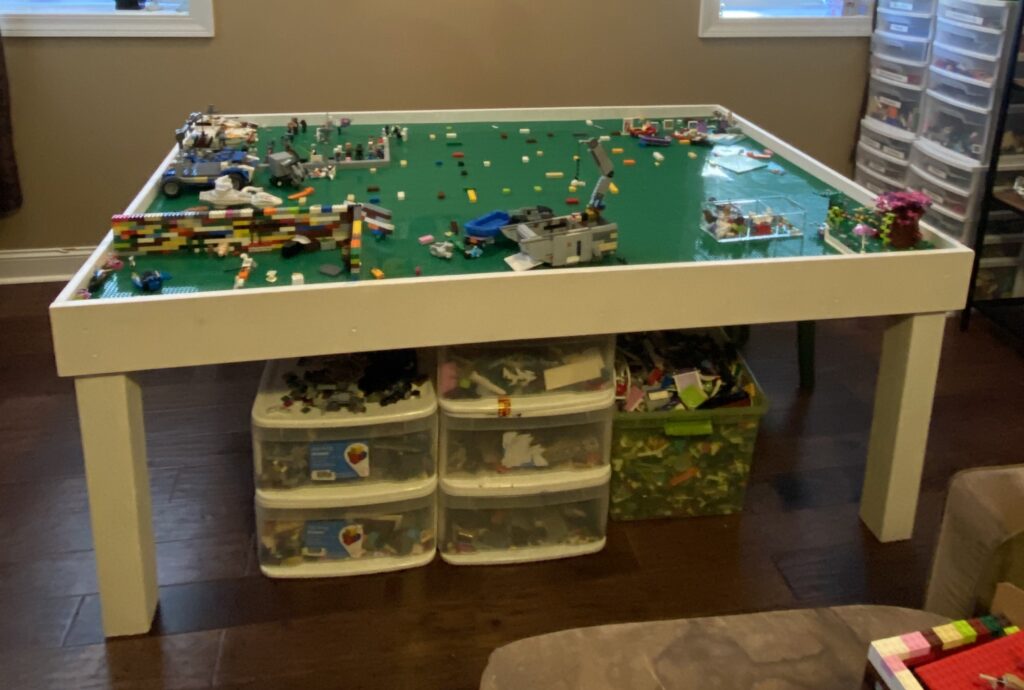
For now, we’re using the storage bins we’ve had for years but I can see a storage bin build in my future!


You May Also Like

Delicate Arch

Pasta e Fagioli (Bidigare style)
