

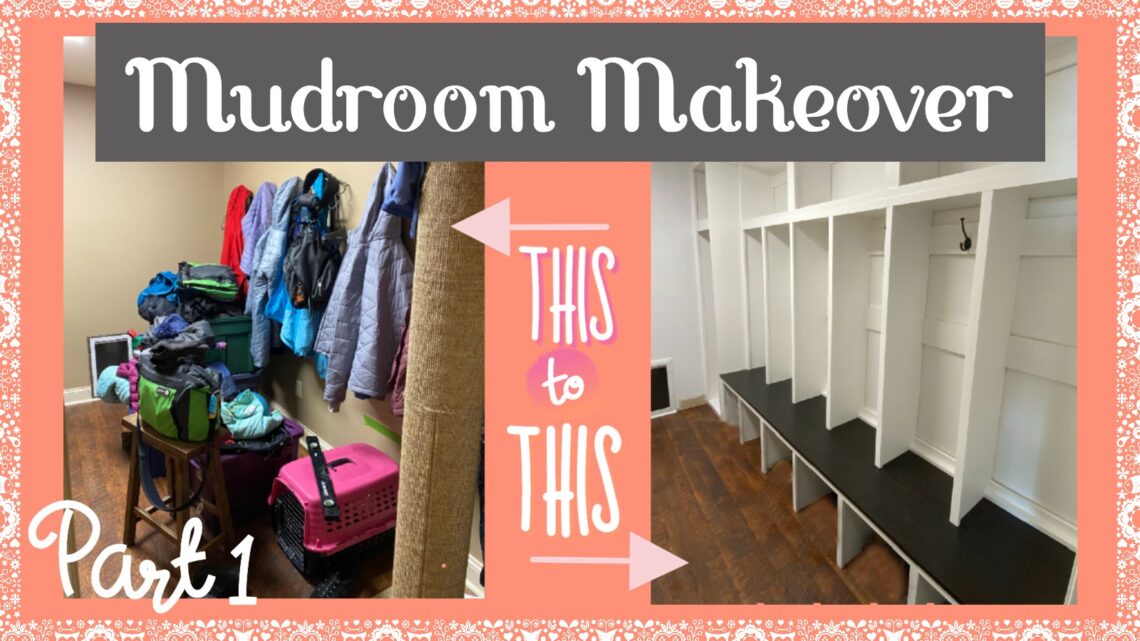
Mudroom Makeover: Part 1
Mudroom bench and lockers
When we moved into our house we had six people and no place to hang our coats. You can see how this was a recipe for disaster.
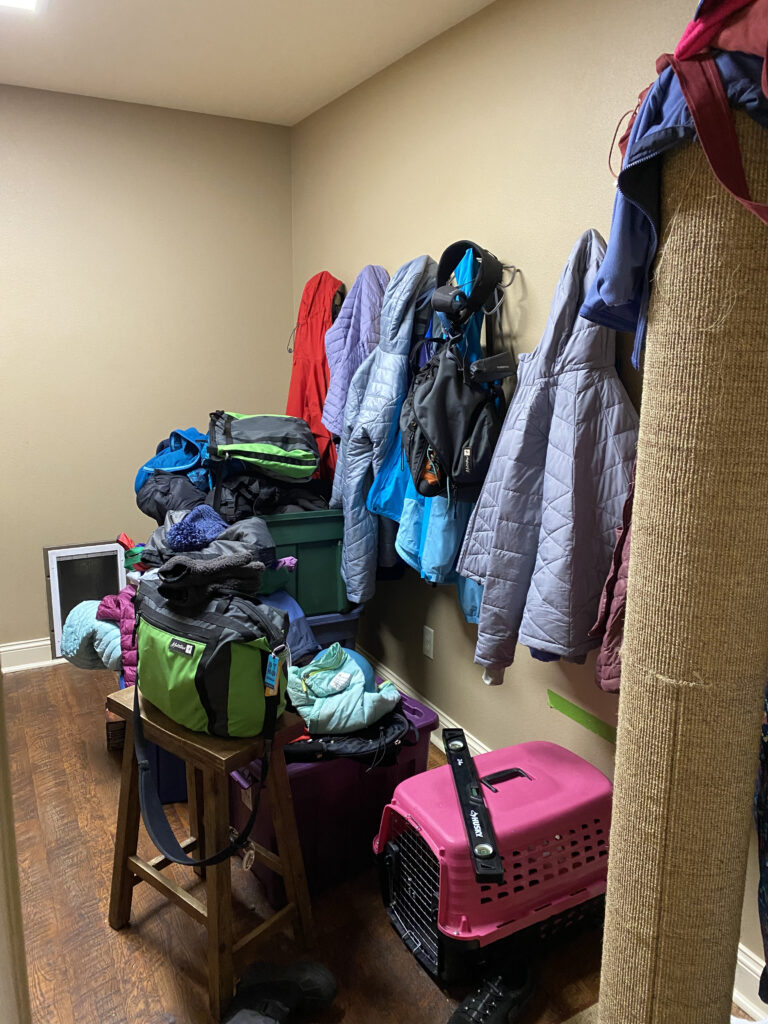
This was our laundry room. Not enough storage and the youngest couldn’t reach the hooks, which meant coats on the floor.
Mudroom locker idea
We needed a change. I found this awesome mudroom locker idea from Ana White. Her ideas are great and her instructions are clear and well thought-out. I know if I follow a plan from her site, I’ll end up with a project I’m happy with in the end.

Customization of mudroom lockers
We decided to use this template and make a few customizations. The first was that we wanted six lockers, one for each person in the house. We also wanted to add doors across the top to hide our mess. The next idea we had was to add a small closet at the end of the lockers to house our vacuum and a few cleaning supplies.
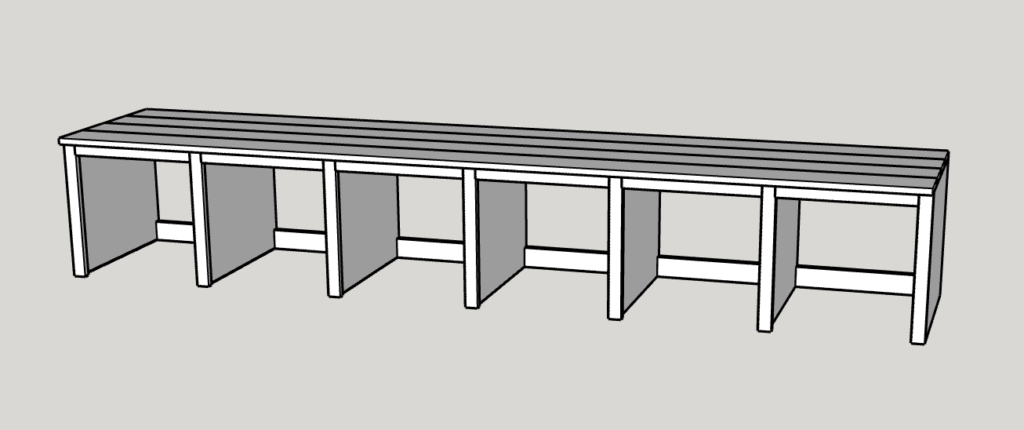
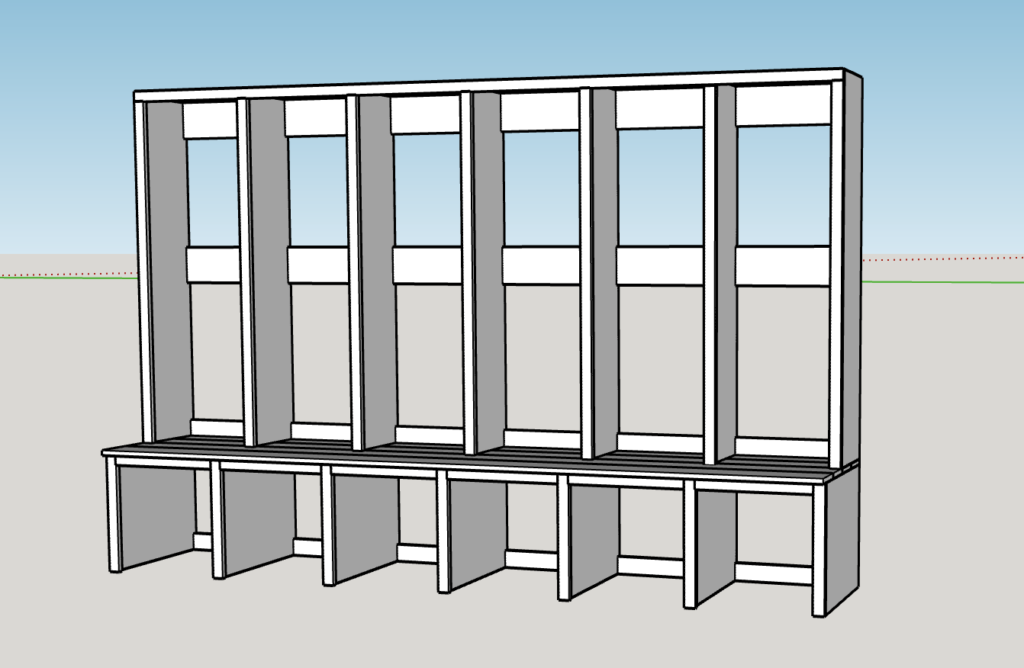
Our coat rack wall measures 125-5/8″. I planned on making the wall unit around 124-5/8″ (124.625″) to give myself some wiggle room. Here’s the general idea of what I had planned:

The small closet at the end needed to be about 16″ wide inside in order to fit our vacuum.
16″ + the plywood sides (0.6875″ x 2) = 17.375″ for the closet.
That would leave 107.25″ left for the lockers. With the plywood being 0.6875″ thick, we could have six 17″ width lockers. Just to be safe, I decided to build the bench and lockers first and then I could re-measure the leftover space before cutting the plywood for the closet.
Supplies for bench and lockers
Wood:
- 3/4″ plywood – AC Sanded Pine Plywood Panel
- Pine 1×3’s and 1×6’s for bay supports
- Pine 1×2’s for face frame
- Oak 1×8’s for bench seat (Or pine in whatever dimensions work for your project)
Tools:
- Circular saw – We bought this new one specifically for this project and I love it!
- Circular saw blade
- Clamps:
- Quick grip clamps for when cutting wood
- Corner clamps for helping build cabinets
- Bar clamps for holding boards edge to edge for making the seat
- Miter saw
- We also just got this miter saw stand. Not necessary but it sure saves my back!
- Orbital sander (if you’re not sanding by hand)
- Hook and loop sanding discs
- Kreg Jig
- Drill
- Nail gun
- Safety glasses
- Mask for sanding
- Tape measure
- Pencil
- Tools for removing molding if you want to make lockers built in
Attachments:
- Pocket holes screws 1-1/2”
- Wood screws for attaching to wall
- Brad nails (1-1/4”)
- Wood glue
- Wood filler
Paint:
- Primer
- Wall paint – Valspar Flat Interior Base A 935291
- Cabinet paint – Valspar Cabinet & Furniture
- Water-based pre stain wood conditioner
- Water-based Stain & Poly (I used Behr Espresso B6212)
- Brushes
- Gloves
- Mask for staining
- Ladder or step stool if your hutch is tall
Other:
- Coat hooks
- Edge banding
- Shiplap – if you want to add this to the back of your hutch
Part 1 – Mudroom Bench
The first piece of this project was to build the bench. This turned out to be a solid piece that could stand alone if you wanted to stop here.
Cut list:
Bench
- Cubby sides (3/4″ plywood) – 7 @ 17-1/4″ x 20-1/4″
- Cubby bay supports – (1×3’s) 18 @ 17″
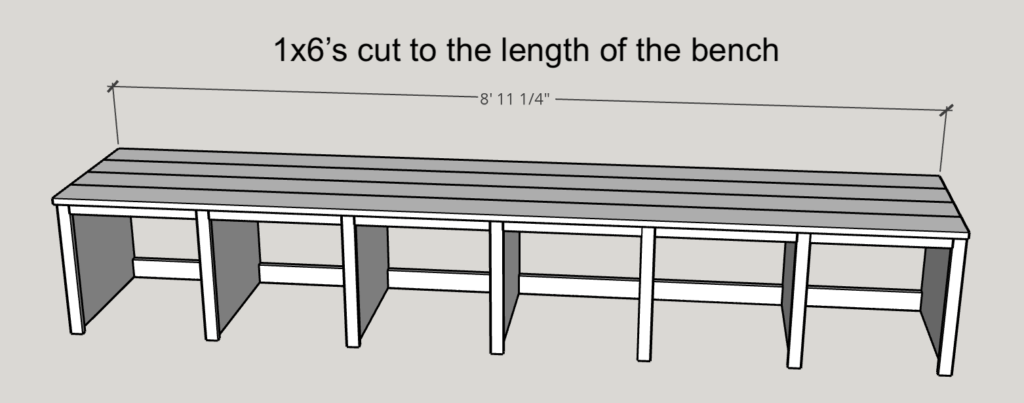
- Bench top – (Oak planks vs pine) @ 107-1/4″ (Number will depend on how wide you want this to be.)
Lockers
- Hutch sides (3/4″ plywood) – 7 @ 52-1/2″ x 11-1/4″
- Hutch tops (3/4″ plywood) – 6 @ 17″ x 11-1/4″
- Hutch bay supports – (1 x 6’s) 12 @ 17″
- Hutch bay supports – (1 x 3’s) 6 @ 17″
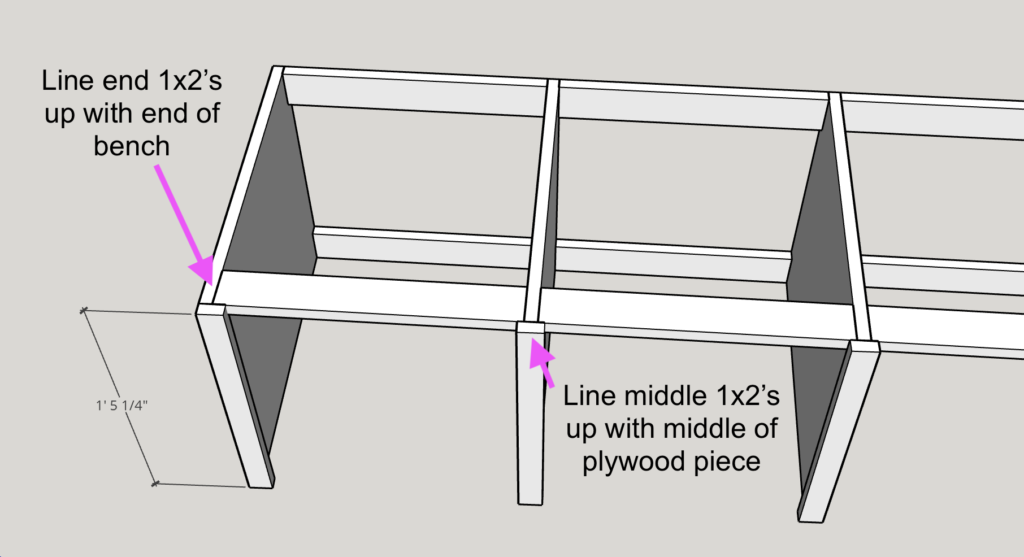
The face frame was made from 1×2’s but I would recommend measuring and cutting these after you have assembled the rest. This way you can make sure they are the exact lengths you need.
Step 1: Remove baseboard from wall
Since I want the lockers and closet to be flush with the wall, I removed the baseboard. This was the most difficult part of the whole project. Our molding was old and brittle and it came off in crumbles. I made a huge mess of our wall in the process.
Step 2: Assemble the bench carcass
Cut 3/4″ plywood pieces to size, keeping in mind that the final bench height will be 3/4″ higher once you add the top and 3/4″ deeper when you add the face frame:
Depth 20.25″ (Final bench depth will be 21″ with face frame)
Height 17.25″ (For final bench height of 18″)

Then cut bay supports from 1 x 3’s (Ours were 17″ long).
Drill pocket holes on the ends of each 1×3 and attach the bay supports to the plywood pieces. I used 3/4″ pocket holes and 1-1/2″ pocket hole screws.

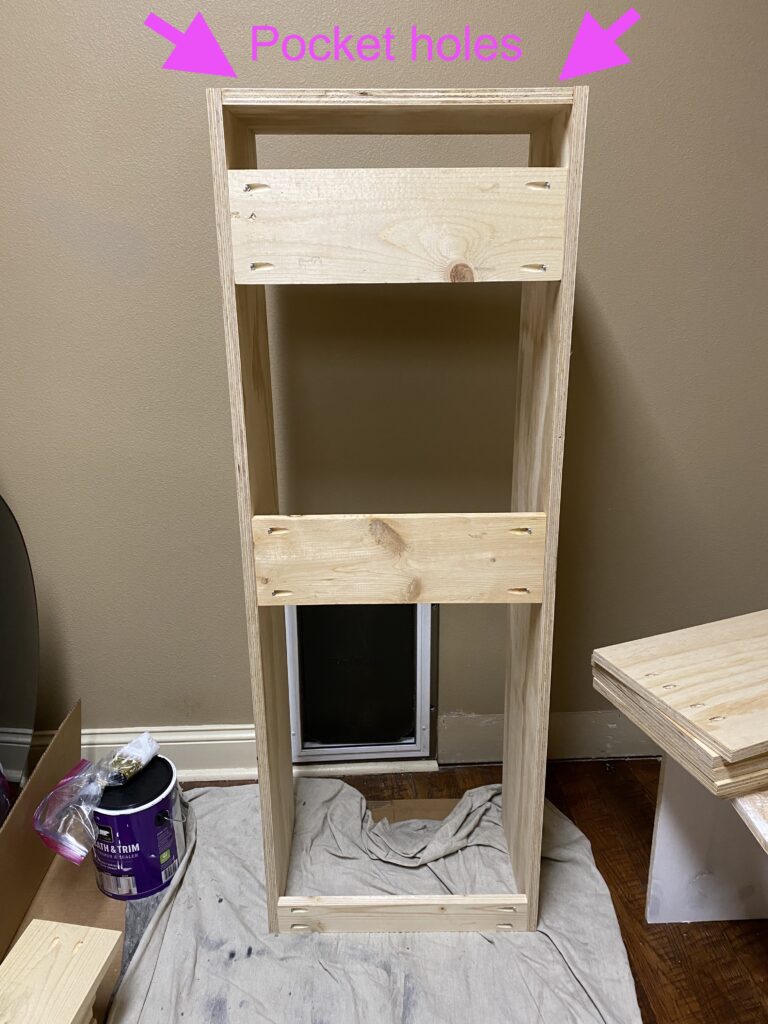
Remember to put the pocket holes facing toward the back wall and underneath to hide them.

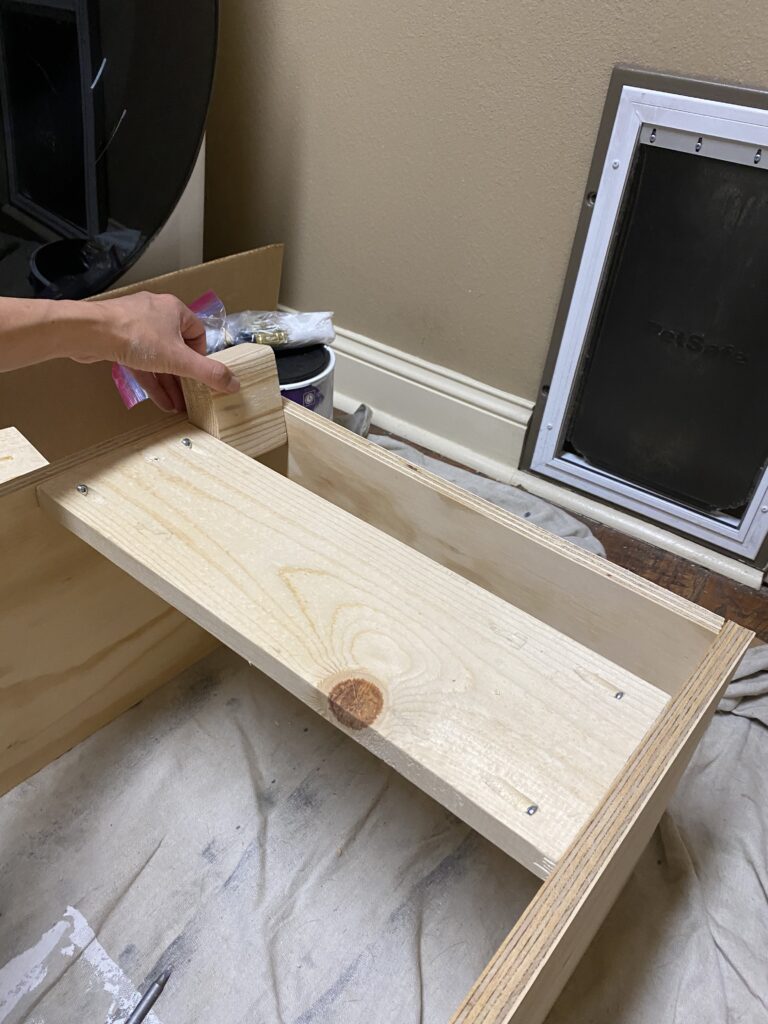
In the first two images below, you can see the front and back of an assembled cubby. In the third picture, you can see the rest being added. Since our bench was so long, I built it backwards and upside down and then flipped the finished piece over into place.


In a later step, I secured the bench to studs in the wall with screws through the back bay supports.
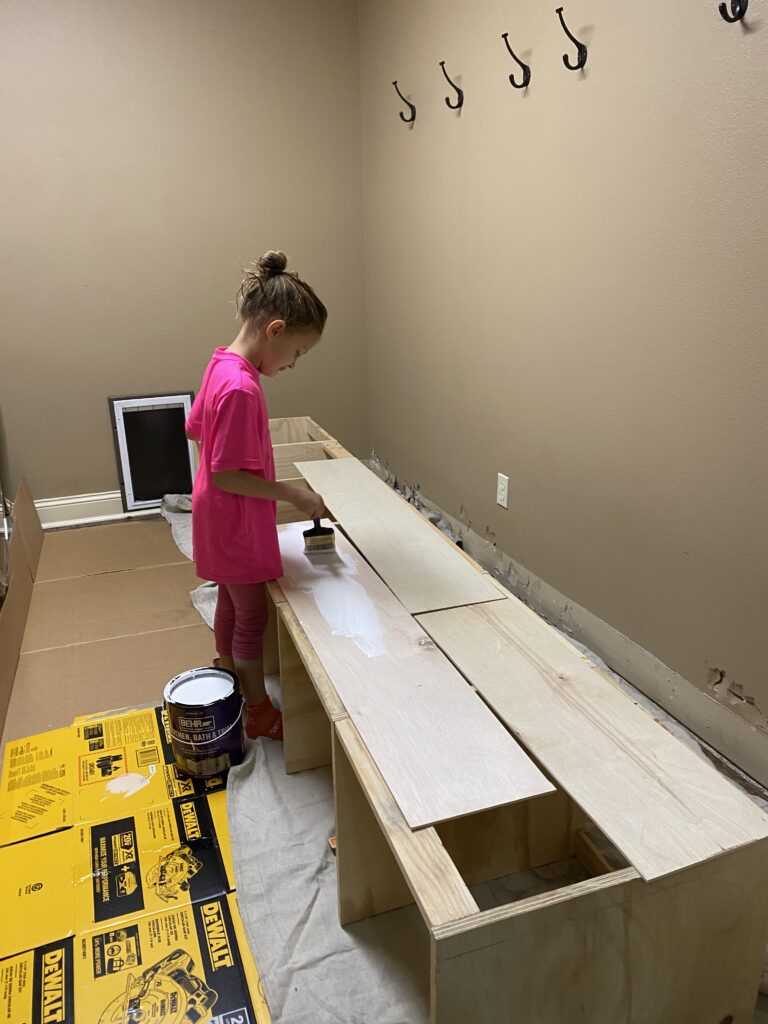
Step 2 1/2: Let the helpers help
Our 7 year old was dying to get started on the painting part of the project. While I moved on to cutting pieces for the face frame, I let her get started on priming. Here she is working on a few backing pieces I cut to hide the mess I made of the wall tearing out the baseboard:
Our dog, Hadley was very sad she wasn’t allowed in the room to help paint.

I had planned on adding the face frame next but for that I needed to make a trip to the hardware store (and it was well below freezing) so I decided to start on the bench seat instead. Since we had everything I needed for the top, I could avoid going outside until my skin wouldn’t hurt.
Step 3: Build the bench seat
My original plan was to use four pine 1×6’s, which was one of the options suggested in Ana White’s tutorial.
However, I decided to change this to oak for two reasons. First of all, I know the kids (and let’s be honest- probably also the adults) will be standing on this bench. Oak will be a little more durable than pine in the long run. Also, since our bench will be in our laundry/mudroom, rather than in the garage, I thought oak might make it just a little fancier. I know, I’m known for being fancy- ha!
I ended up using three oak 1×8’s for the bench top. Whatever you decide to use, the installation will be the same.
Cut bench boards to length:
I cut them flush with the the edge of the base since I’m making this a built-in. If your bench will be free-standing, you may want to have the bench-top overlap the base a bit.
You may choose to have your seat overlap in front as well.

Attach the bench seat boards with pocket hole screws:
Once you have the seat boards the length you want, attach them together edge to edge using 3/4″ pocket holes and 1-1/4″ pocket hole screws. Add one screw joint about every 8″.

I found this step to be much easier with help from clamps!
Choose your own adventure – How rustic do you want your bench?
At this point, the seat would look great as it is and you could be ready to attach it to your bench. I decided to make things harder on myself and go for a super smooth, stained bench. After attaching it with pocket holes, I sanded and sanded and sanded with our orbital sander.
Then I applied a pre stain wood conditioner, and then sanded it some more. I usually use regular stain and then add a couple of coats of polyurethane. This time I tried out a Stain & Poly mix. I chose a water-based option because I was staining inside and I didn’t want the big stink that comes with oil-based.
I wasn’t happy with my first attempt so I sanded most of it off. It had a nice effect that I might have gone with if I wasn’t after a dark chocolate color for our laundry room.
Here was ours after the first staining and sanding:
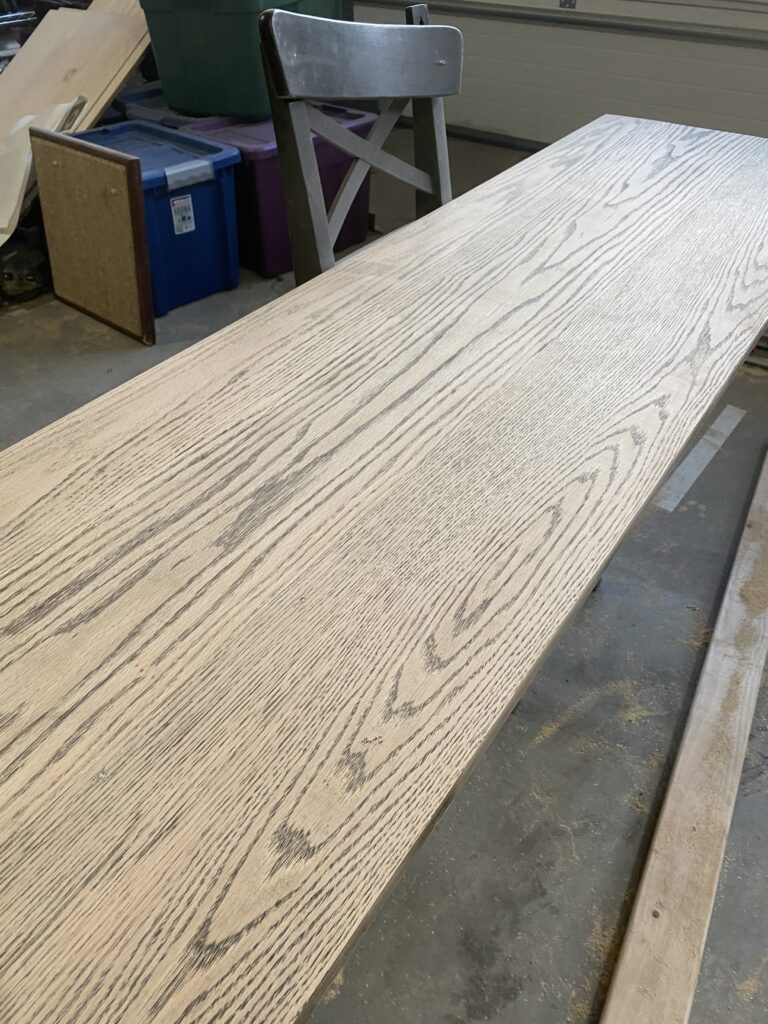
It looks like a film negative version of the original stained board.
I realized that with stain and poly mixed, I got a better result by brushing it on with a paintbrush than my usual rag method. After three coats of the stain & poly, here is the seat on the bench before I added the face frame:
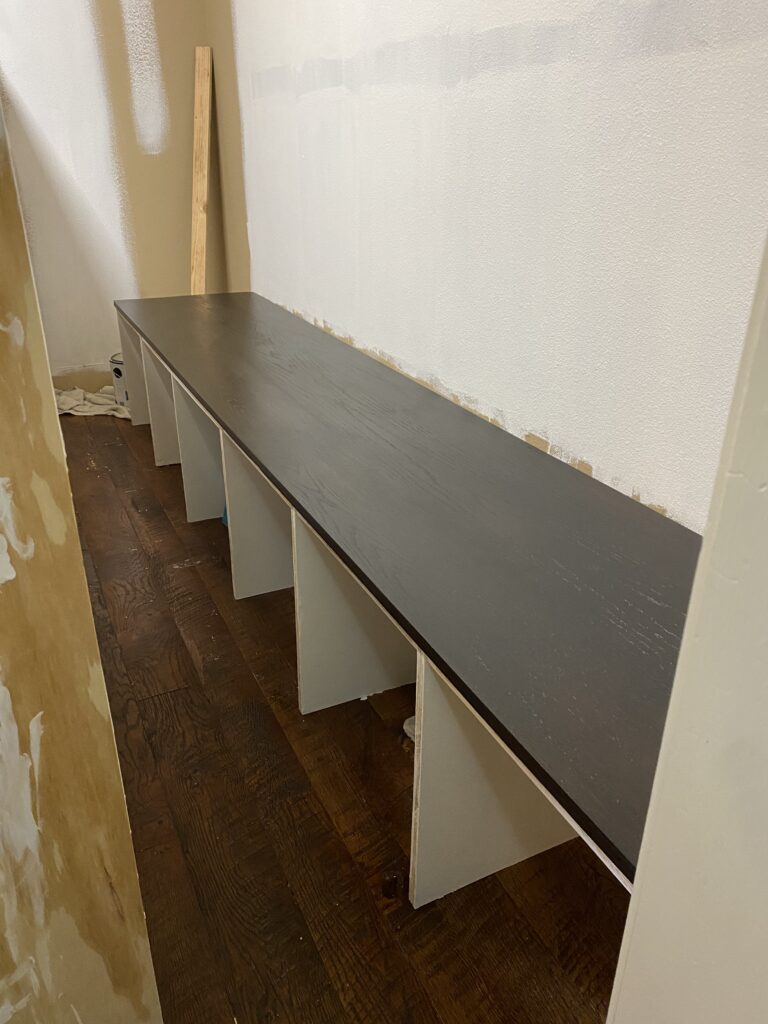
This was my first time used a stain mixed with poly. I thought it was more difficult to apply at first but I think this was mainly because I usually put stain on with a rag and this required a brush.
This is a good time to secure the seat to the base by screwing through the bay supports from underneath, using 1-1/4″ screws. You may also want to add wood glue and brad nails for extra support.
I waited until later for this part because we decided to paint all the white pieces before installing the bench seat.

Part 2 – Mudroom Hutch
We liked the height of our old coat hooks, so in order to keep that the same, I chose a height of 52.5″ for the hutch.
Here was me playing around with the locker height:

Step 1: Cut and assemble the hutch carcass
This assembly was very similar to the bench. First I cut the plywood locker sides and tops.
Sides: H 52.5″ x D 11.25″ (Total locker depth will end up as 12″ with the face frame.)
Tops: W 17″ x D 11.25″
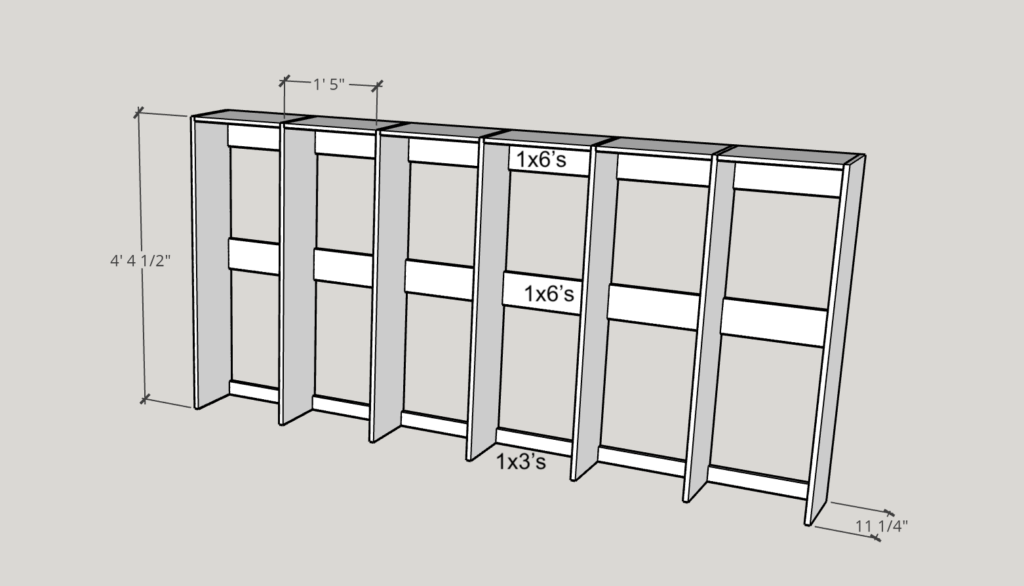
Bay supports:
The 1×6’s on the top back are for securing the hutch to the wall as well as adding coat hooks. I also added another level of 1×6’s in the middle for more coat hooks. The 1×3’s on the bottom help give the lockers stability.
(You could also choose to add a plywood panel to the back rather than leaving it open. Or add something fancier like shiplap as I mention a little later.)
Attach all the pieces with pocket holes and screws on the back just as you did with the bench.
This time, I put the pocket holes on the top of the hutch because that part would be hidden.
Tip: When installing the 1×6’s that will not be exactly at the top of bottom of the cabinet, I cut a piece of scrap wood to use as a guide. This will help you install the boards evenly.
The hutch was also too big to fit in our door so I assembled it in the room.

Step 2: Painting
After putting all that time into staining and sanding and staining, I didn’t want to get white paint on our bench. As a result, we decided to paint before we added the bench seat.
It’s nice to have people small enough to really get in there to help!


Step 3: Putting it all together
Time to put the hutch in place on top of the bench. This was definitely a two person job. I secured the hutch to the wall studs using the 1×6’s bay supports on top and the 1×3’s on the bottom.

You can see here we had also started the process of painting the walls white.
Initially, I had thought about adding shiplap to the back of the hutches.
Then my mom made a great point that you’d hardly see the backs after the coats were in there. She saved us a lot of $$$!
Step 4: Add the face frame
To finish the rough edges of the plywood and to give it a thicker appearance, I added a face frame of 1×2’s. (Another option here would be to add edge banding instead.)

I measured each frame piece before I cut to make sure they fit perfectly.
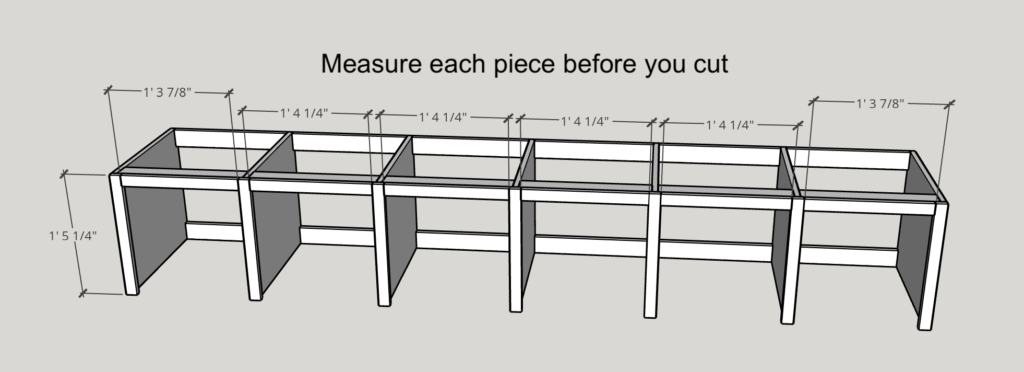
Don’t forget the framing for the hutch:

Usually, I would have attached the face frame and then painted the whole cabinet together. Since we did things a little out of order, we painted the face frame pieces and THEN attached them.

I attached the framing with wood glue and 1-1/4″ brad nails. Then I filled in the nail holes with wood filler.
Finished mudroom bench and lockers
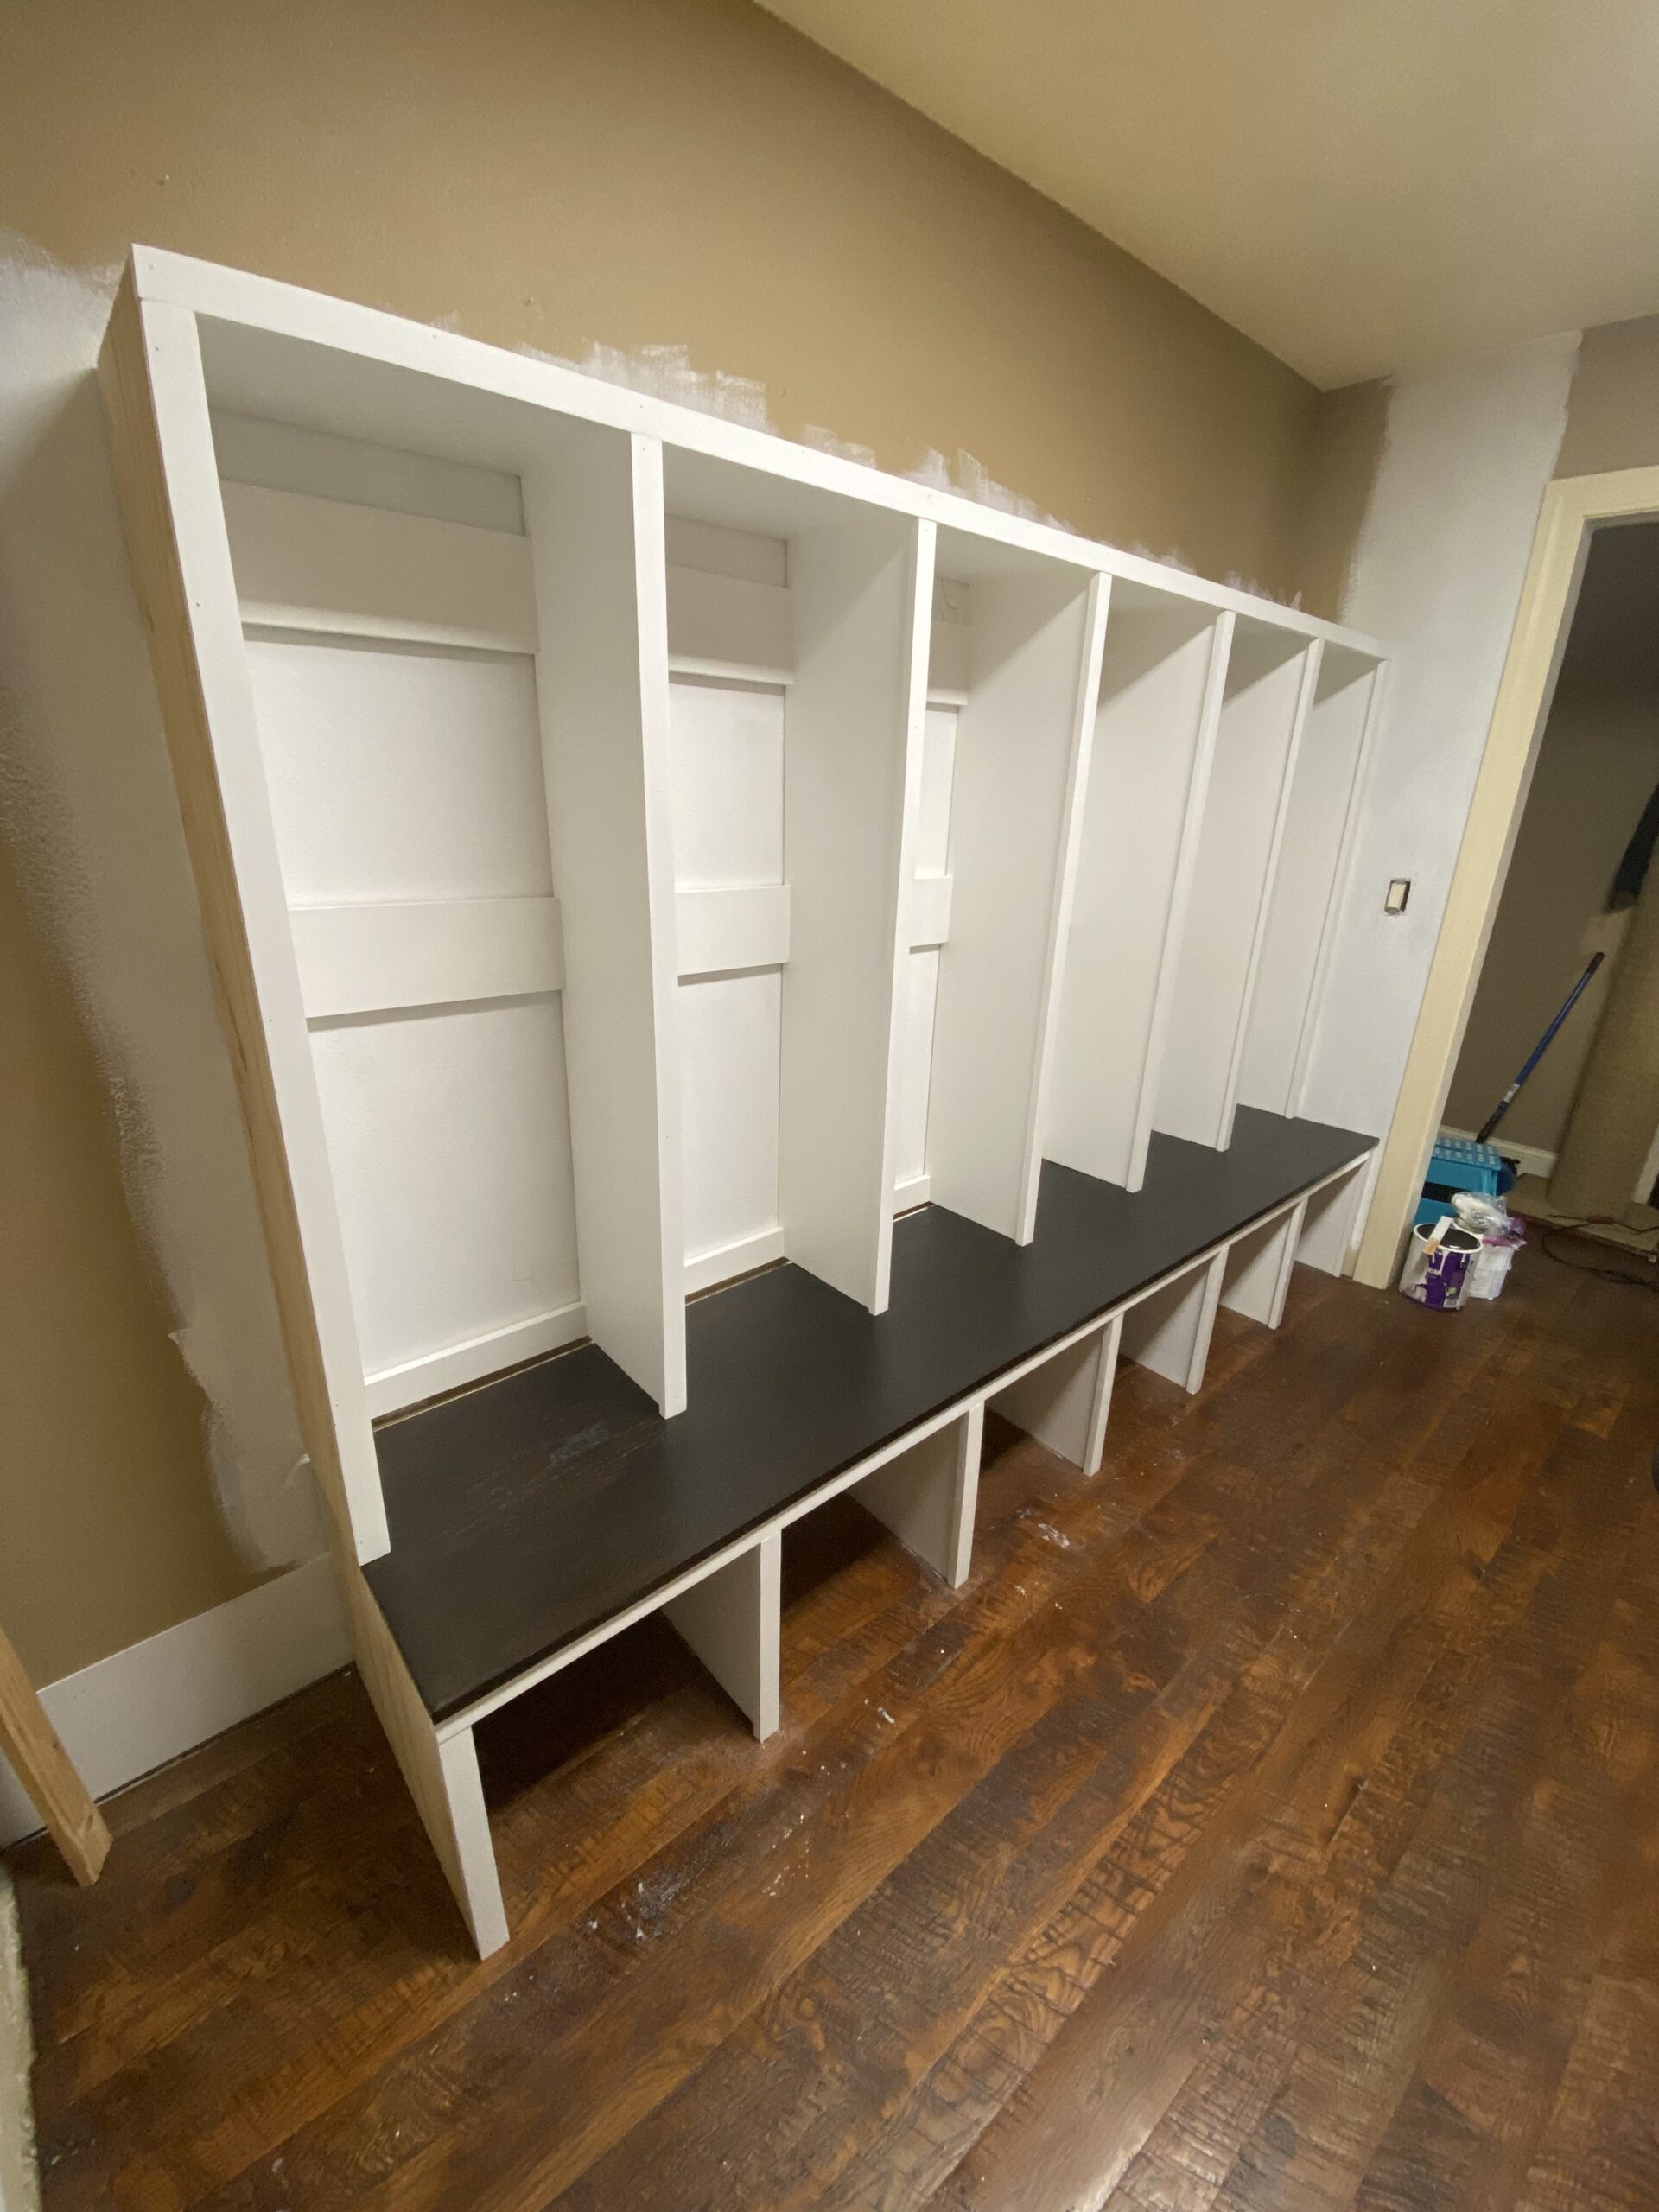


But wait- we’re not done!
Since this is already so long, I’m going to stop here and make a separate post explaining the rest. We plan on adding a supply closet to the end of the lockers, cabinets on top, and crown molding to make it look built in. Then we plan to tackle the other side of the laundry room by adding more cabinets and refinishing the existing ones.
You can see the next parts here: